Deploy Agent Stream appliance
By the end of this guide, you will have a running Agent Stream appliance provisioned through the Affinidi Portal and an Agent Stream Dashboard URL to access and configure it.
Agent Stream is hosted as a managed appliance by Affinidi, and shares its appliance foundation with Agent Gateway. You define the instance through the portal and Affinidi provisions, configures, and operates the underlying infrastructure. Once the appliance is live, you configure and operate it from its browser-based dashboard. See Architecture → for the full picture.
You need this guide if you are starting from scratch. If your team already has a running Agent Stream instance, skip to Create your first LLM Surface.
Prerequisites
- An Affinidi account with access to the Affinidi Portal.
- Permission to create Agent Stream resources in your organisation’s portal workspace.
- A browser and device that support passkeys (WebAuthn), for signing in to the dashboard.
Steps
Sign in to the Affinidi Portal and open Agent Stream
Go to Affinidi Portal and sign in with your Affinidi credentials.
In the left sidebar, select Agent Stream under the Affinidi Trust Fabric section.
Create a new appliance
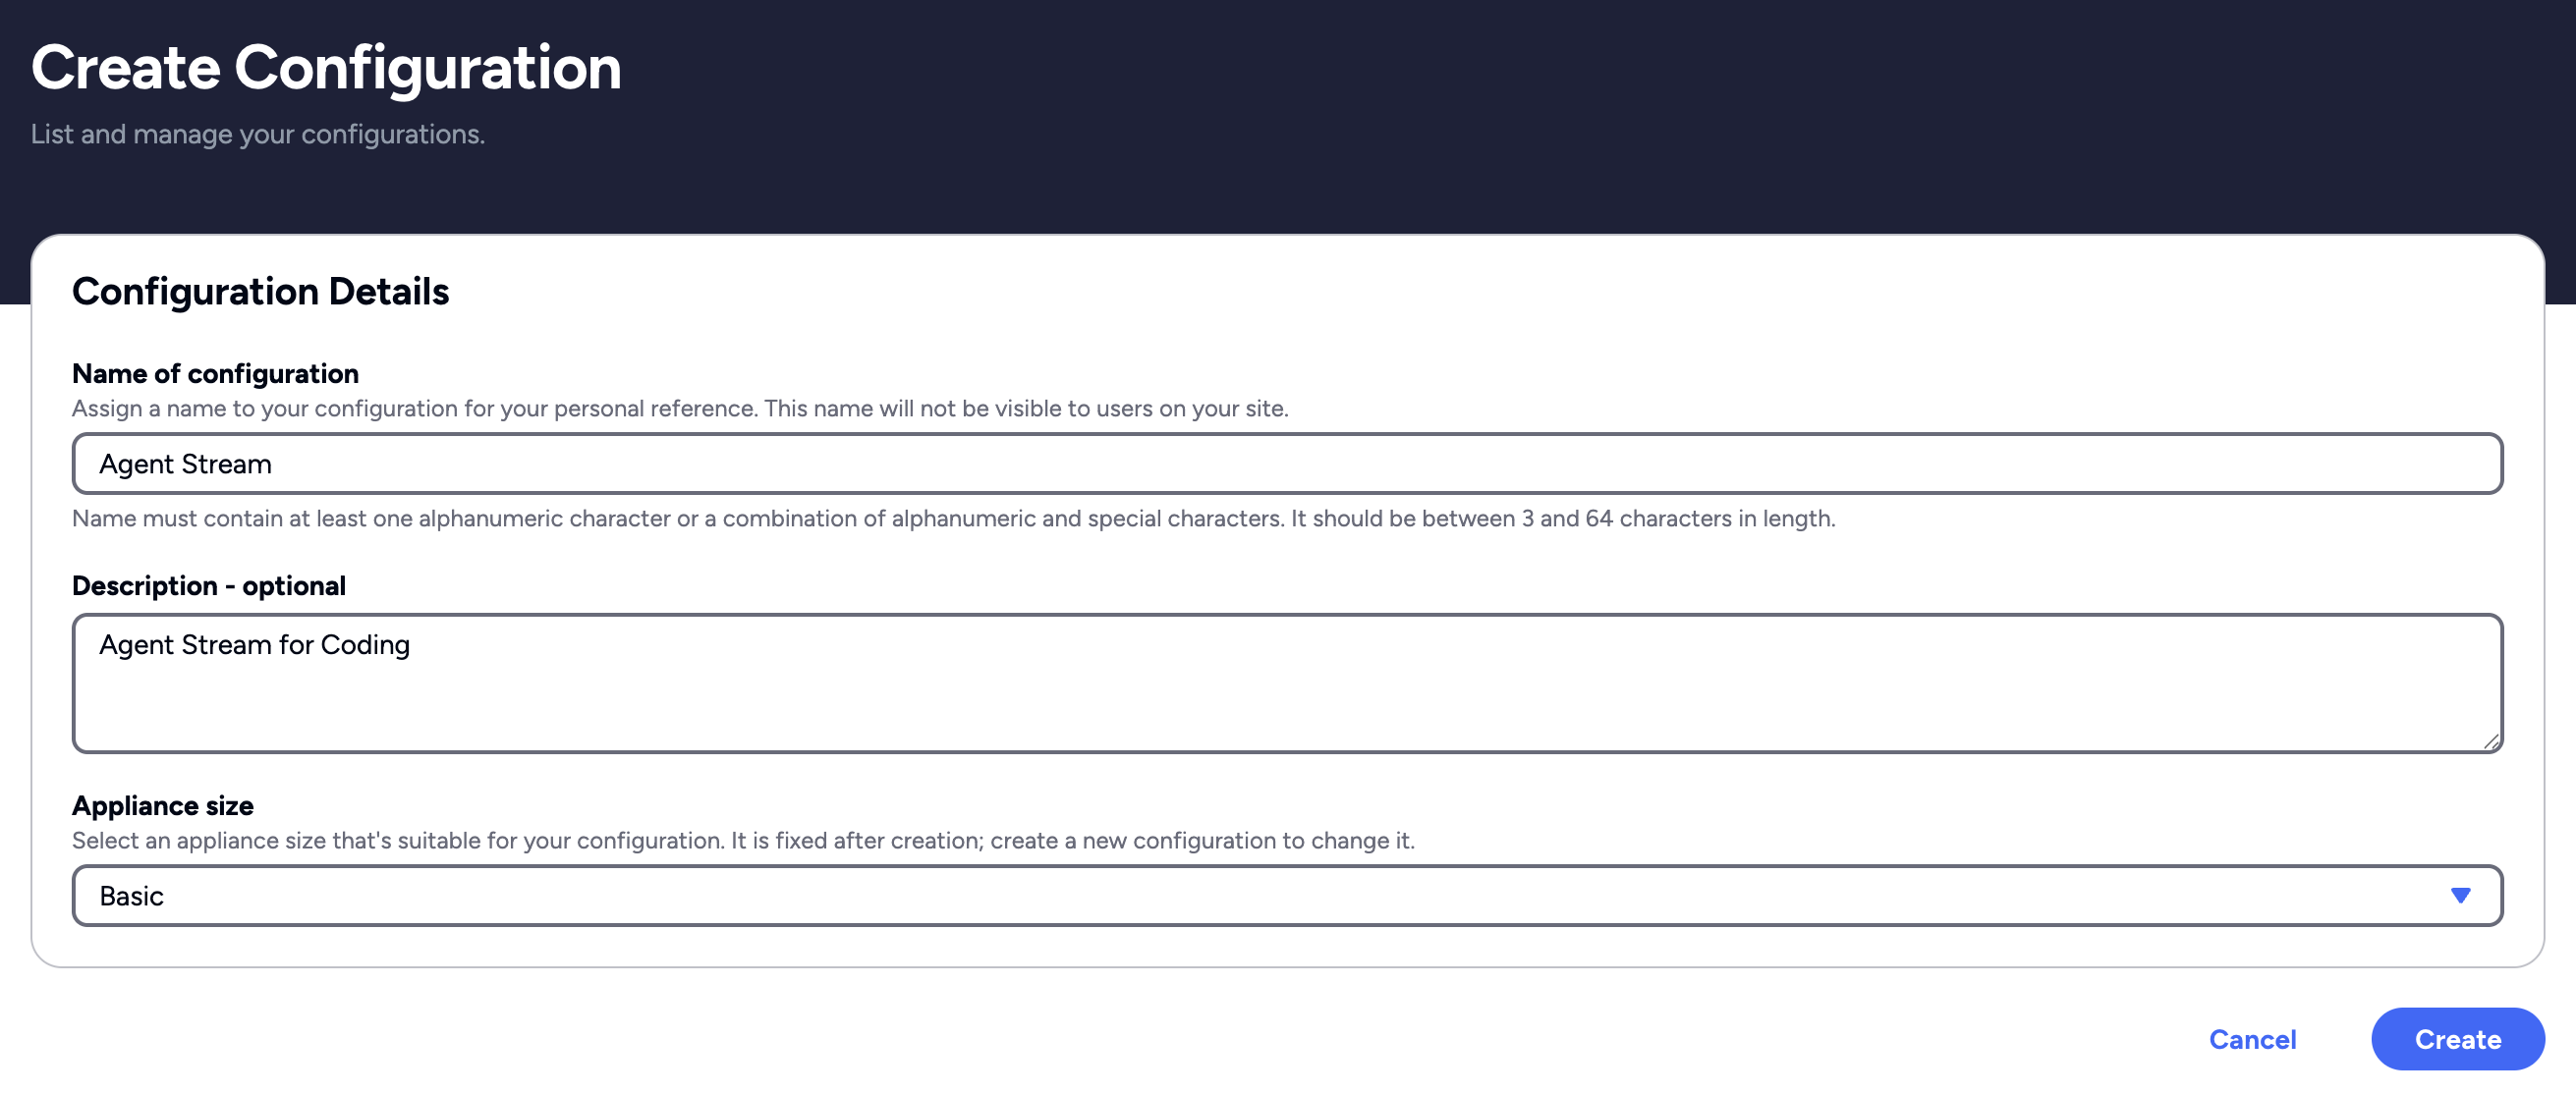
Select Create configuration.
Fill in the configuration form:
| Field | Description |
|---|---|
| Name of configuration | A short label for this instance, for example Agent Stream. Used only to identify the appliance in the portal. |
| Description - optional | A brief note about the purpose of this instance. |
| Appliance size | The size of the appliance suitable for your use case and expected traffic. You can’t change this field after creation. |
Select Create to submit the request.
Wait for the appliance to complete the deployment
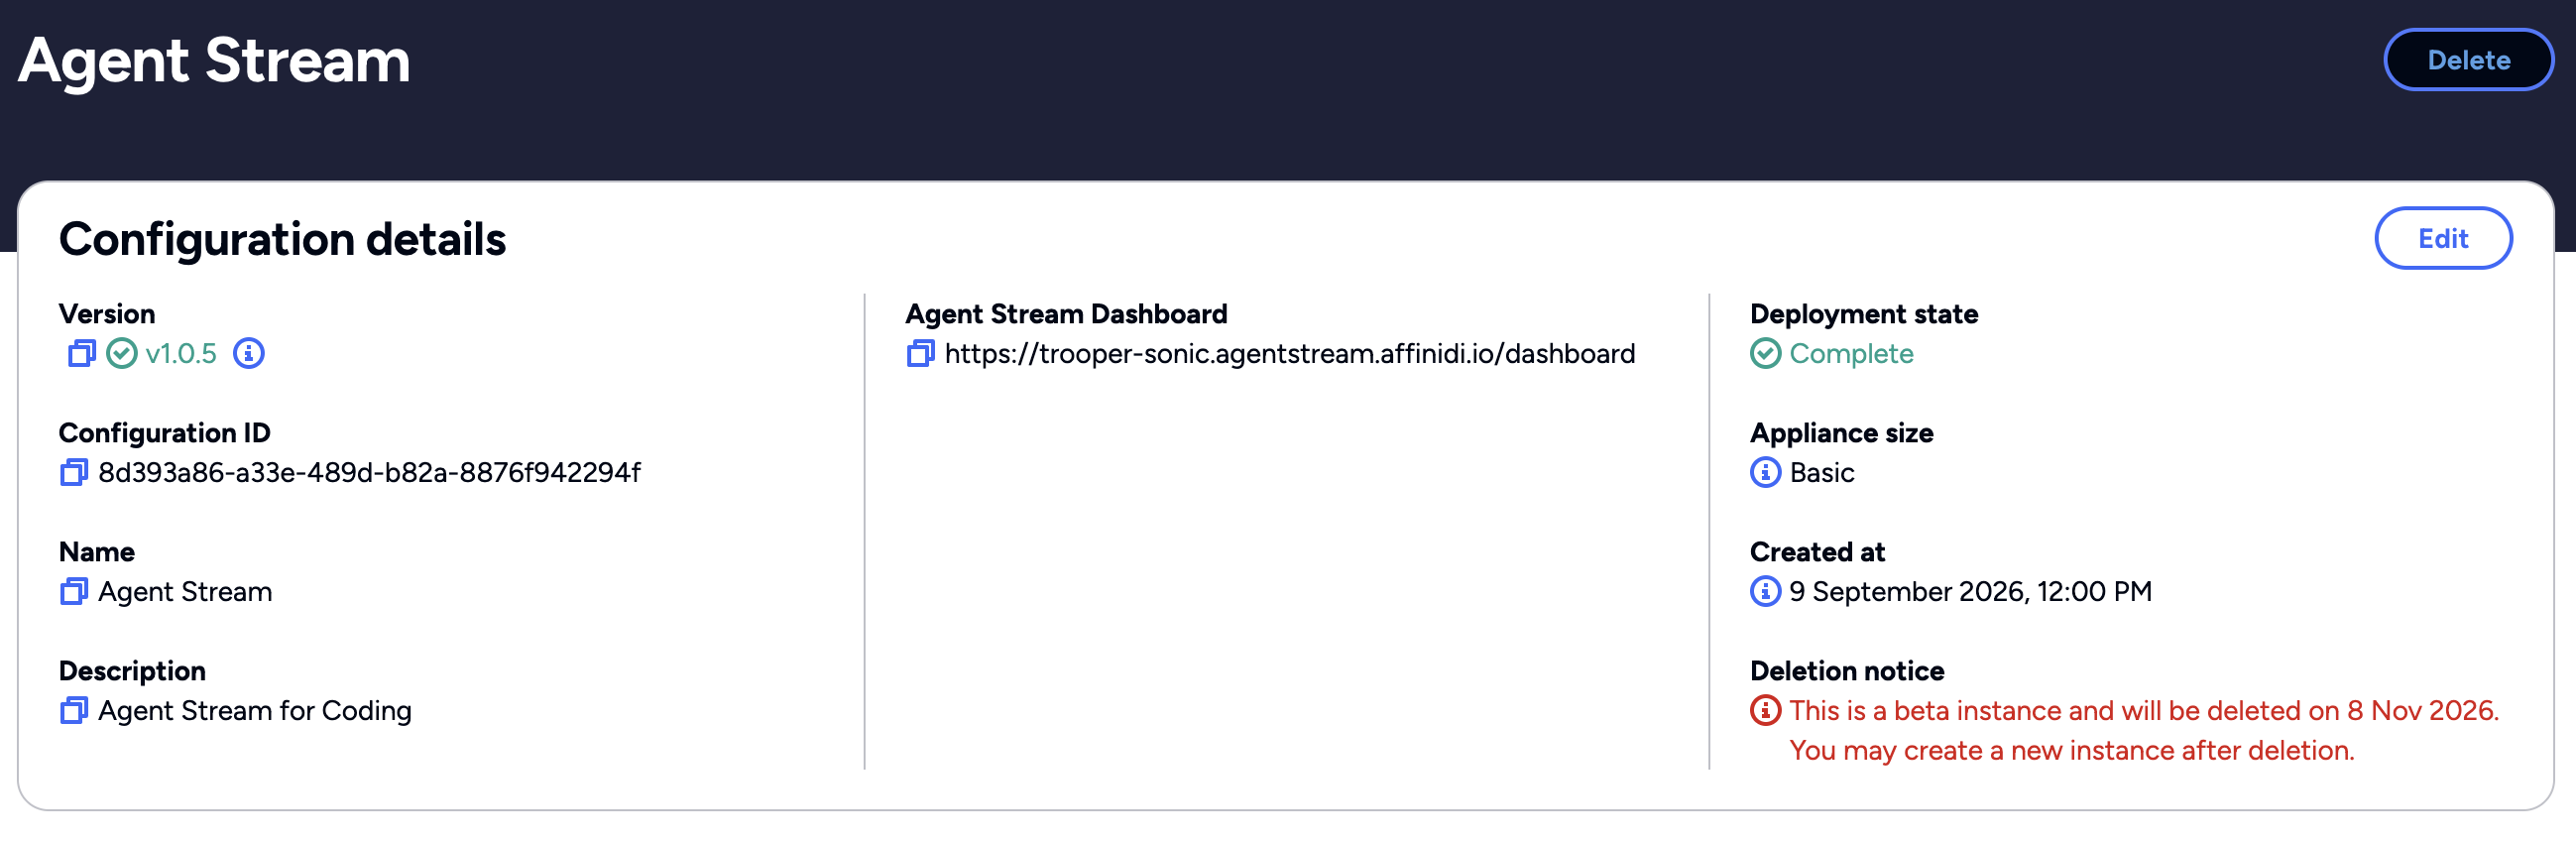
Provisioning typically completes within a few minutes. The portal shows the appliance deployment state as it transitions from In Progress to Complete.
Once the deployment state is Complete, the appliance shows the Agent Stream Dashboard address: the URL for the appliance’s browser-based control plane.
Copy the Agent Stream Dashboard URL. You will need it in the next step.
Open the Agent Stream Dashboard
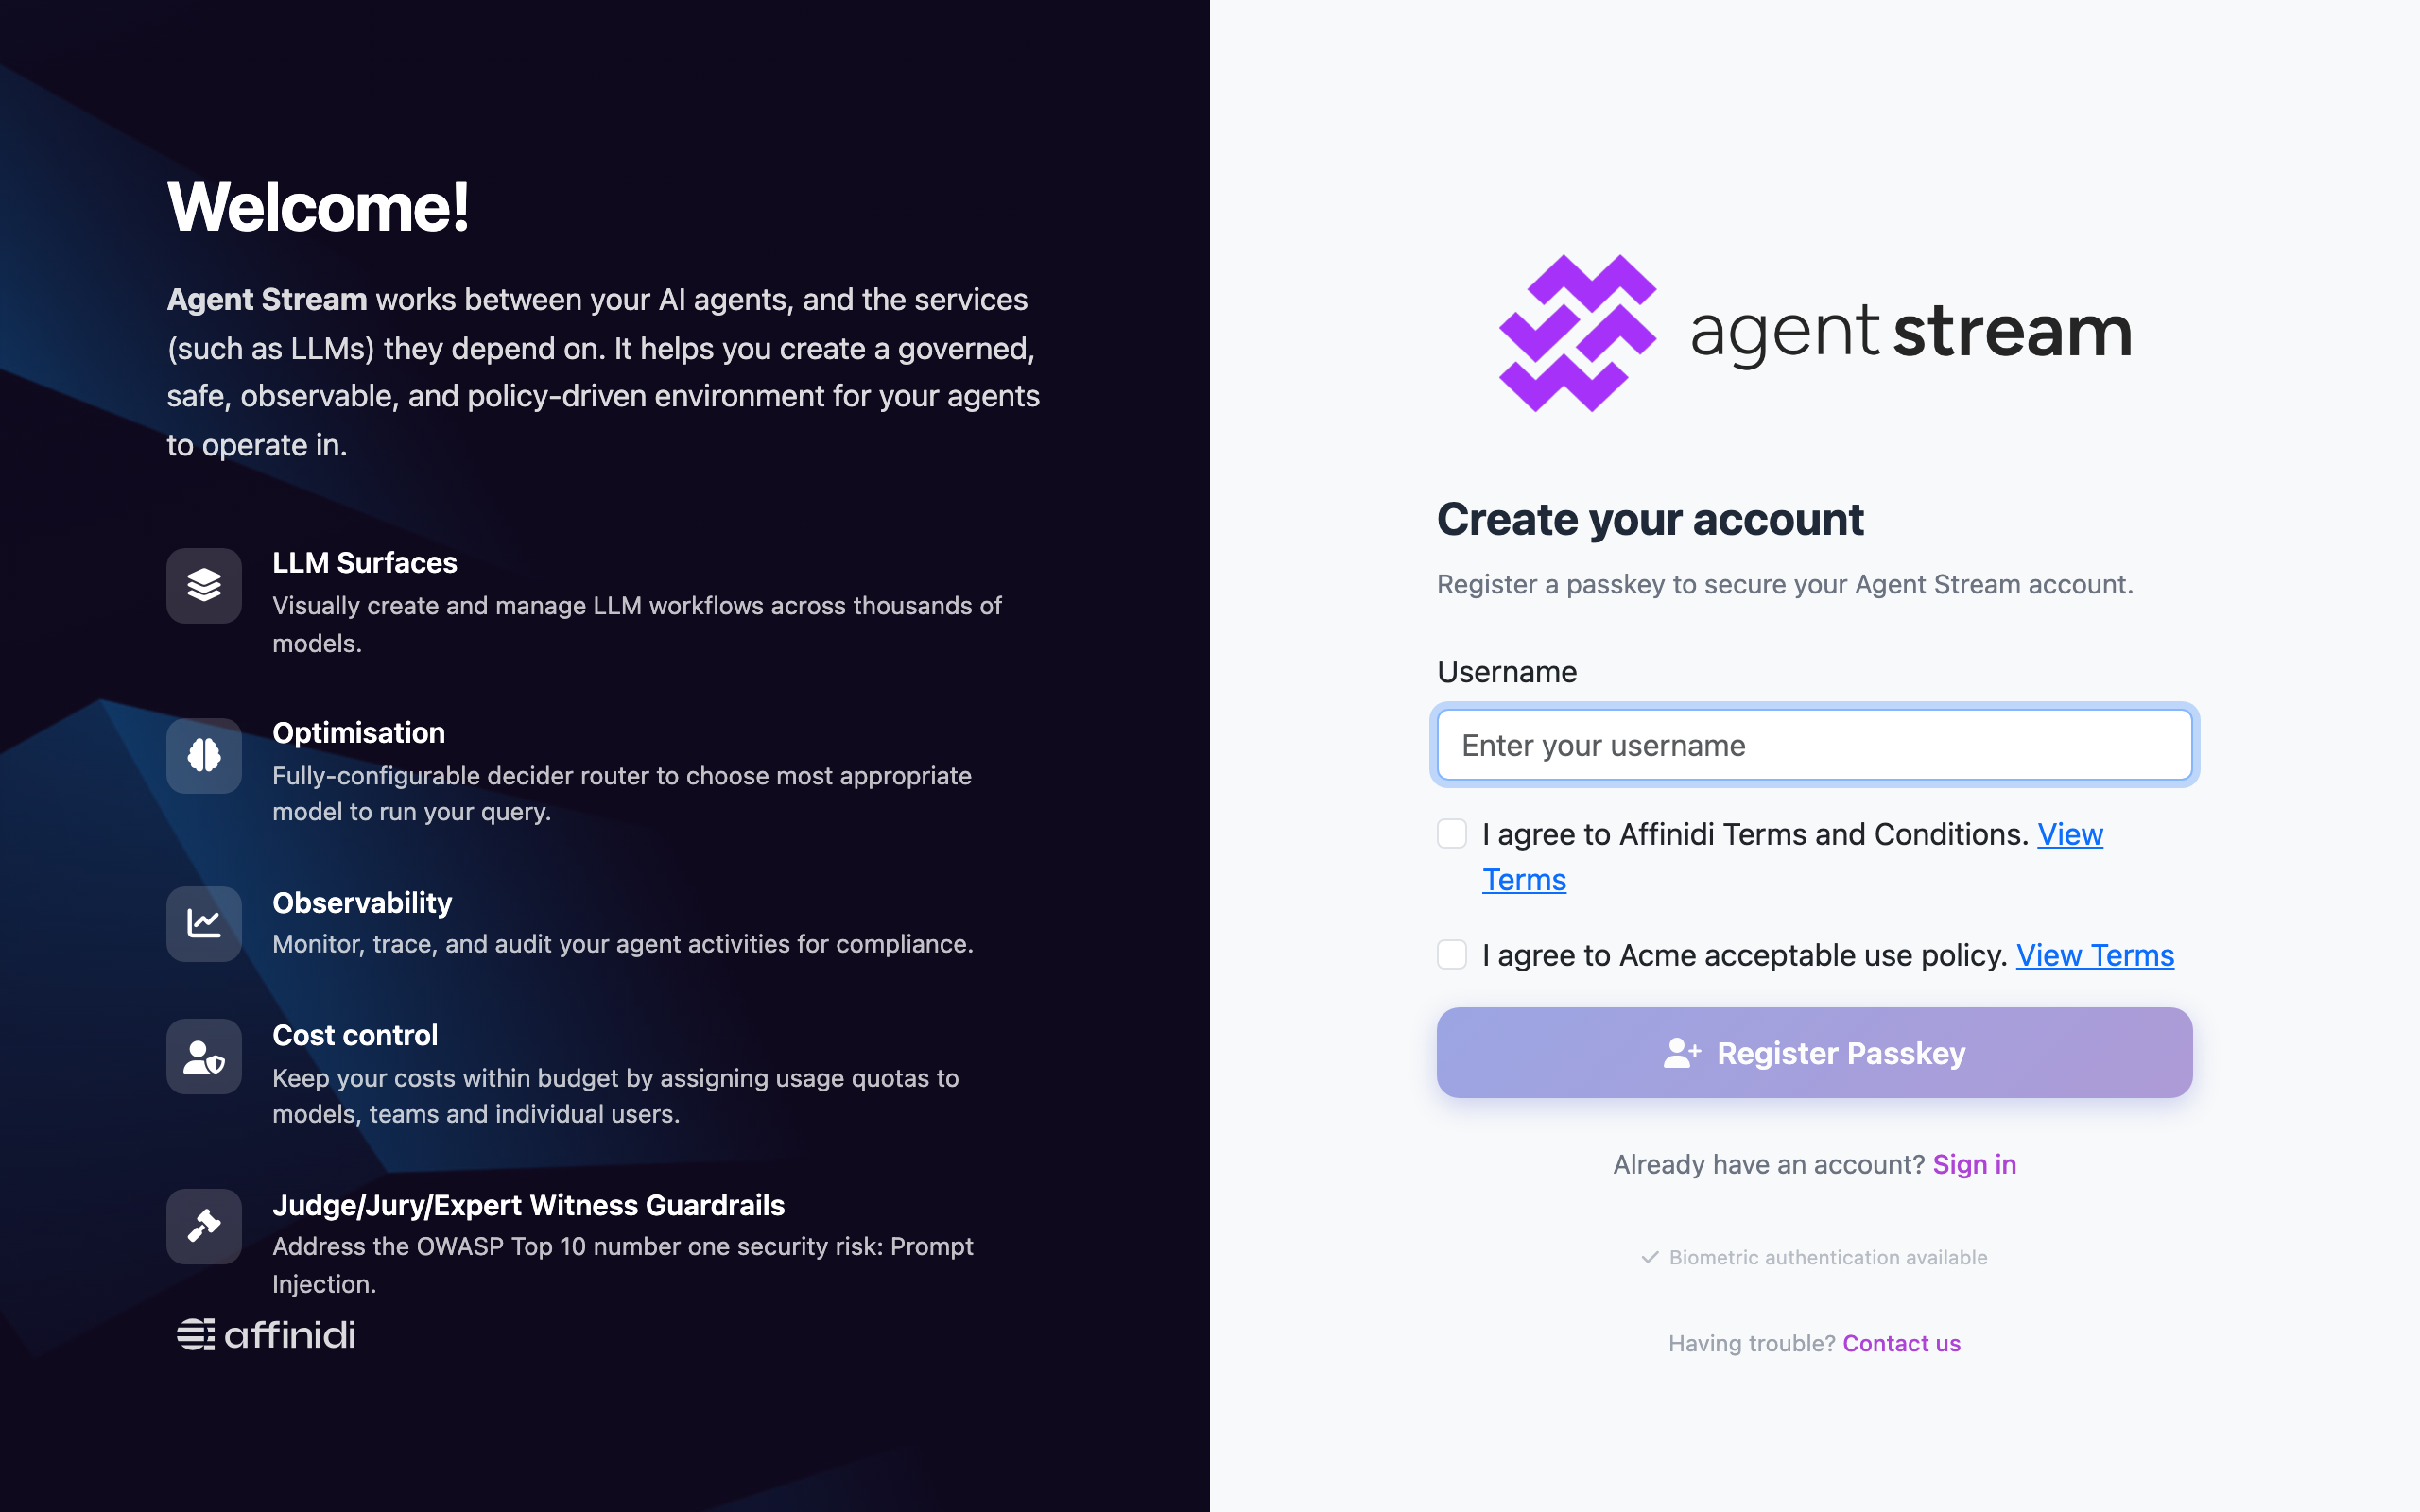
Paste the Agent Stream Dashboard URL into your browser. As this is a new instance, no accounts exist yet. To register as the first user:
- Select Create an account.
- Enter a username.
- Tick each I agree to … checkbox. Select View Terms next to a checkbox to read that document. Register Passkey stays unavailable until every checkbox is ticked.
- Select Register Passkey and complete the passkey prompt in your browser or device.
- When the form shows Passkey registered successfully! You can now log in., enter your username and select Sign in with passkey.
The first account registered on a new Agent Stream instance becomes the primary administrator, with the Administrator role at the top of the role ladder described in Security and access control →. The Users list marks it PRIMARY. Its role and status can’t be changed, and the account can’t be deleted. Register with the account that should own administrative access to this appliance.
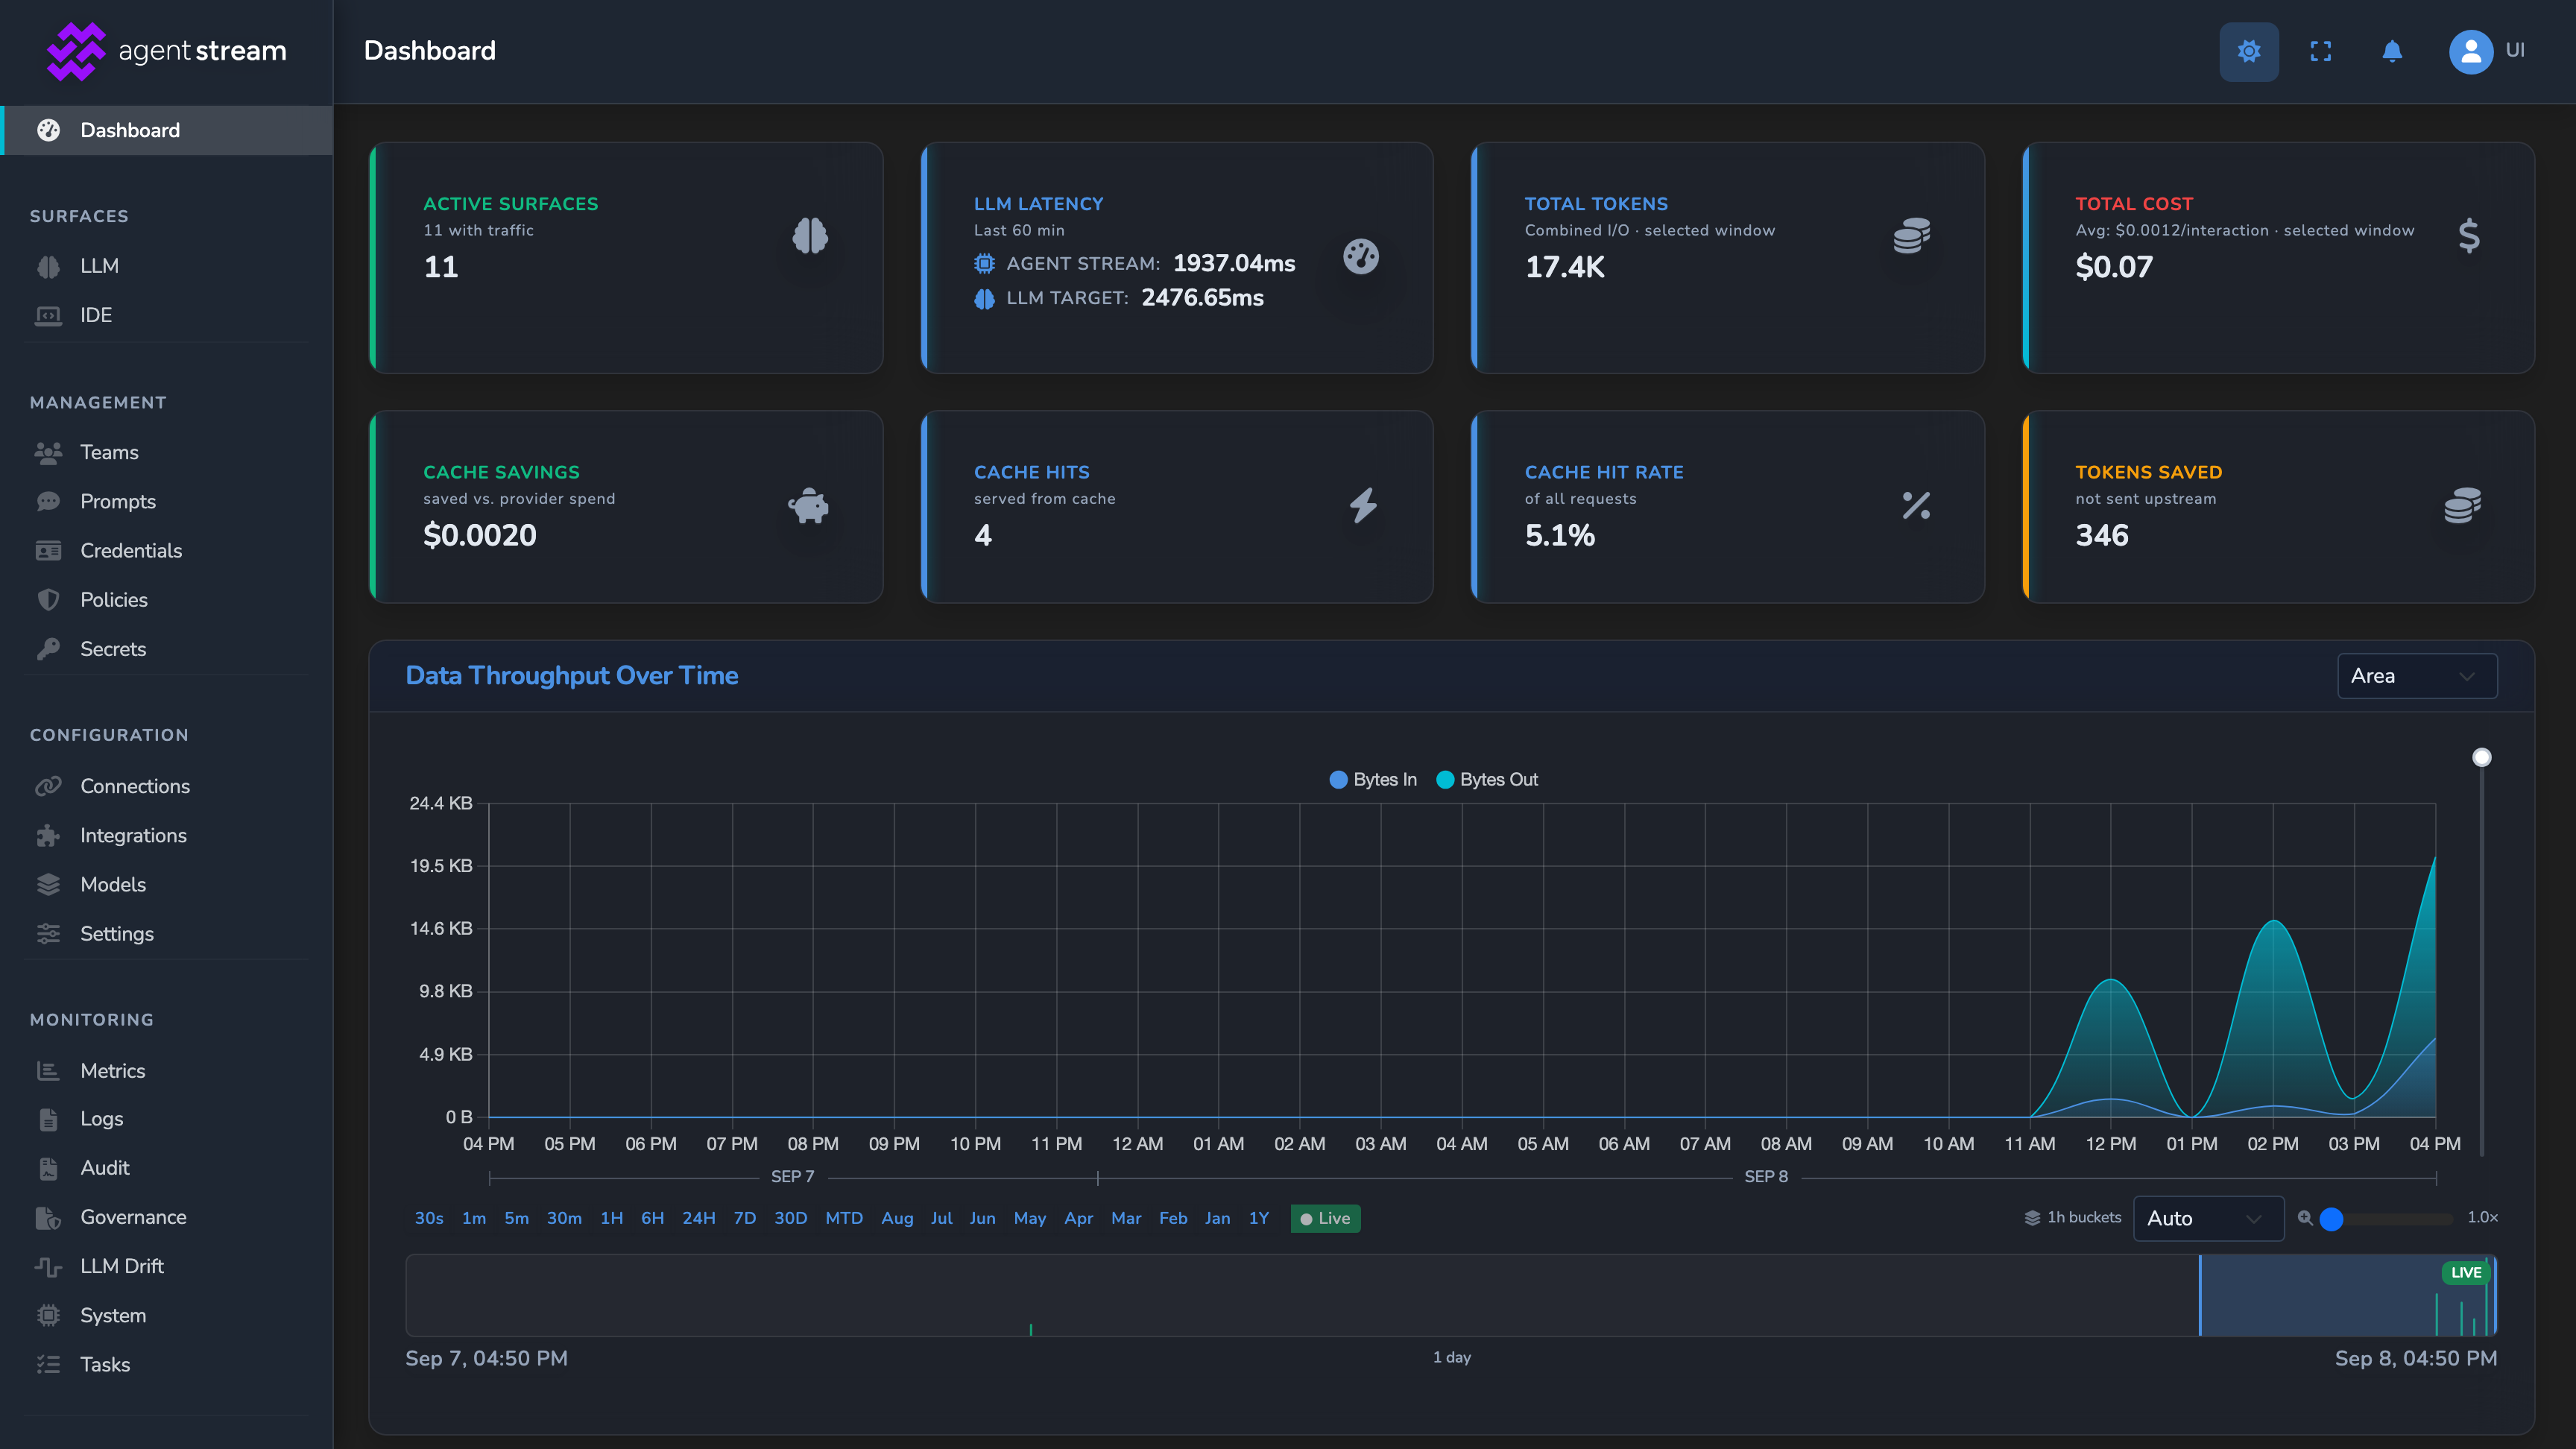
After signing in, you land on the dashboard’s overview page. The sidebar groups everything you will use in the next guides under four headings: SURFACES (LLM, IDE), MANAGEMENT (Teams, Prompts, Credentials, Policies, Secrets), CONFIGURATION (Connections, Integrations, Models, Settings), and MONITORING (Metrics, Logs, Audit, Governance, LLM Drift, System, Tasks).
The appliance is ready. You can now create your first LLM Surface.
Onboard additional users
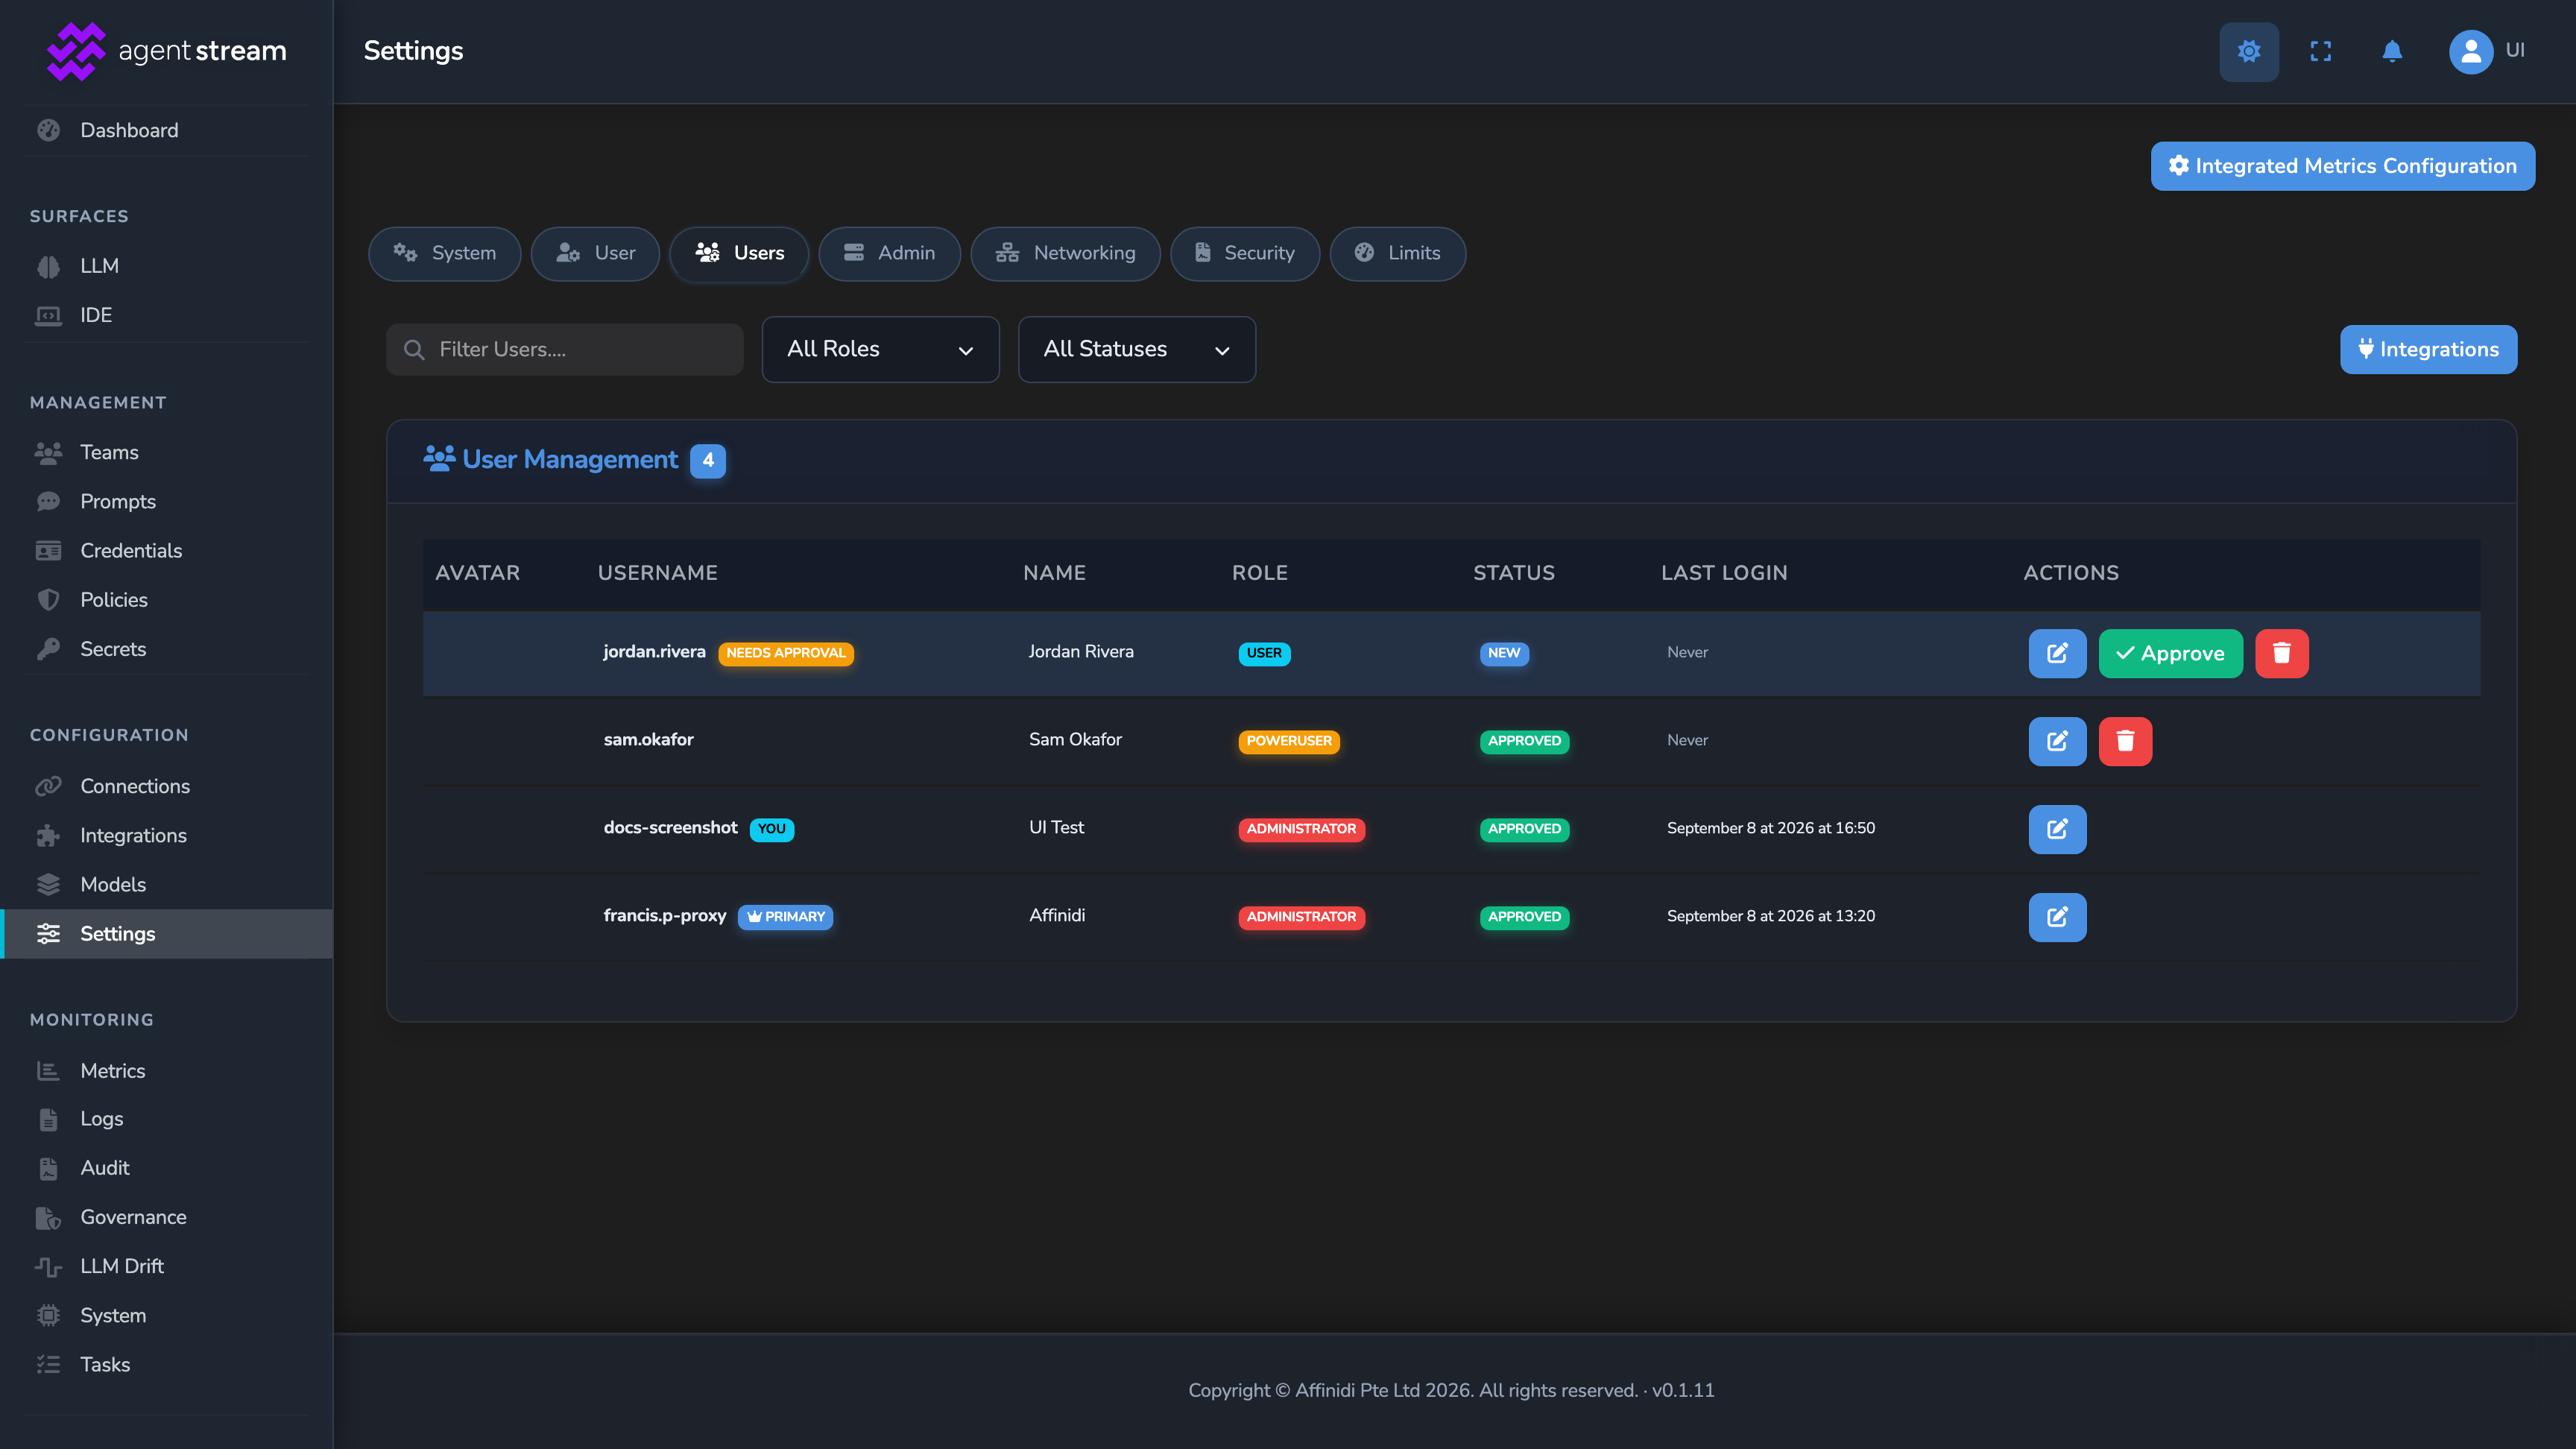
Share the Agent Stream Dashboard URL with any team members who need access. Each person registers their own account from the login page, in the same way as the first user: Create an account, a username, each I agree to … checkbox, then Register Passkey.
A new account appears under Settings → Users with NEW status and a NEEDS APPROVAL badge, and can’t sign in until it is approved. As the administrator, open Settings and select the Users tab, then either:
- Select Approve on the account’s row to approve it with the User role.
- Select the edit button on the account’s row, set Role to User, Power User, or Administrator, set Status to APPROVED, and select Save.
See Security and access control → for what each role can access. The number of dashboard accounts is capped by the appliance size: Settings → Limits shows the Users limit and its current usage.
When the terms change, for example when an administrator publishes a new version on Settings → T&C Manager and requires existing users to accept it, each user sees Review the Terms at their next sign-in. They tick each I agree to … checkbox and select Accept and continue. See Settings →.
Confirm
Confirm the appliance is reachable and your session is active:
- Open the Agent Stream Dashboard URL in your browser, enter your username, and select Sign in with passkey.
- Confirm the overview page loads without error, with the SURFACES, MANAGEMENT, CONFIGURATION, and MONITORING sidebar groups all visible.
- Under SURFACES, select LLM. The LLM Surfaces list loads (empty at this stage). This confirms the appliance is live and your session has the necessary permissions to manage surfaces.
Next steps
- Create your first LLM Surface: Connect a surface to a real LLM provider and send a test request.
- Architecture: Understand the layers a request passes through before configuring surfaces.
- Security and access control: The RBAC role ladder and what each role can access, in depth.
Glad to hear it. Thanks for letting us know.
Sorry to hear that. Thanks for letting us know.