MCP surface starter
Use this guide when you want AI agents to call MCP tools through a governed access point, so every request is subject to identity, scope, and observability rather than reaching the MCP server directly.
An MCP surface is that access point: it defines the inbound route from external callers to your managed agent and, optionally, routes outbound calls from your agent to an external MCP server through a transit point.
This guide walks through creating the surface, configuring both routes, and confirming the setup works end to end.
Prerequisites
- You are logged in to the Agent Gateway dashboard.
- You have permission to create surfaces.
- A publicly accessible MCP server for your managed agent. The gateway must be able to reach this endpoint. If your server runs locally, use a tunnelling tool to expose it over a public URL. For production use, deploy your MCP server to a stable, publicly reachable endpoint.
- (Optional, for outbound routing) A separate publicly accessible MCP server to receive outbound calls through the transit point.
Steps
Add a new surface and select a template
- Open Surfaces in the dashboard.
- Select Add Surface.
- In Start a new surface, select the MCP Surface Starter template.
- Update the generated Name in the Surface tab if needed.
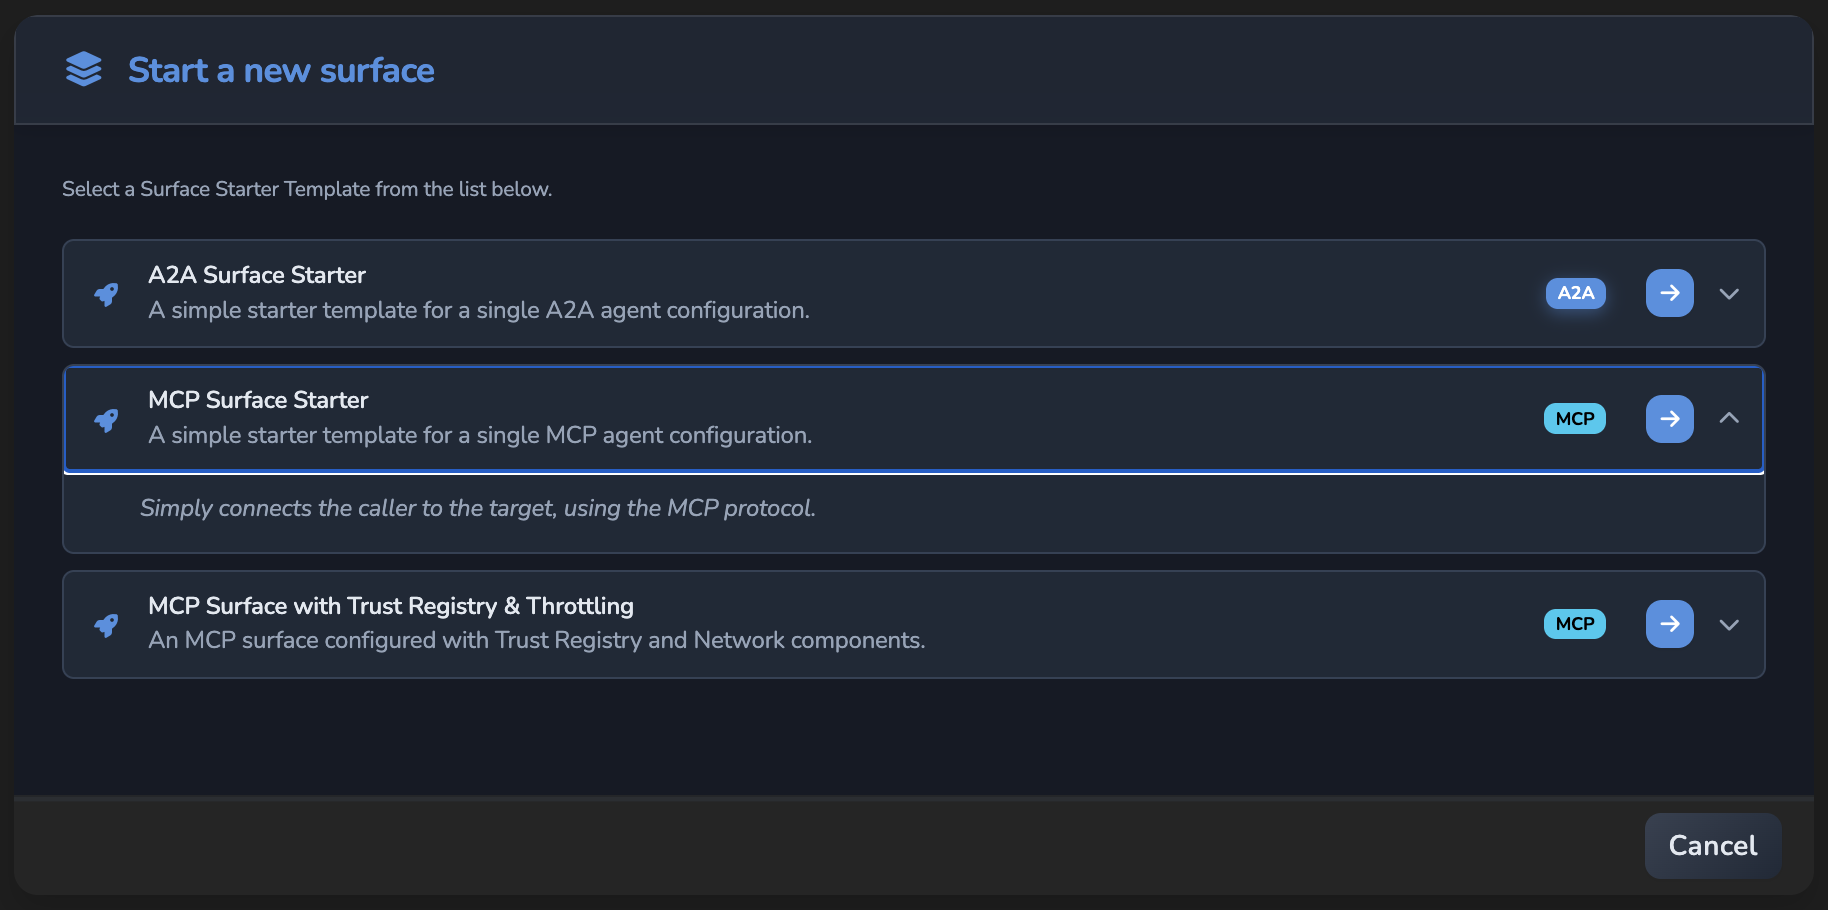
The canvas opens with three elements: a Surface container (blue box), a Managed Agent node, and an Access Point node. Elements with red outlines still require configuration. Additional templates are available in the Templates view after the canvas opens.
Tip: Select the auto-layout icon in the toolbar (tooltip: Auto-layout (⌘L / Ctrl+L)) to realign the canvas at any time. Select the undo icon (tooltip: Undo (⌘Z / Ctrl+Z)) to revert a change.
Configure the Managed Agent
- Select the Managed Agent node.
- Set Target Endpoint URL to the MCP server URL that should receive forwarded traffic.
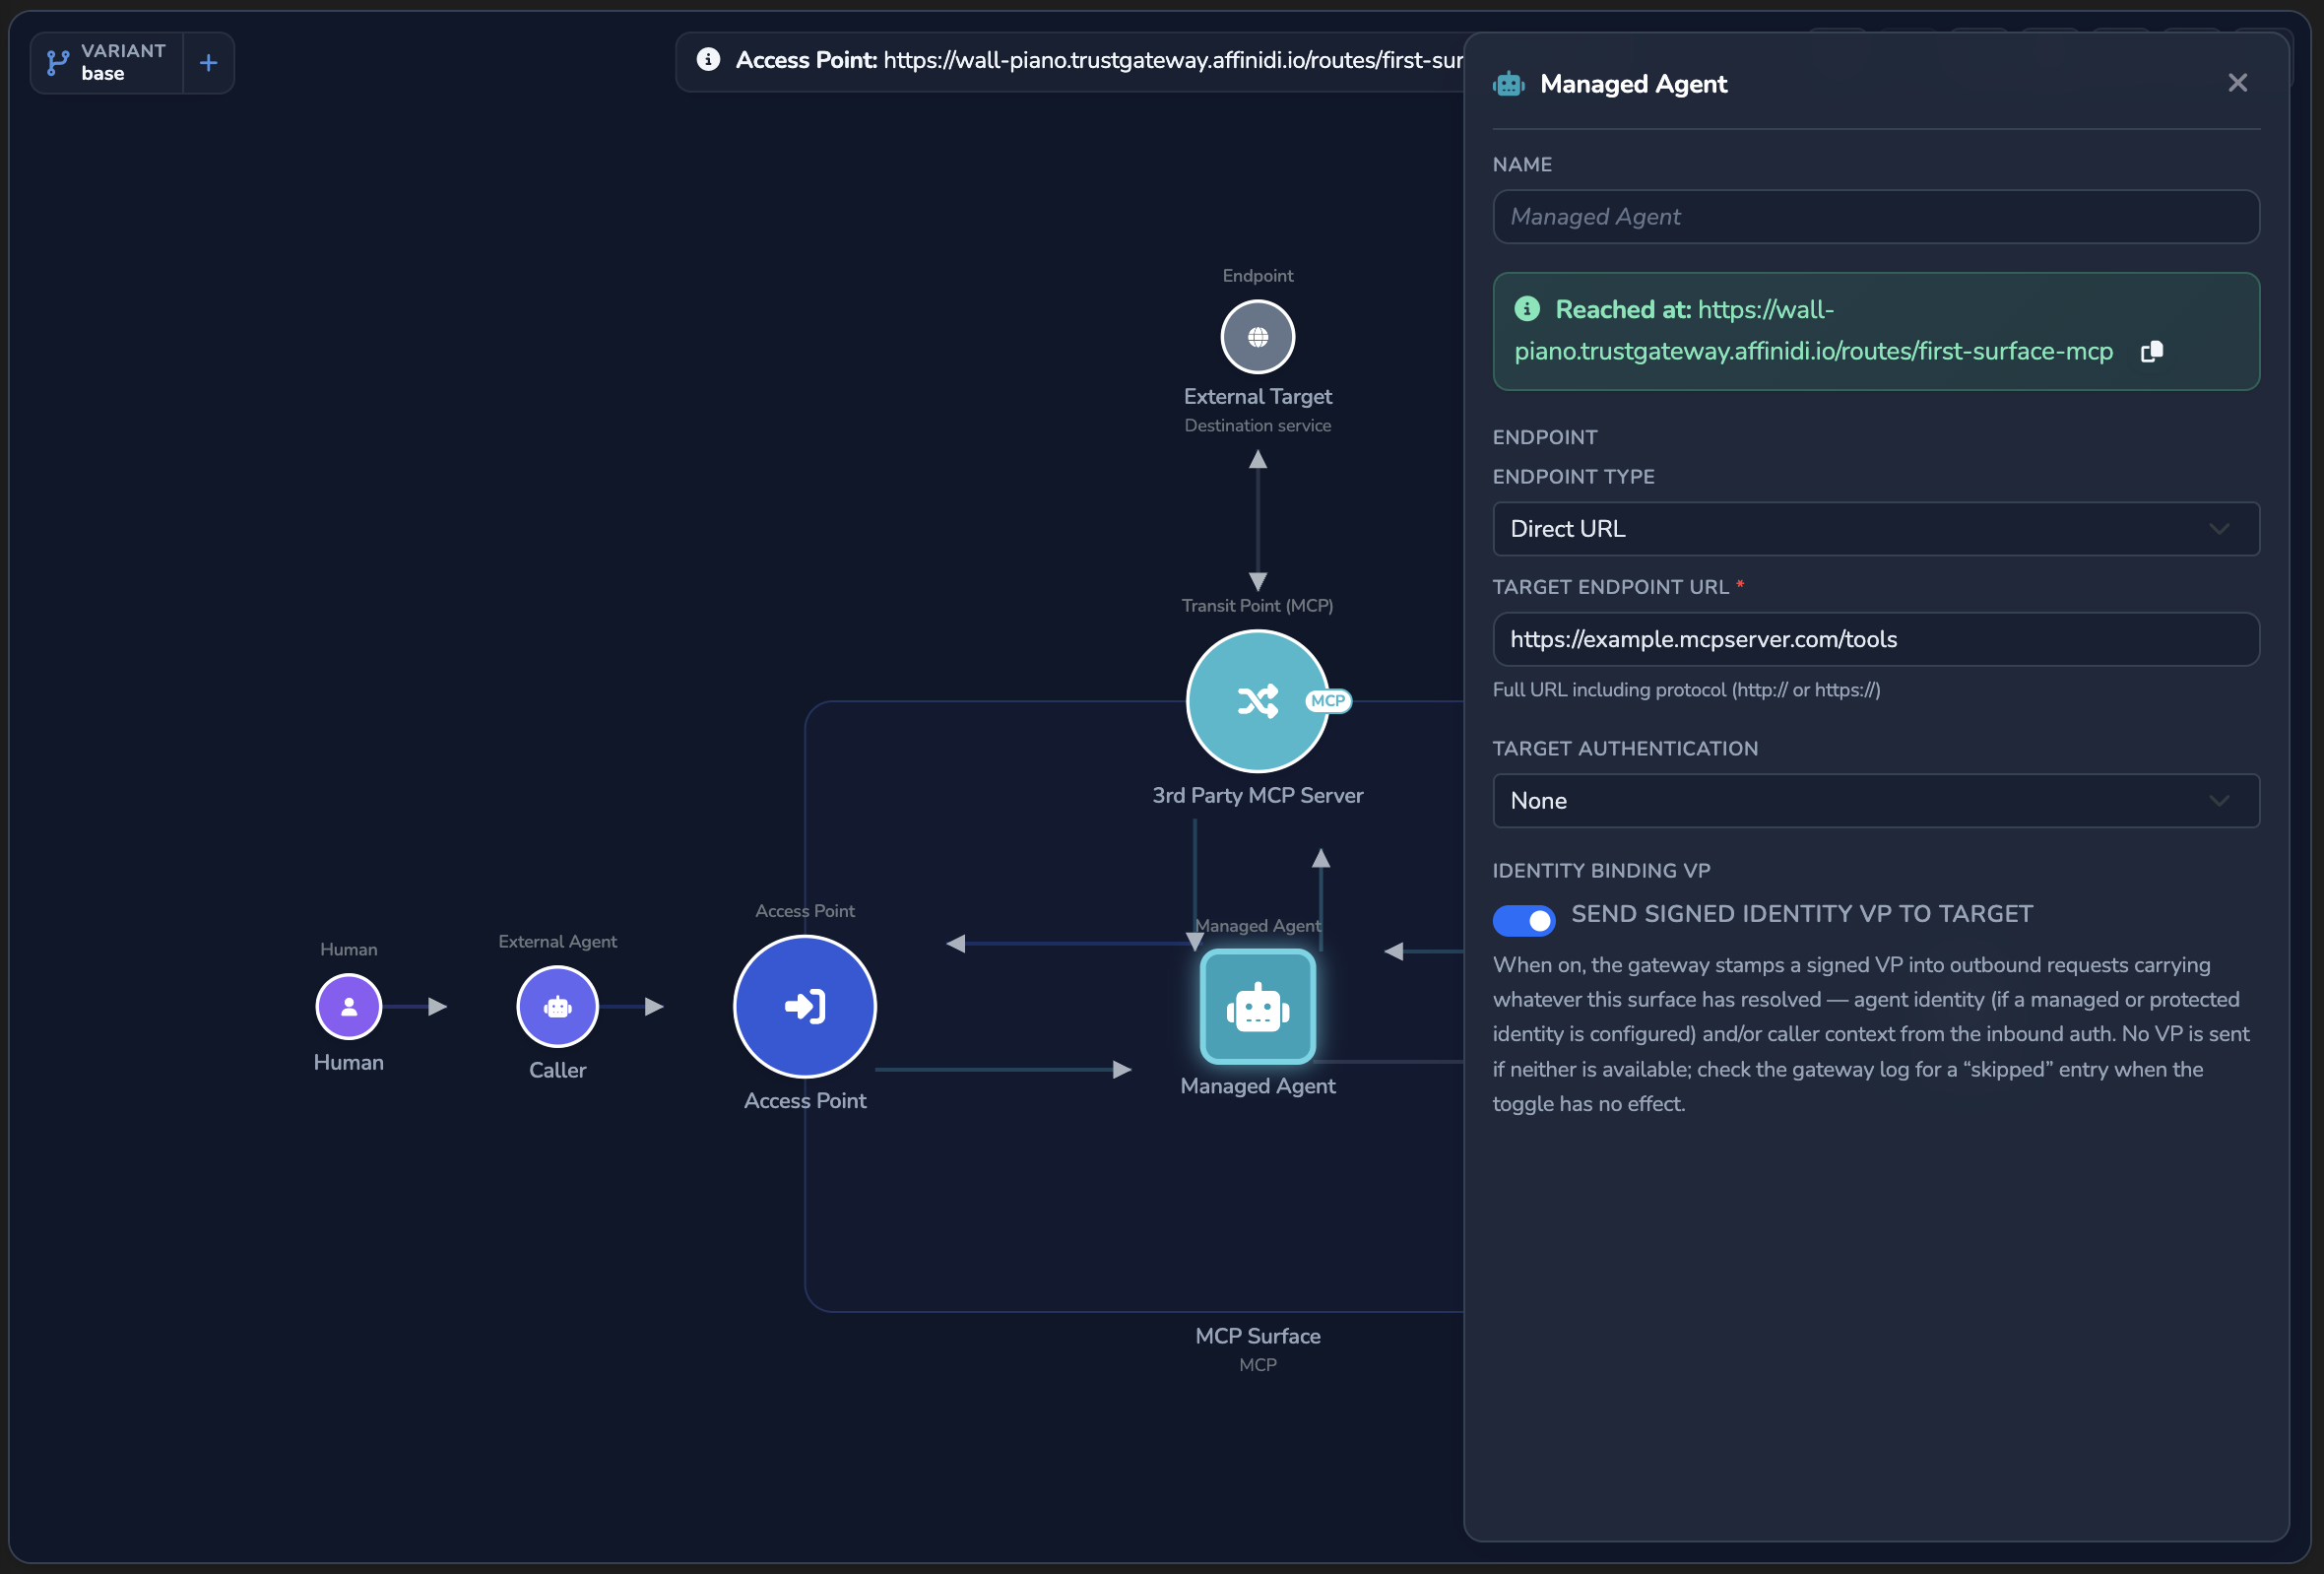
If your managed agent is a REST API with an OpenAPI specification rather than a native MCP server, you can generate an MCP-compatible endpoint from it using an MCP proxy. See Expose a REST API as MCP tools.
If required fields are incomplete, the red outline remains and the Elements tab lists what is still missing.
Configure the Access Point
The MCP Surface Starter template pre-configures the Access Point node with defaults for your deployment. Select the Access Point node to review or update the Channel Route: the URL where external callers reach your surface.
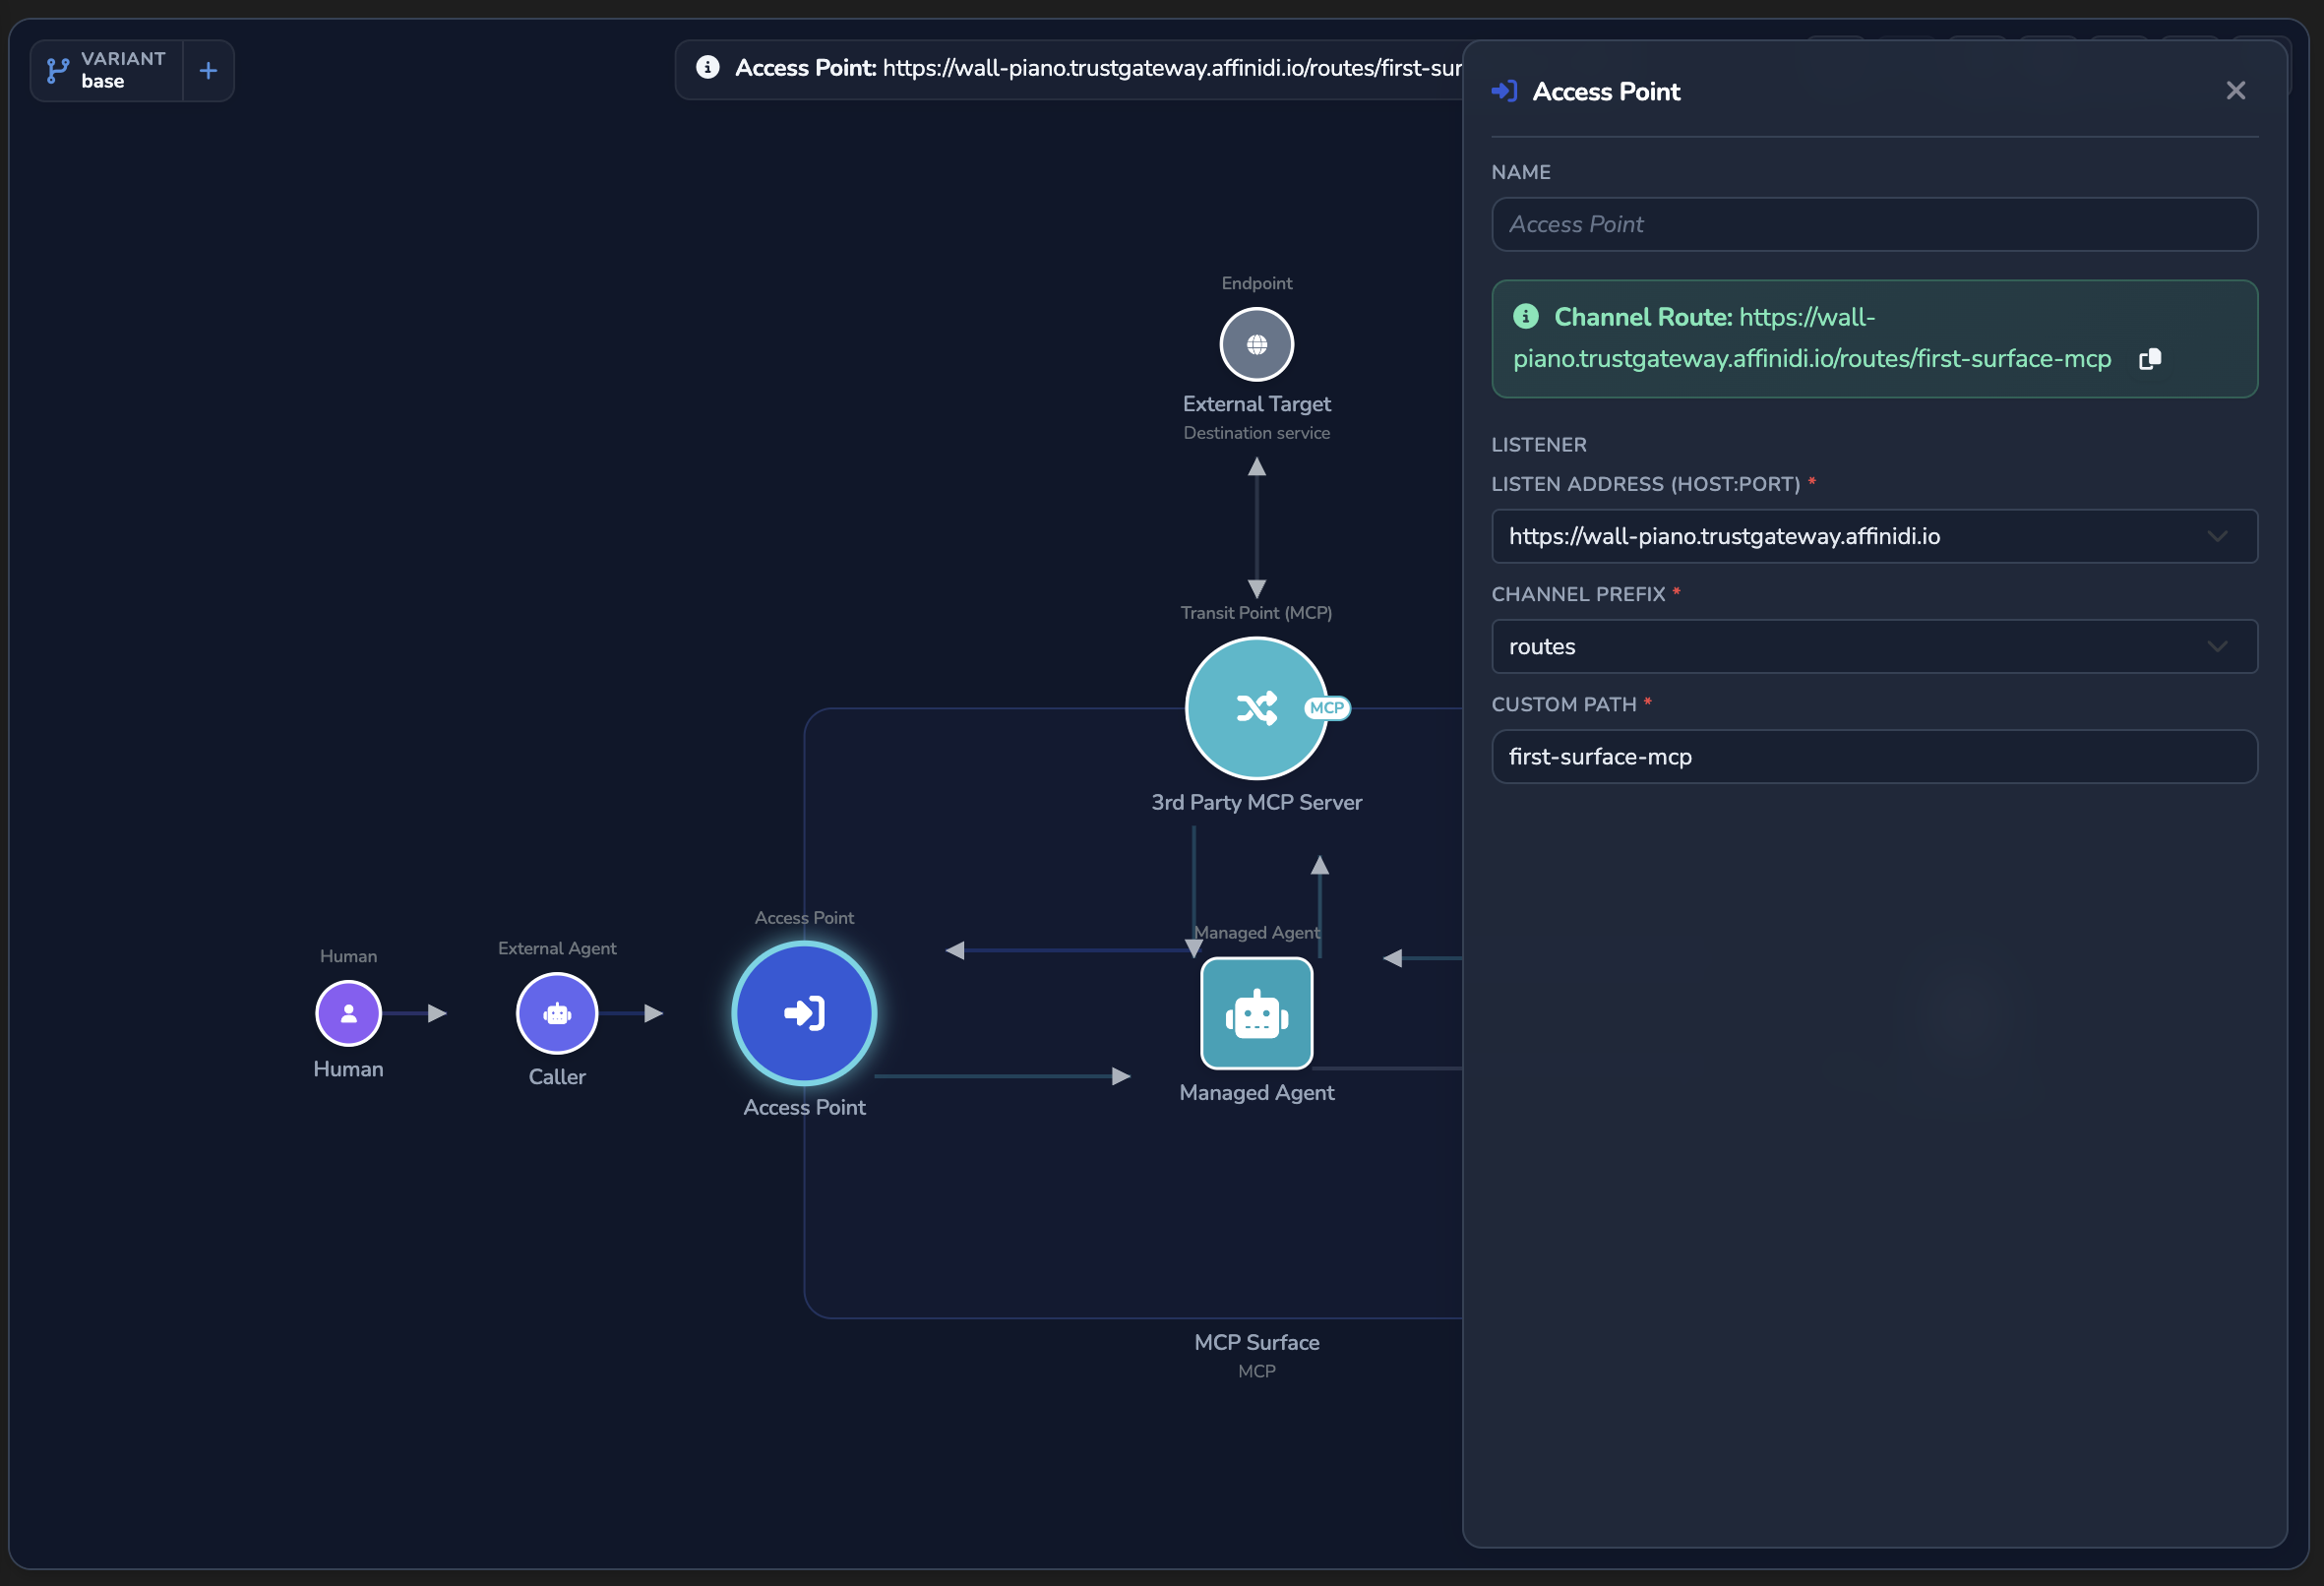
The route is composed from three fields in the Routing section: Listen Address (Host:Port), Surface Prefix, and Custom Path. The full URL is shown in the Channel Route banner at the top of the panel.
The Channel Route is also the base path for any transit point you add in Step 4.
Add a transit point for outbound MCP calls (optional)
Skip this section if you only need inbound routing from external callers to your managed agent.
- From the canvas palette, drag the MCP element from the Transit Points section onto the canvas. The new node connects to the Managed Agent automatically.
- Fill in the following fields in the transit point panel:
| Field | Value |
|---|---|
| Name | mcp-weather |
| Endpoint Type | Direct URL |
| Target Endpoint | The public URL of your MCP server. |
| Listen Address (Host:Port) | Select your configured outbound listener. |
| Custom Path | routes (the UI marks this field as required, but it can be left blank; the gateway then routes using the transit alias alone). |
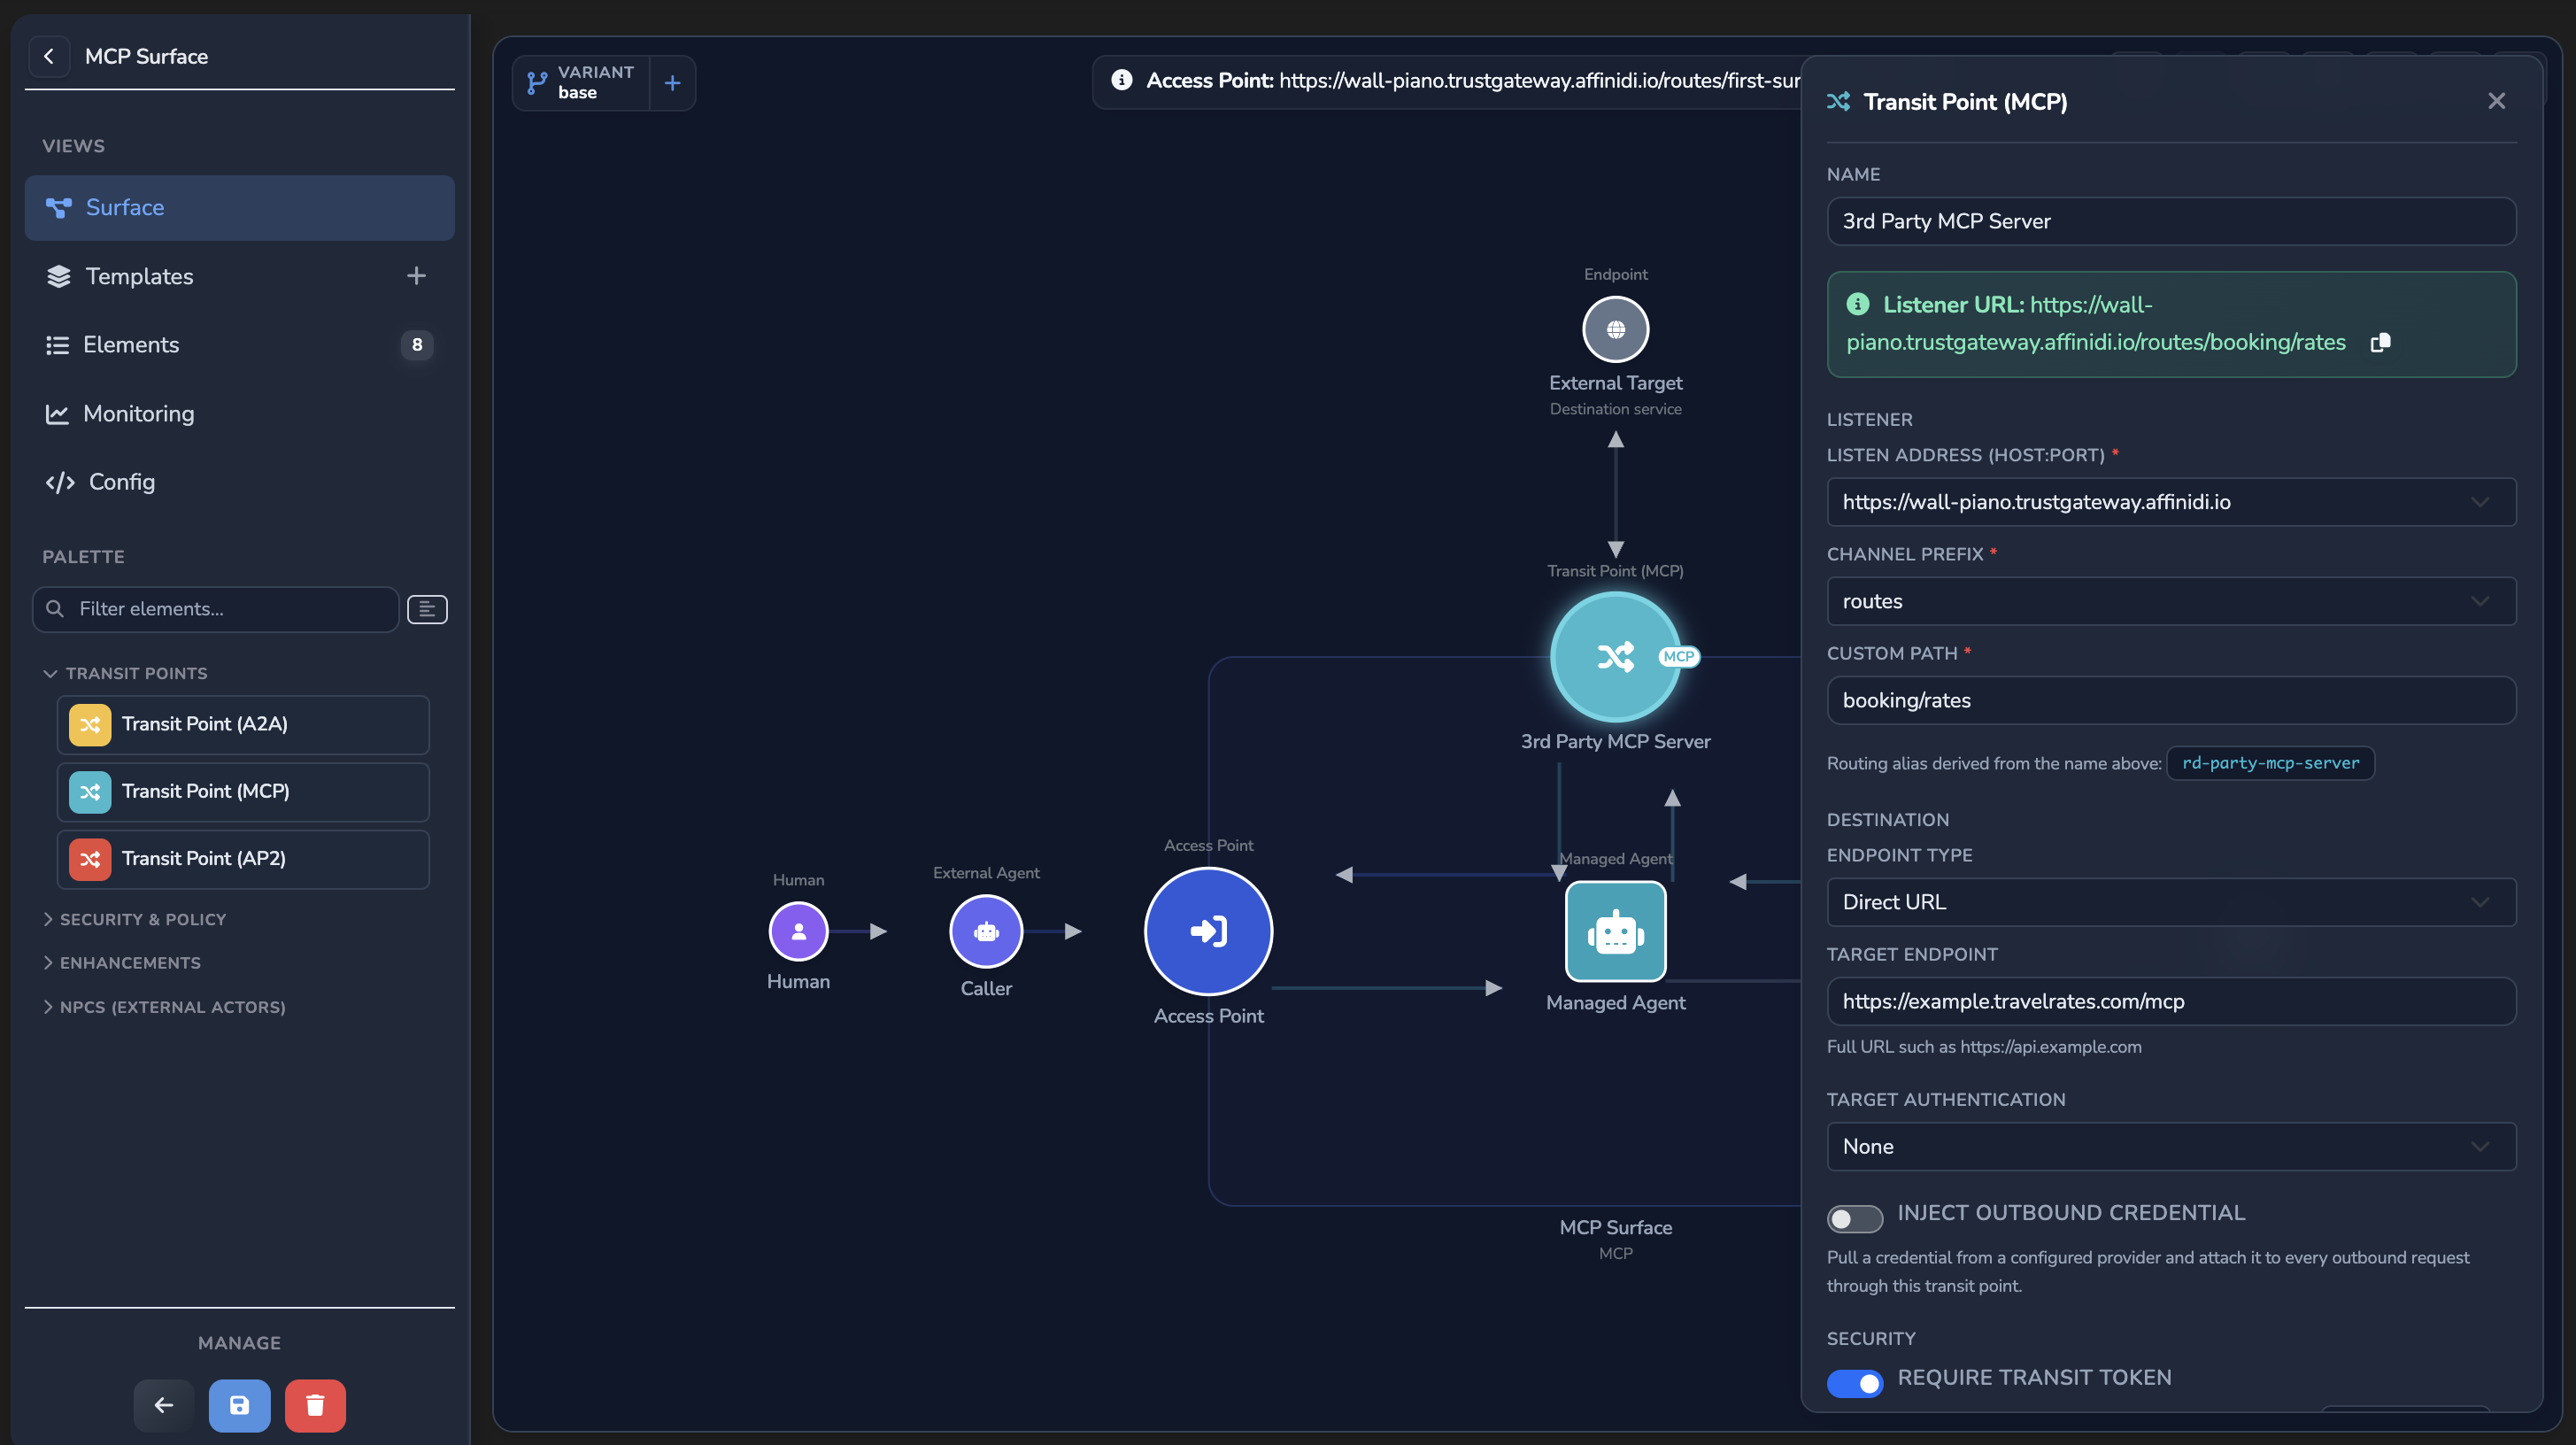
Configuration notes:
- The alias shown is derived automatically from the name you enter.
- If Listen Address (Host:Port) does not match a configured outbound listener, routing for this transit point is skipped.
Confirm
Open the Elements tab and confirm that all required fields are complete. No red outlines should remain on any surface element. You can also open the Config tab to inspect the configuration of your surface.
Once the Elements tab shows all fields as complete, save the surface. In create mode, select the green checkmark button in the toolbar (tooltip: Create surface). In edit mode, select the disk icon button in the toolbar (tooltip: Save changes).
The surface is now live and the gateway begins routing traffic. Connect an MCP-compatible client to the URL shown in the Channel Route banner of the Access Point panel to confirm end-to-end routing.
Default outbound route (no custom path set):
https://<GATEWAY_HOST>/outgoing/<SURFACE_ROUTE>/<TRANSIT_ALIAS>/<OPTIONAL_PATH>Example:
https://<GATEWAY_HOST>/outgoing/<your-surface-route>/mcp-weatherCustom outbound route (custom path set):
https://<GATEWAY_HOST>/<CUSTOM_PATH>/<OPTIONAL_PATH>Save as a reusable template (optional)
- Select the Surface tab in the left sidebar.
- Select Save Surface as Template….
- Fill in the template metadata: name, details, description, and priority in the template list.
- Save the template.
Your template is then available in future surface creation flows alongside the prebuilt templates.
Troubleshooting
| Symptom | Likely cause | Fix |
|---|---|---|
| Red outlines remain after filling all fields. | A required field is still empty or invalid. | Check the Elements section: it lists every incomplete field. |
| MCP client receives 404. | URL pattern does not match the transit point configuration. | Confirm the URL you are using matches the route shown in the transit point’s own Listener URL banner and the transit alias shown below the transit point Name field. |
| MCP client receives 502 or connection refused. | The MCP server is not reachable from the gateway. | Confirm the server is running and Target Endpoint in the transit point panel matches the correct URL. |
| Transit point routing is silently skipped. | Listen Address (Host:Port) does not match any configured listener. | Review your listener configuration and ensure the selected address matches exactly. |
Next steps
- Control MCP tool access with per-tool policies: restrict which tools the surface exposes using per-tool policies.
- Expose a REST API as MCP tools: use an MCP proxy to convert a REST API into the surface’s managed agent endpoint.
Glad to hear it! Please tell us how we can improve more.
Sorry to hear that. Please tell us how we can improve.
Thank you for sharing your feedback so we can improve your experience.