5 Simple Steps to Integrate Your App with Affinidi Login
New Ways to Do Familiar Things
What You Are Building
You’ll build a simple JavaScript app. When a user signs in, the app will display the identity token (idToken) issued by the identity provider.
What Is Familiar
Your app uses OIDC (OpenID Connect) - a standard authentication protocol - to connect with an identity provider. This works like social logins (e.g., Google or Facebook). The provider returns an idToken to your app, as defined by OIDC.
What Is New
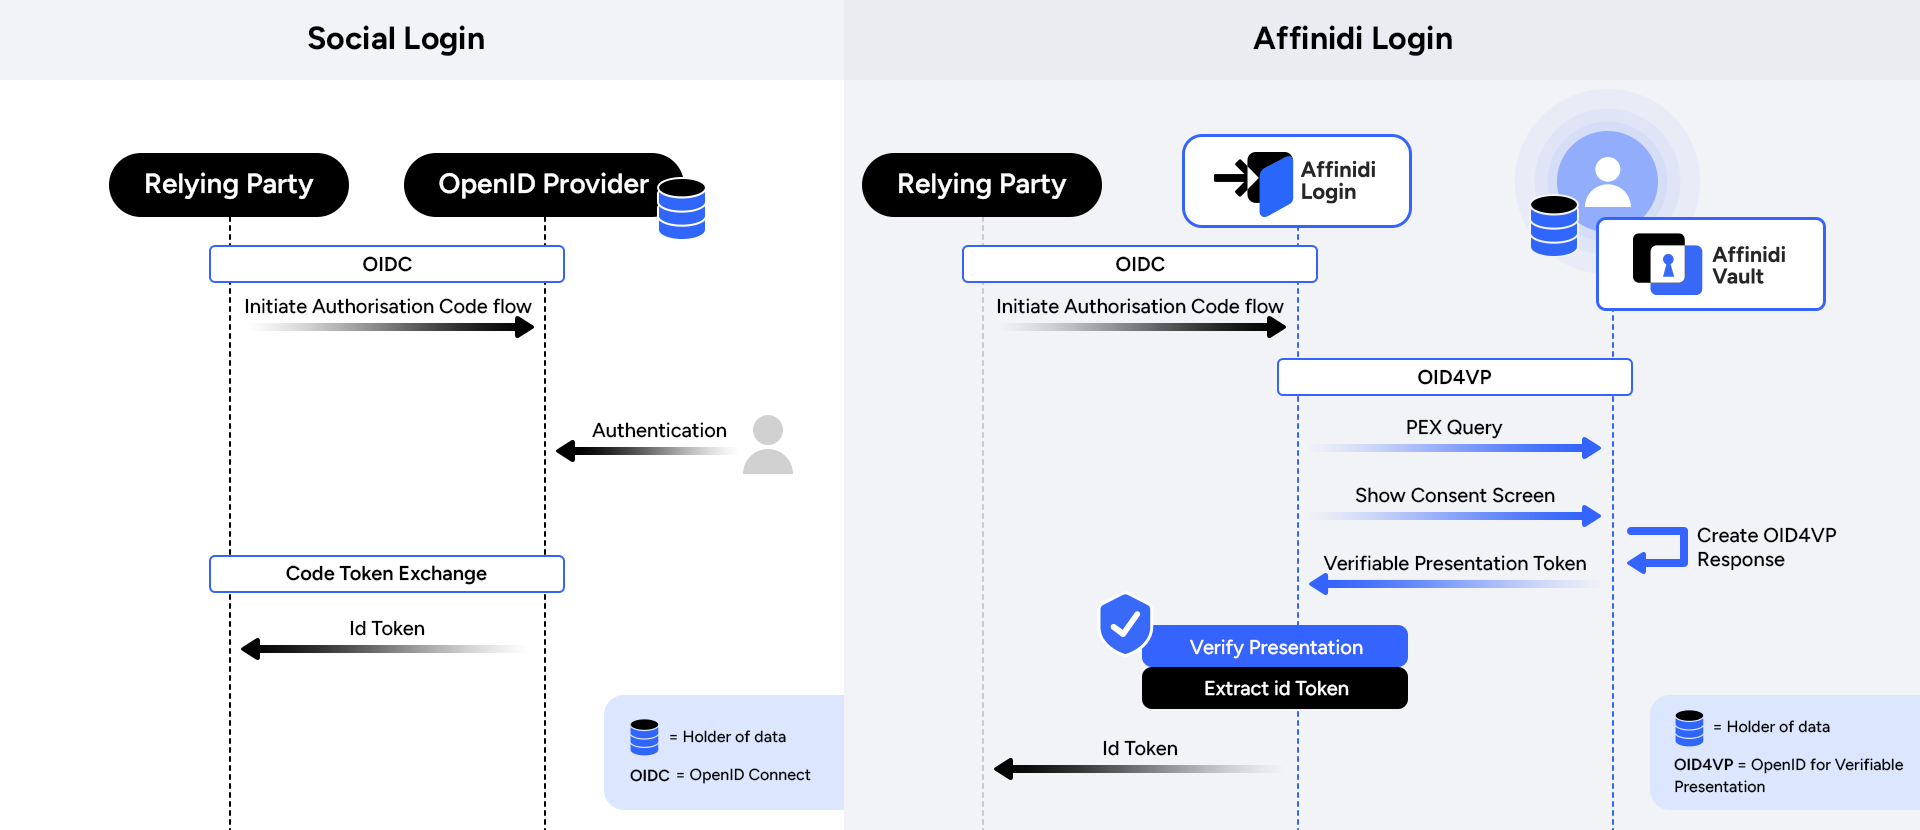
In this setup, users act as their own identity providers. When signing in, they prove their identity without relying on passwords or third-party systems.
This secure, efficient, and privacy-preserving method lets your app offer a personalised experience. It supports both sign-in and sign-up - no forms required.
Before You Begin
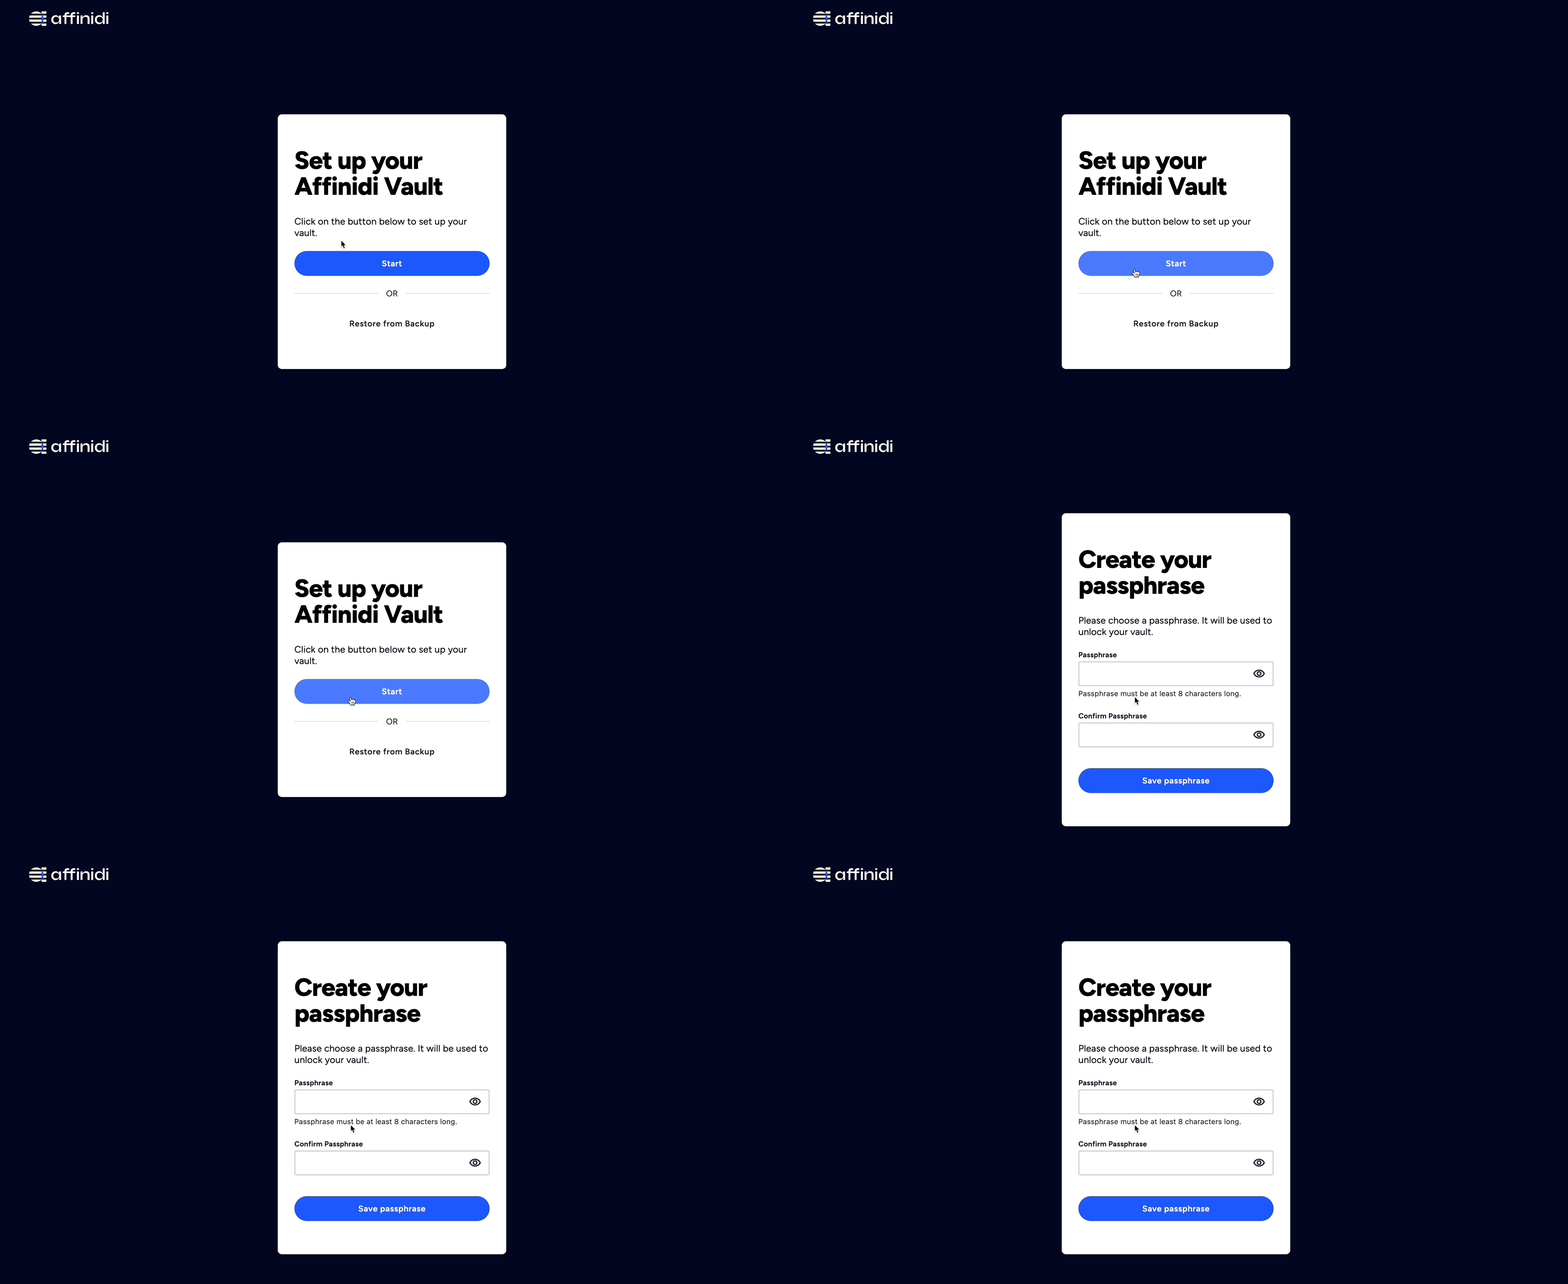
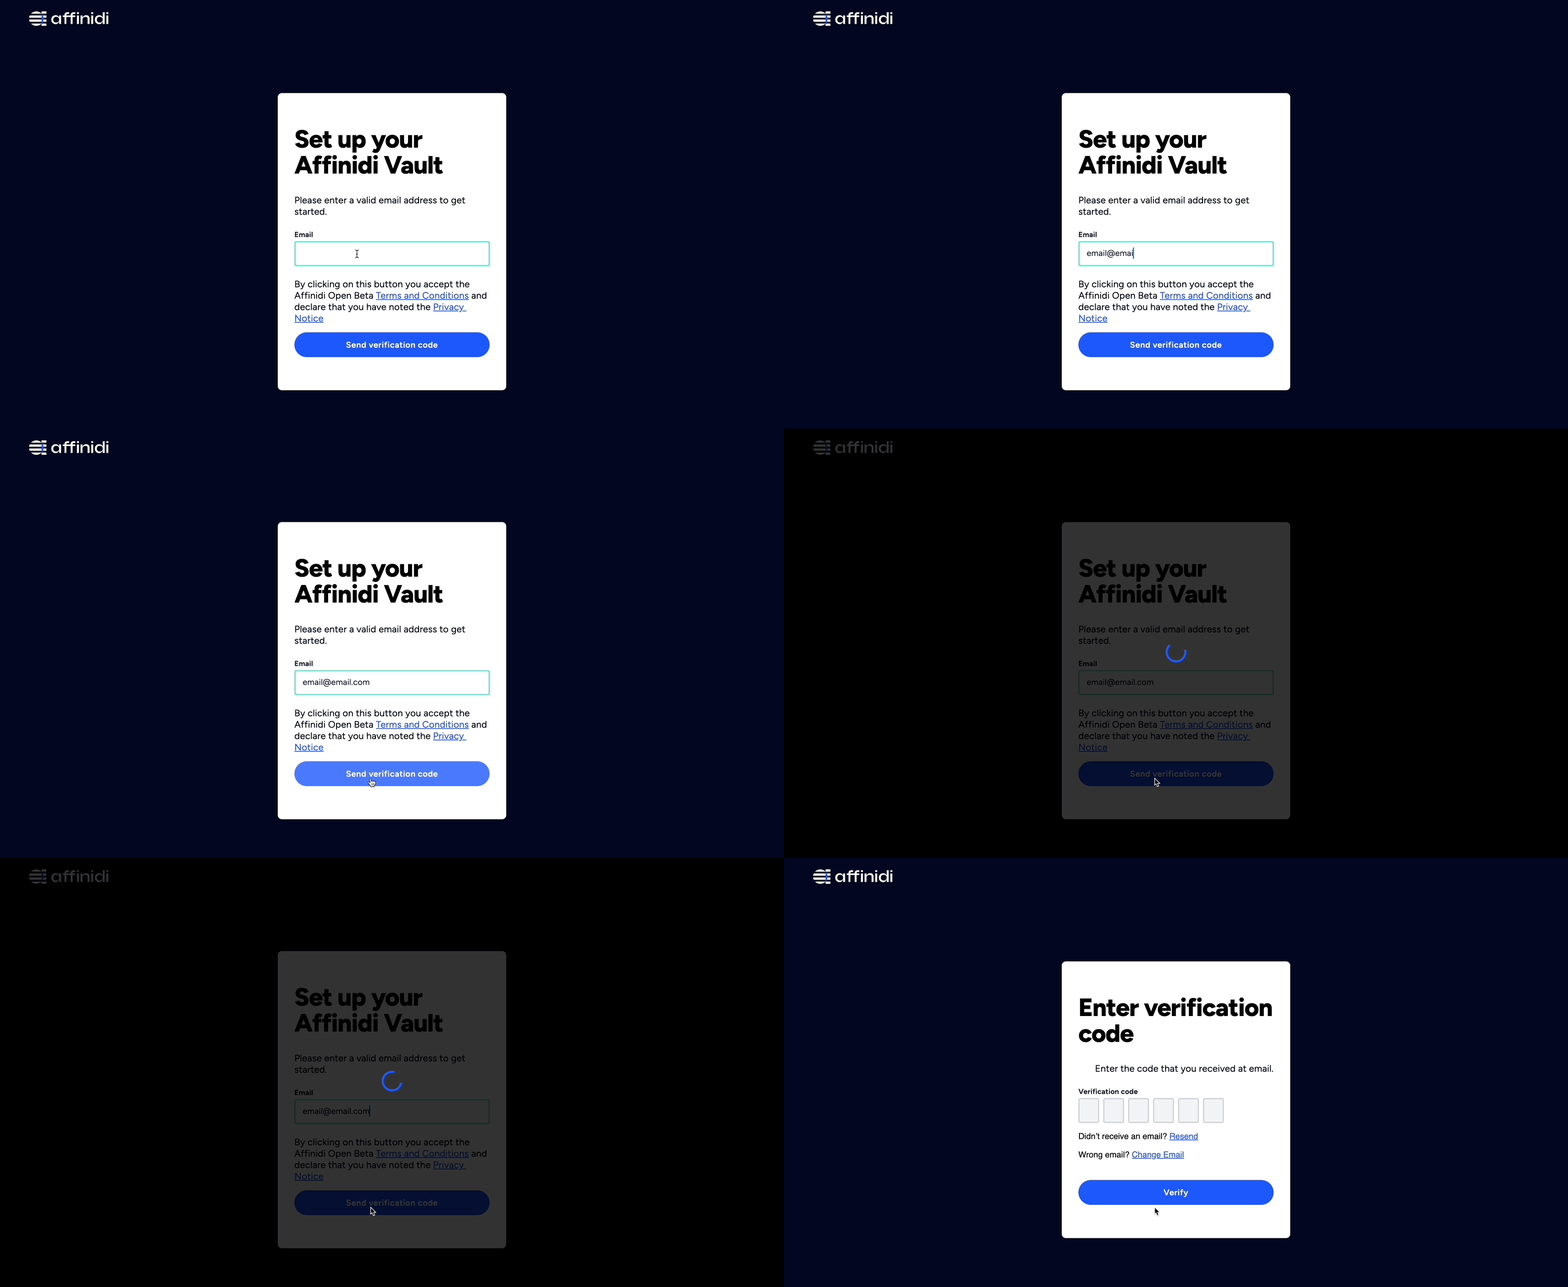
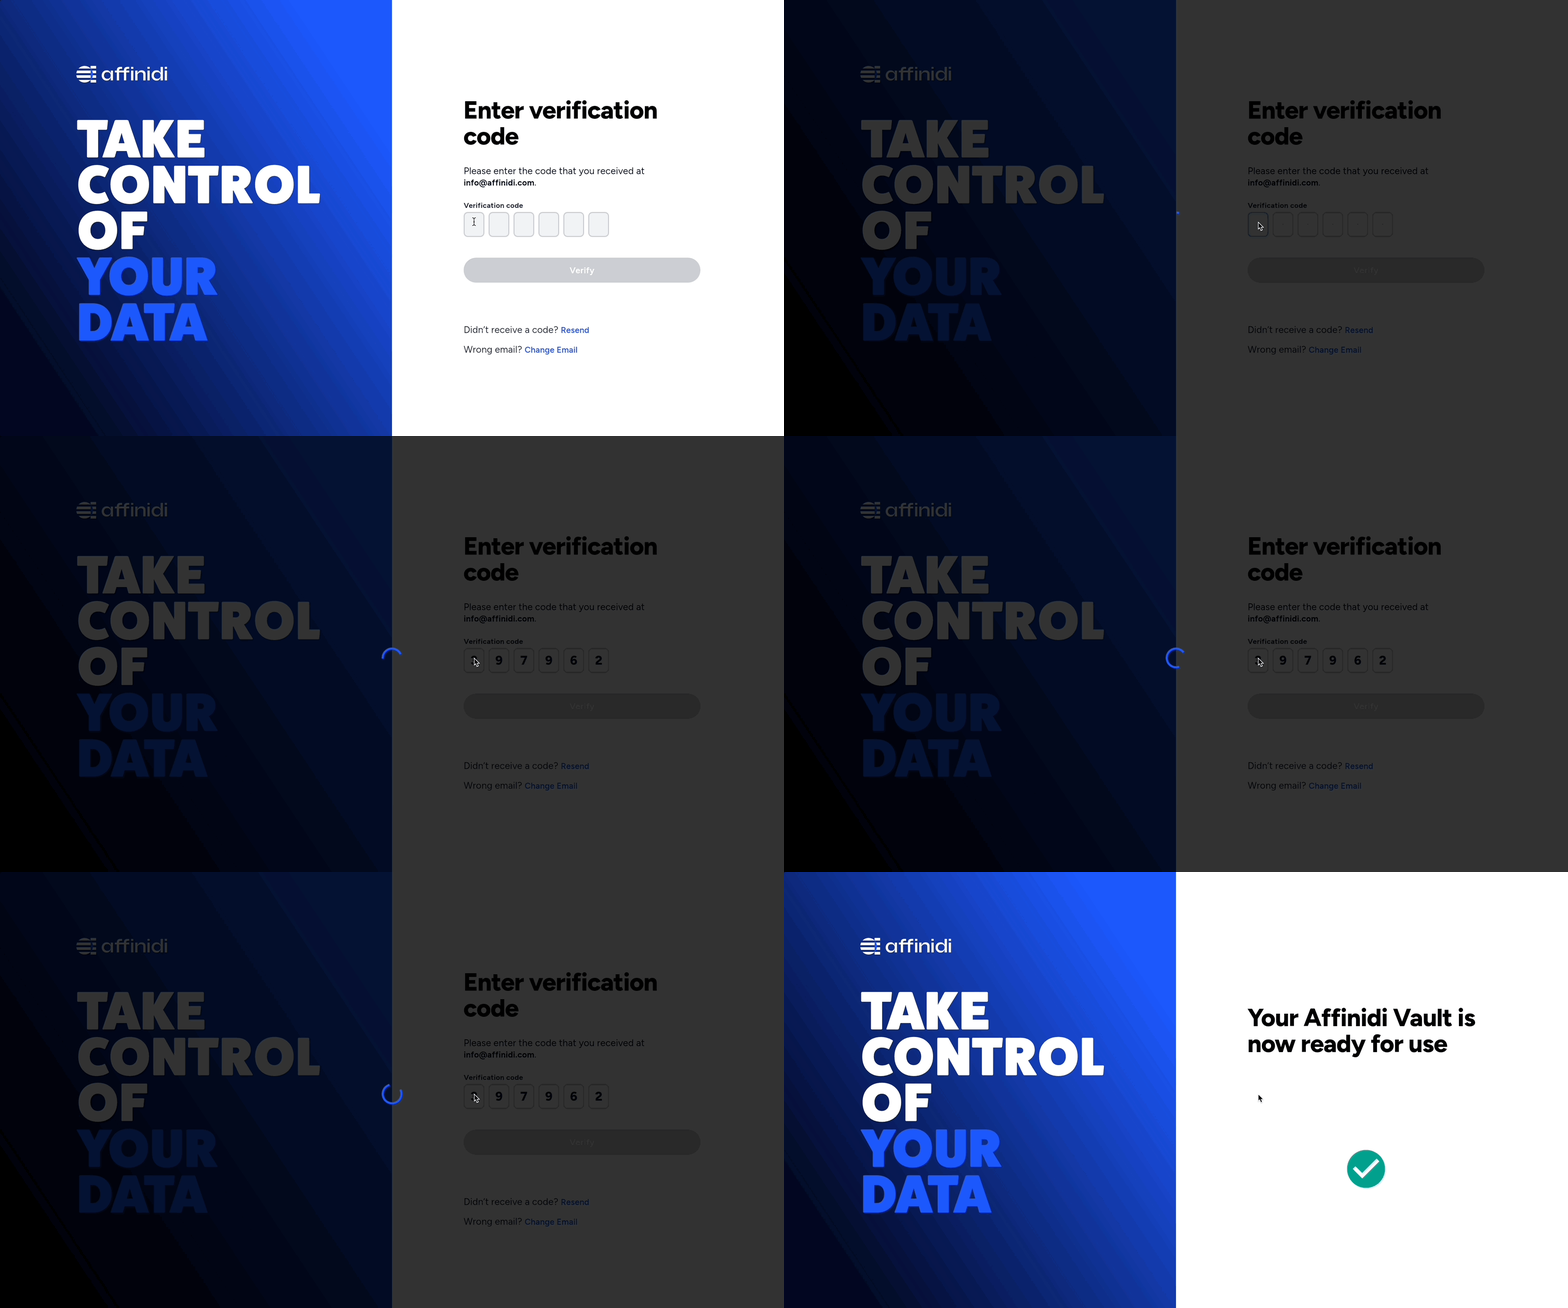
- Set up Affinidi Vault account. This Affinidi Vault would enable users of our application to collect, store and share their identity; their data and to act as their own identity provider
Install NodeJS : This is an open source Javascript runtime environment, much like the runtime that your browser uses to render Javascript applications.
Optionally, install Affinidi CLI. Follow the guide below if it hasn’t been installed.
Let’s Build
Follow this step-by-step guide to enable passwordless authentication using Affinidi Login. Whether you’re new or experienced, you’ll be up and running quickly. #LetsBuildTogether.
Step 1 : Set Up Your Application
- Create the project structure.
- Convert it into a Node.js app.
- Add an index.js file to serve as the main entry point.
- Create an .env file to store secrets.
- Install required Node packages.
This sets up the foundation for authentication support.
        mkdir hello-world-affinidi-login
cd hello-world-affinidi-login

npm init -y
touch index.js
touch .env

npm install express dotenv passport openid-client express-session

# Why we do need each of these modules
#
# express is a minimalist web framework for Node.js
# dotenv helps loads environment variables from .env, created above
# passport is express-compatible authentication framework for Node.js
# openid-client is Relying-Party implementation for Node.js, which is passport compatible
# express-session is session middleware for express, required by passport
To create a application with authentication support, let’s list down the required structure. We shall build on this as we go.
File Path : index.js
        //  1. Import required Libraries
//  2. Create an express application and setup session
//  3. Define application end-points
//  4. Start the http server
//  5. Integrate Authentication
Step 2 : Implement Core Logic
- Define the core logic based on your app’s requirements.
- Create three environment variables for better organisation.
File Path : index.js
        //  1. Import required Libraries
const express = require('express');
const passport = require('passport');
const session = require('express-session');
const { Issuer, Strategy } = require('openid-client');
const http = require("http");
require("dotenv").config();

//  2. Create an express application and setup session
const app = express();
app.use(session({
    secret: 'my-secret',
    resave: false ,
    saveUninitialized: false
}));

// 3. Define application end-points
app.get("/", (req, res) => {
    res.send(" Lets build a Unified Digital Identity <br/><br/><a href='/login'> Affinidi Login</a>");
})

app.get('/login',
    function (req, res, next) {
        next();
    },
);

app.get('/login/callback', (req, res, next) => {})

app.get("/protected", (req, res) => {
    res.header("Content-Type", 'application/json');
    res.end("Protected Content for Authenticated Users");
})

// 4. Start the http server
const httpServer = http.createServer(app)
httpServer.listen(8080, () => {
    console.log(`Hello World - Affinidi Login : Up and running on 8080`)
})
For better housekeeping, let’s first create 3 environment variables
File Path : .env
        issuer= #Verifiable Identifier for the issuer of claims, in this case, Affinidi Login
client_id=  #Public Identifier for our application, issued by Affinidi Login
client_secret= #Secret known to our application
Step 3 : Integrate Authentication
- Use the openid-client library to create an affinidi-login authentication strategy.
- Integrate this strategy with Passport middleware.
        // 5. Integrate Authentication
// 5a. Discover Affinidi Login - Issuer
Issuer.discover(process.env.issuer).then(function (oidcIssuer) {
  // 5b. Create a RP-client which can initiate an OIDC flow
  var client = new oidcIssuer.Client({
    client_id: process.env.client_id,
    client_secret: process.env.client_secret,
    redirect_uris: ["http://localhost:8080/login/callback"],
    response_types: ['code'],
    token_endpoint_auth_method: 'client_secret_post'
  });

  // 5c. Provide this strategy to the passport middleware
  passport.use(
    'affinidi-login', new Strategy({ client, passReqToCallback: true }, (req, tokenSet, userinfo, done) => {
      req.session.tokenSet = tokenSet;
      req.session.userinfo = userinfo;
      return done(null, tokenSet.claims());
    }));
});

passport.serializeUser(function (user, done) {
  done(null, user);
});
passport.deserializeUser(function (user, done) {
  done(null, user);
});
Step 4 : Create Routes for Authentication
- Add routes to trigger authentication.
- From the landing page (/), redirect to /login.
- Use Passport to authenticate users.
Here’s what the final index.js would look like
FilePath : index.js
        //  1. Import required Libraries
const express = require('express');
const passport = require('passport');
const session = require('express-session');
const { Issuer, Strategy } = require('openid-client');
const http = require("http");
require("dotenv").config();

//  2. Create an express application and setup session
const app = express();
app.use(session({
    secret: 'my-secret',
    resave: false ,
    saveUninitialized: false
}));
app.use(passport.initialize());
app.use(passport.session());

// 3. Define application end-points
app.get("/", (req, res) => {
    res.send(" Lets build a Unified Digital Identity <br/><br/><a href='/login'> Affinidi Login</a>");
})

app.get('/login',
    function (req, res, next) {
        next();
    },
    passport.authenticate('affinidi-login',{scope:'openid'})
);

app.get('/login/callback', (req, res, next) => {
    passport.authenticate('affinidi-login', {successRedirect: '/protected', failureRedirect: '/'})(req,res,next)
})

app.get("/protected", (req, res) => {
    res.header("Content-Type", 'application/json');
    res.end(JSON.stringify(req.user, null, 4));
})

// 4. Start the http server
const httpServer = http.createServer(app)
httpServer.listen(8080, () => {
    console.log(`Hello World - Affinidi Login : Up and running on 8080`)
})

// 5. Integrate Authentication
// 5a. Discover Affinidi Login - Issuer
Issuer.discover(process.env.issuer).then(function (oidcIssuer) {
    // 5b. Create a RP-client which can initiate an OIDC flow
    var client = new oidcIssuer.Client({
      client_id: process.env.client_id,
      client_secret: process.env.client_secret,
      redirect_uris: ["http://localhost:8080/login/callback"],
      response_types: ['code'],
      token_endpoint_auth_method: 'client_secret_post'
    });

    // 5c. Provide this strategy to the passport middleware
    passport.use(
      'affinidi-login', new Strategy({ client, passReqToCallback: true }, (req, tokenSet, userinfo, done) => {
        req.session.tokenSet = tokenSet;
        req.session.userinfo = userinfo;
        return done(null, tokenSet.claims());
      }));
  });

  passport.serializeUser(function (user, done) {
    done(null, user);
  });
  passport.deserializeUser(function (user, done) {
    done(null, user);
  });
Step 5 : Integrate Affinidi Login and Run Your App
Your app now initiates an OIDC flow with Affinidi Vault as an identity provider, authenticates users, and receives an idToken. This token is shown on the /protected page.
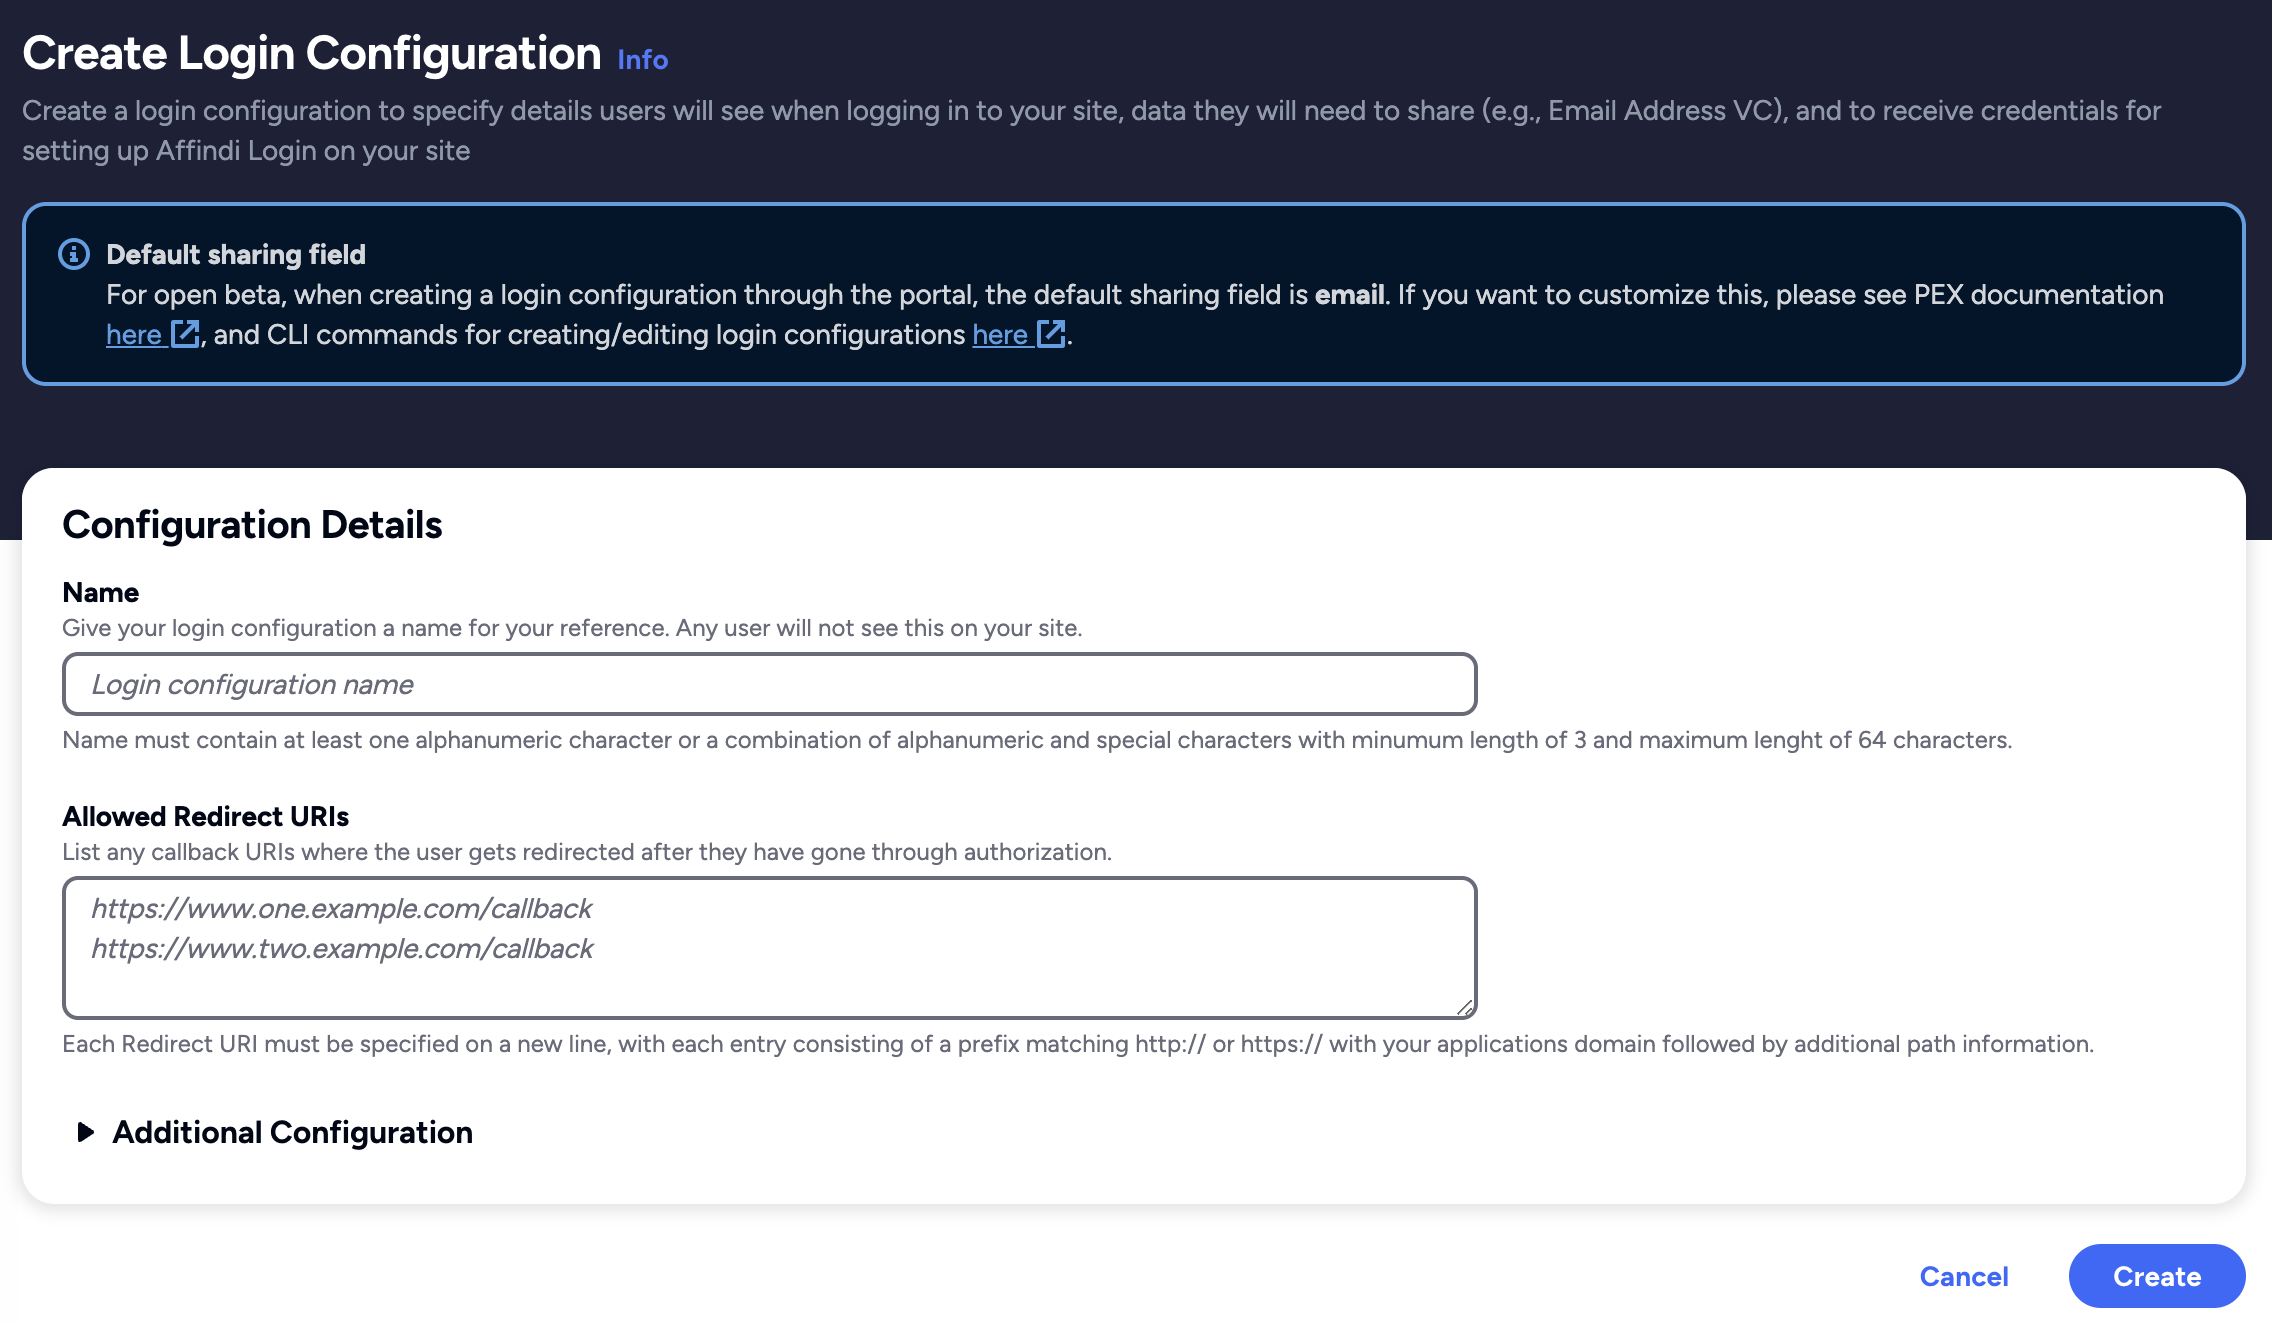
To use Affinidi Login: Create a login configuration using Affinidi CLI or Affinidi Portal.
Set redirect-uri to http://localhost:8080/login/callback. Choose a name and keep other settings default.
You’ll receive Client Id, Client Secret, and Issuer.
Update your .env file with these values.
File Path : .env
        client_id=cliEnt0101-07d5-xxxx-1111-d2de03f62456
client_secret=mYsEcReTmYsEcReT
issuer=https://<PROJECT_ID>.apse1.login.affinidi.io
Run the app and test it at http://localhost:8080
node index.jsSummary
After authentication, the /protected page displays the idToken. This token includes zero-party data - information shared directly by users with their consent.
Here’s a sample token. Under the custom node, you’ll find claims provided by the user, not a third-party system.
        {
    "acr": "0",
    "at_hash": "0A1HHZ4xu0Cpv0gLKqnZ_Q",
    "aud": [
        "eed5f015-07d5-1111-893c-d2de03f62456"
    ],
    "auth_time": 1698111980,
    "custom": [
        {
            "type": [
                "VerifiableCredential",
                "Email"
            ]
        },
        {
            "email": "test@gmail.com"
        },
        {
            "did": "did:key:..."
        }
    ],
    "exp": 1698112882,
    "iat": 1698111982,
    "iss": "https://<PROJECT_ID>.apse1.login.affinidi.io",
    "jti": "d96ea1d4-f8d1-aaBB-ccDD-e3d627d1bde9",
    "rat": 1698111949,
    "sid": "26c7c401-xxYY-4cb1-880c-435599ad6b1a",
    "sub": "did:key:..."
}
Bonus
Want deeper insights into your users without relying on forms or third-party data? Instead of B2B integrations, update your Login Configuration:
- Modify the Login Configuration created above (e.g. modify the presentation definition and the idTokenMapping)
- Refer to the documentation for customisation options.
Download the sample JSON file here. This file defines a login configuration where an application requires multiple user’s identity attribute from user’s Affinidi Vault and in a specfic defined formal of idToken.
affinidi login update-config --id=<login-config-id-created-above> --file="profile-pex.json"That’s it. Run the app again and see the updated token with richer user data.
In this Hello World example, you built an app, integrated Affinidi Login, and received zero-party data - all in five steps. You now have a secure, privacy-first way to respect user identity ownership.
Keep building.
What’s Next
Glad to hear it! Please tell us how we can improve more.
Sorry to hear that. Please tell us how we can improve.
Thank you for sharing your feedback so we can improve your experience.
