Credential Issuance configuration
A Credential Issuance configuration sets the wallet that signs the credentials your application issues and the schemas it can issue them in. Each project can have one configuration. You create it in Affinidi Portal, then test it by issuing a credential to your own Affinidi Vault.
Configuration details
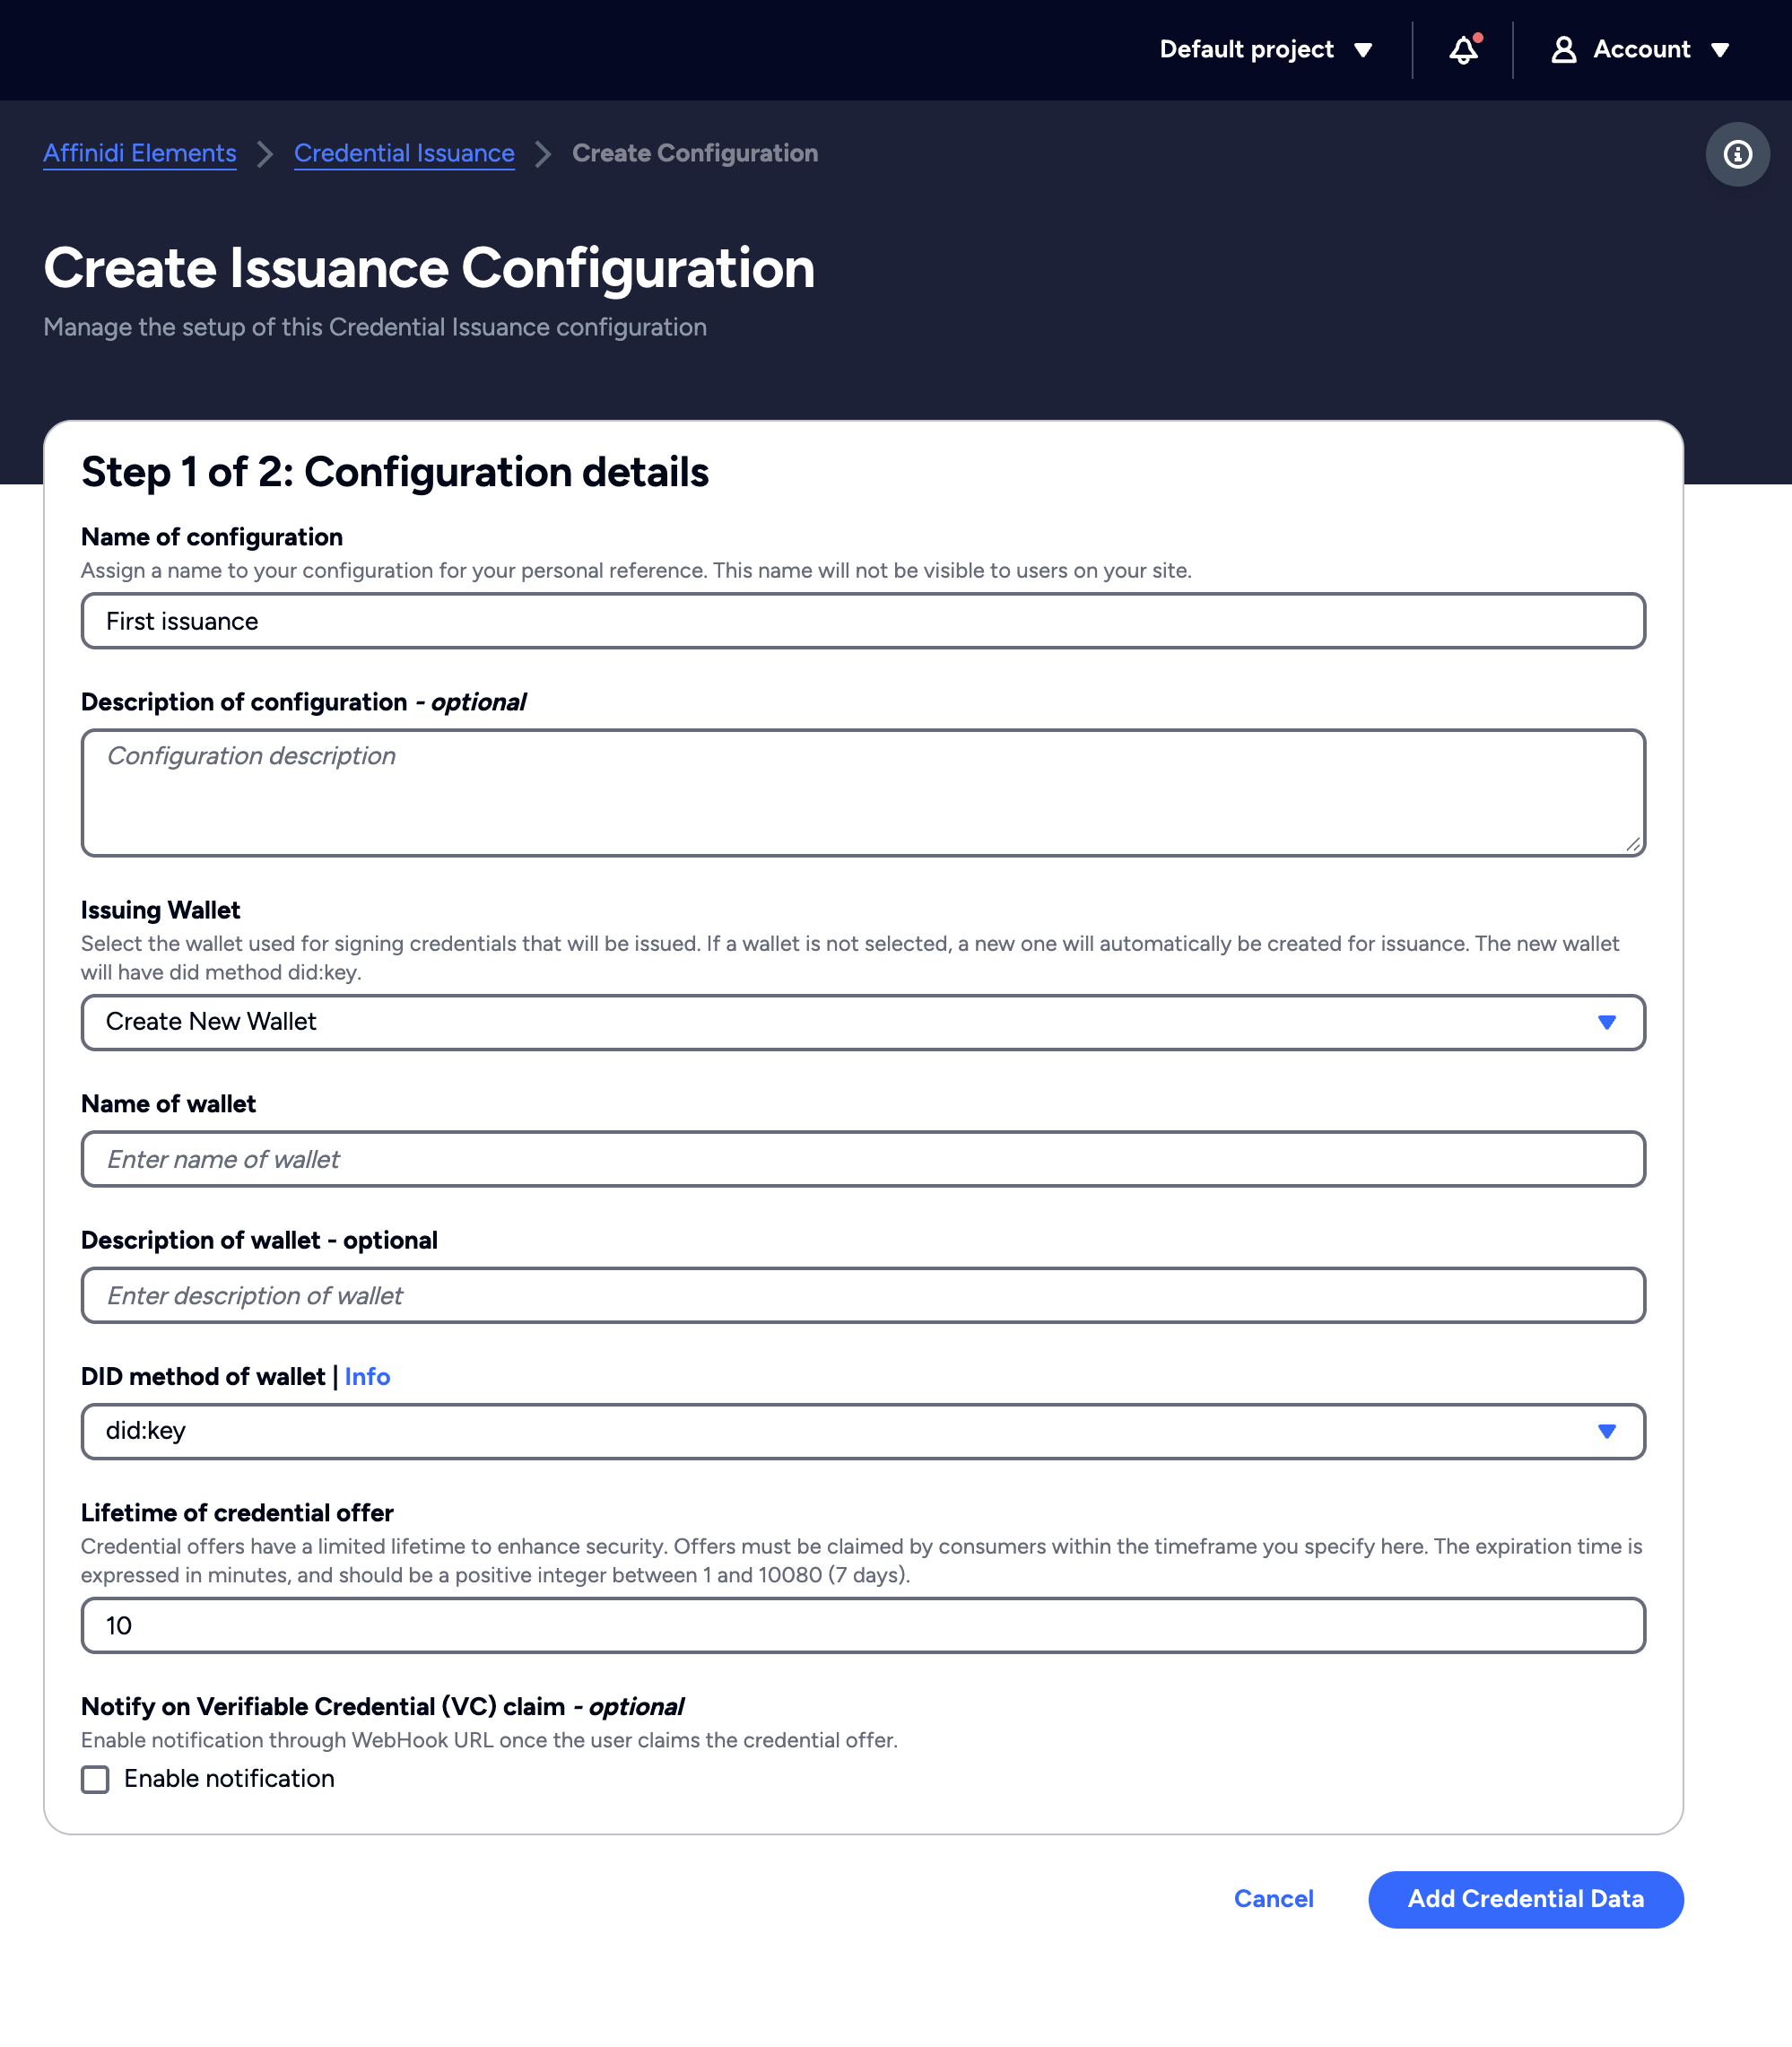
Affinidi Portal asks for these fields in two steps.
Required fields
- Name of configuration: a name for your own reference, shown only in Affinidi Portal.
- Issuing Wallet: the wallet that signs the credentials you issue. Select an existing wallet, or select Create New Wallet and enter a Name of wallet. A new wallet uses
did:keyunless you choosedid:webin DID method of wallet. See Wallets. - Lifetime of credential offer: how long a user has to claim a credential offer, in minutes, from 1 to 10080 (7 days). The default is 10.
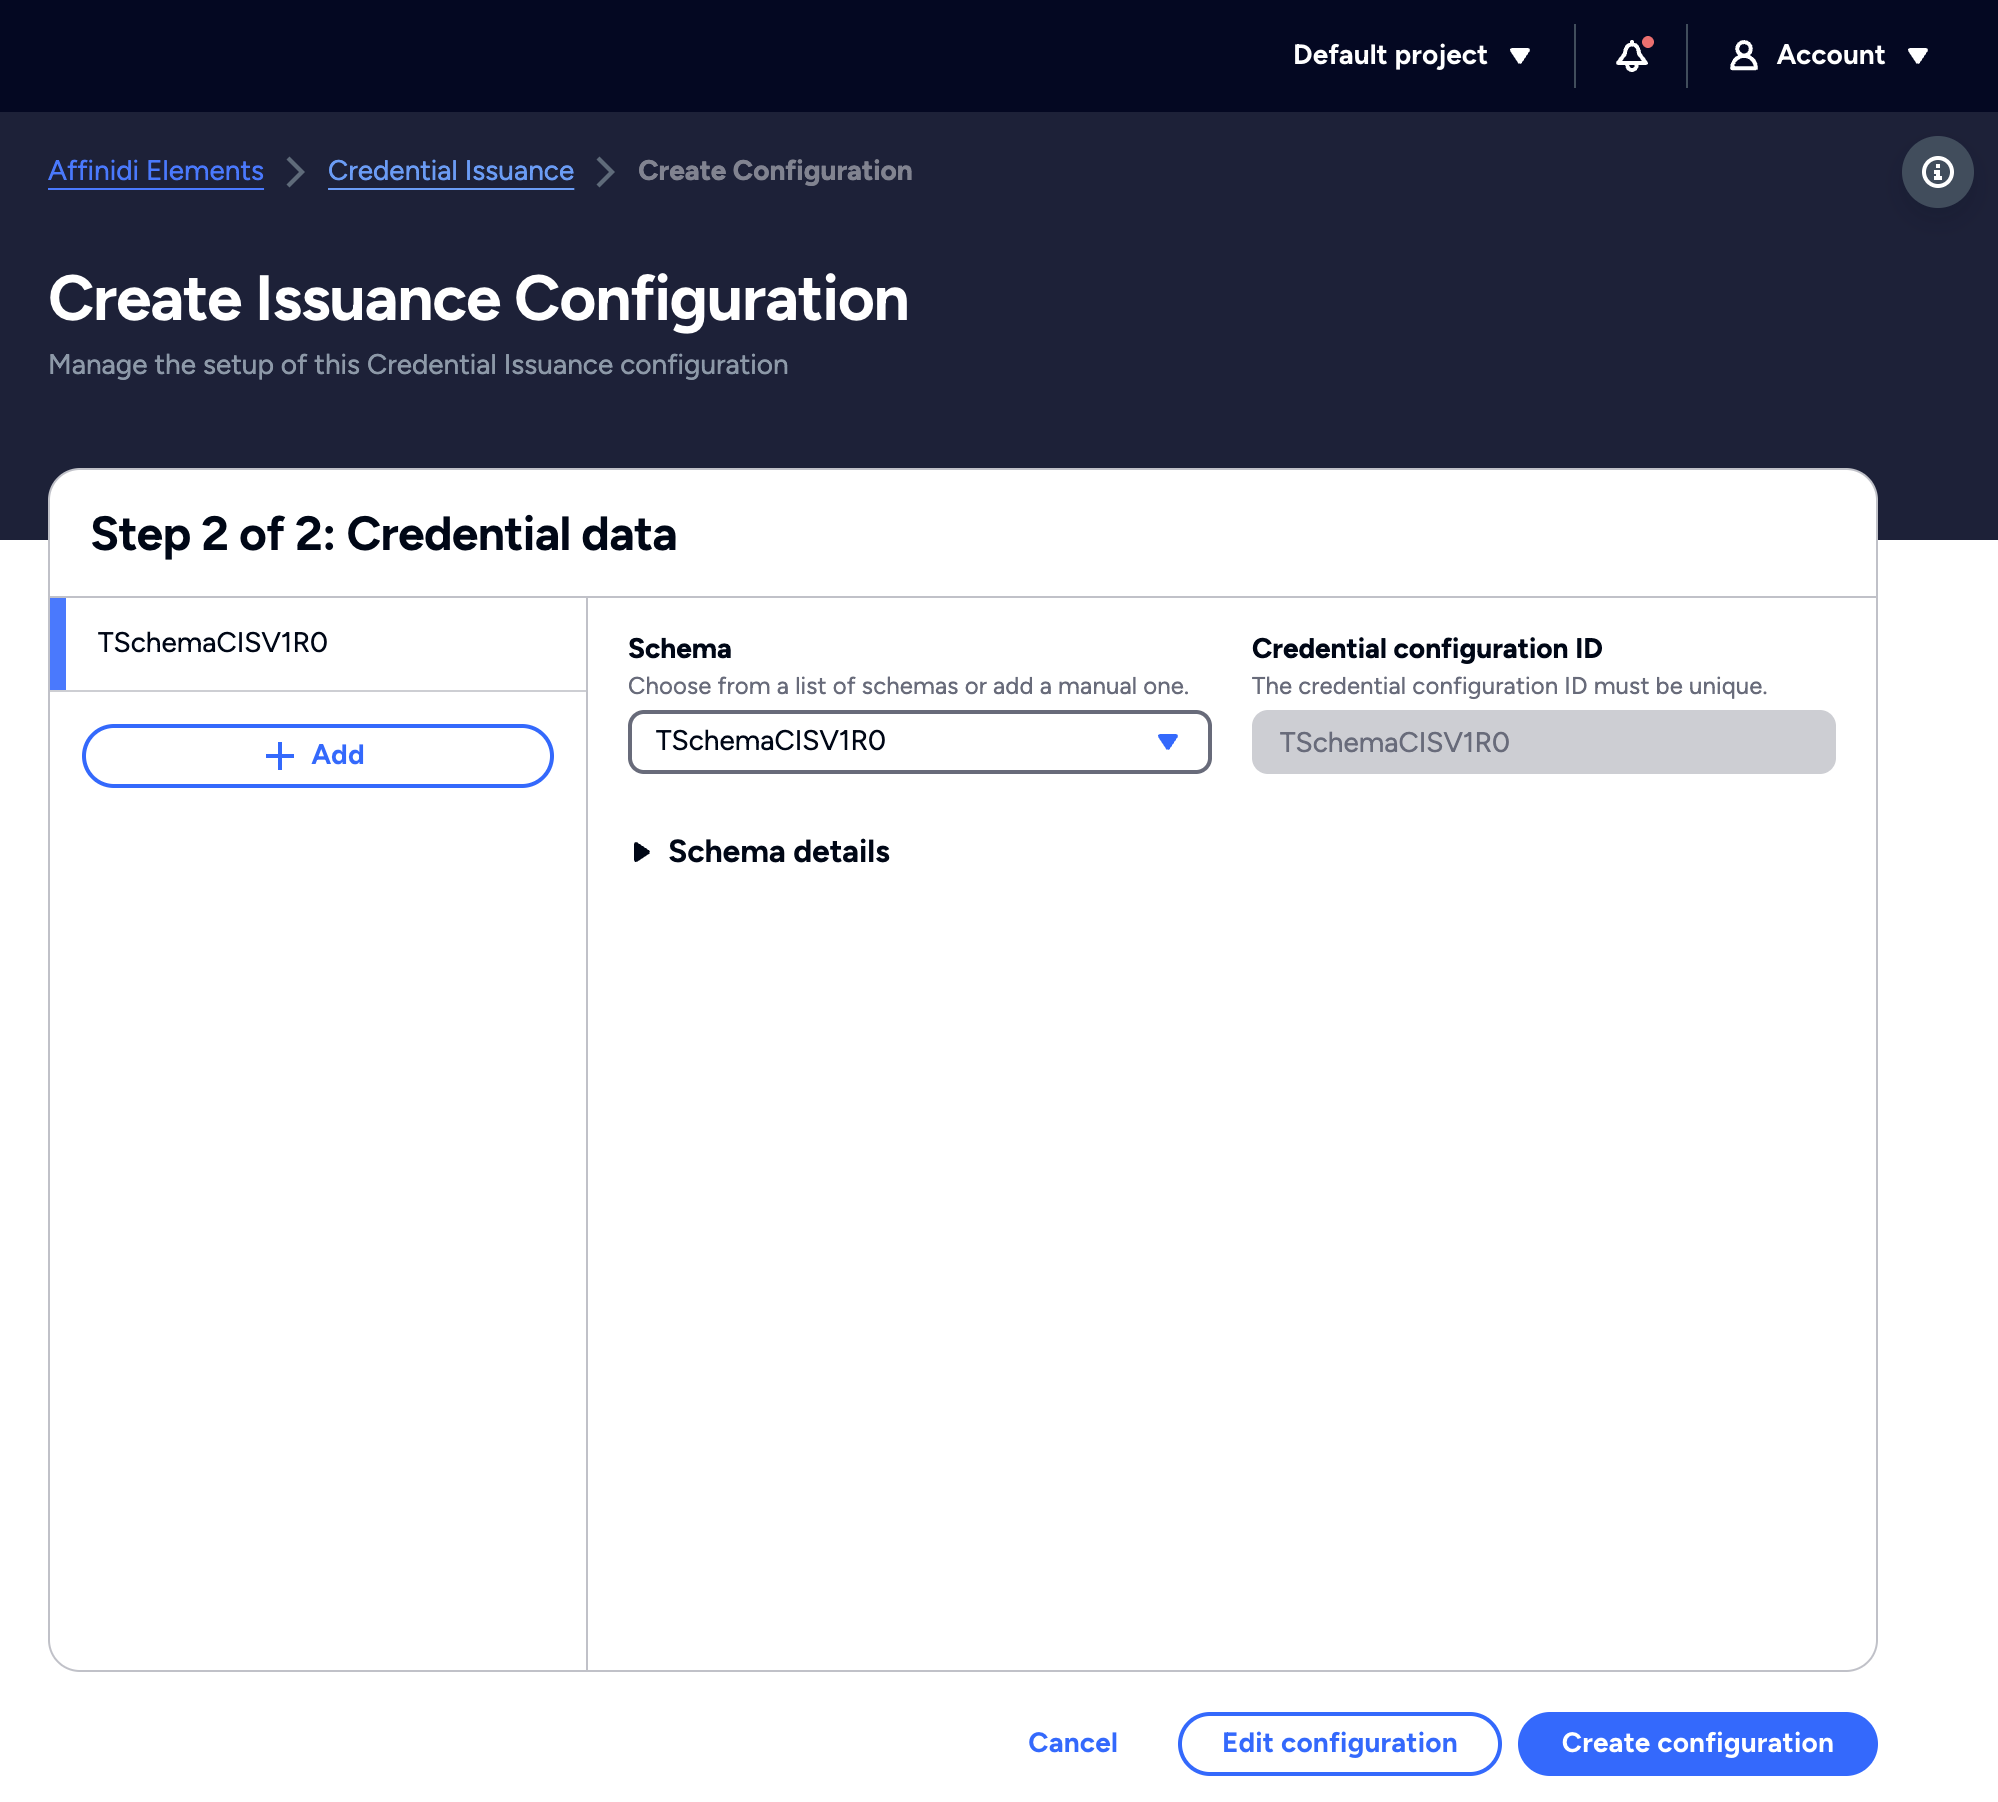
- Schema: on the second step, the schema each credential follows. Choose a public schema authored by your Affinidi Vault’s DID or by the issuing wallet, or choose Manual to enter a schema’s JSON schema URL and JSON-LD schema URL. Create schemas in Schema Builder. Select Add to support more than one schema.
- Credential configuration ID: fills in from the schema, and you can edit it only for a manual schema. It must be unique. Your application passes it as the
credentialTypeIdparameter when it creates a credential offer.
Optional fields
- Description of configuration: what the configuration is for.
- Notify on Verifiable Credential (VC) claim: select Enable notification and enter a Webhook URL for Verifiable Credential (VC) claim notifications to be notified when a user claims a credential offer. See VC claim notification.
- Credential display name: the name the holder sees for credentials issued with that schema.
Create Credential Issuance configuration
In the Affinidi Elements section of the sidebar, go to Credential Issuance , and select Create configuration. The button is unavailable when the project already has its configuration.
Enter the fields under Step 1 of 2: Configuration details, and select Add Credential Data.
Under Step 2 of 2: Credential data, choose the Schema for each credential type you issue.
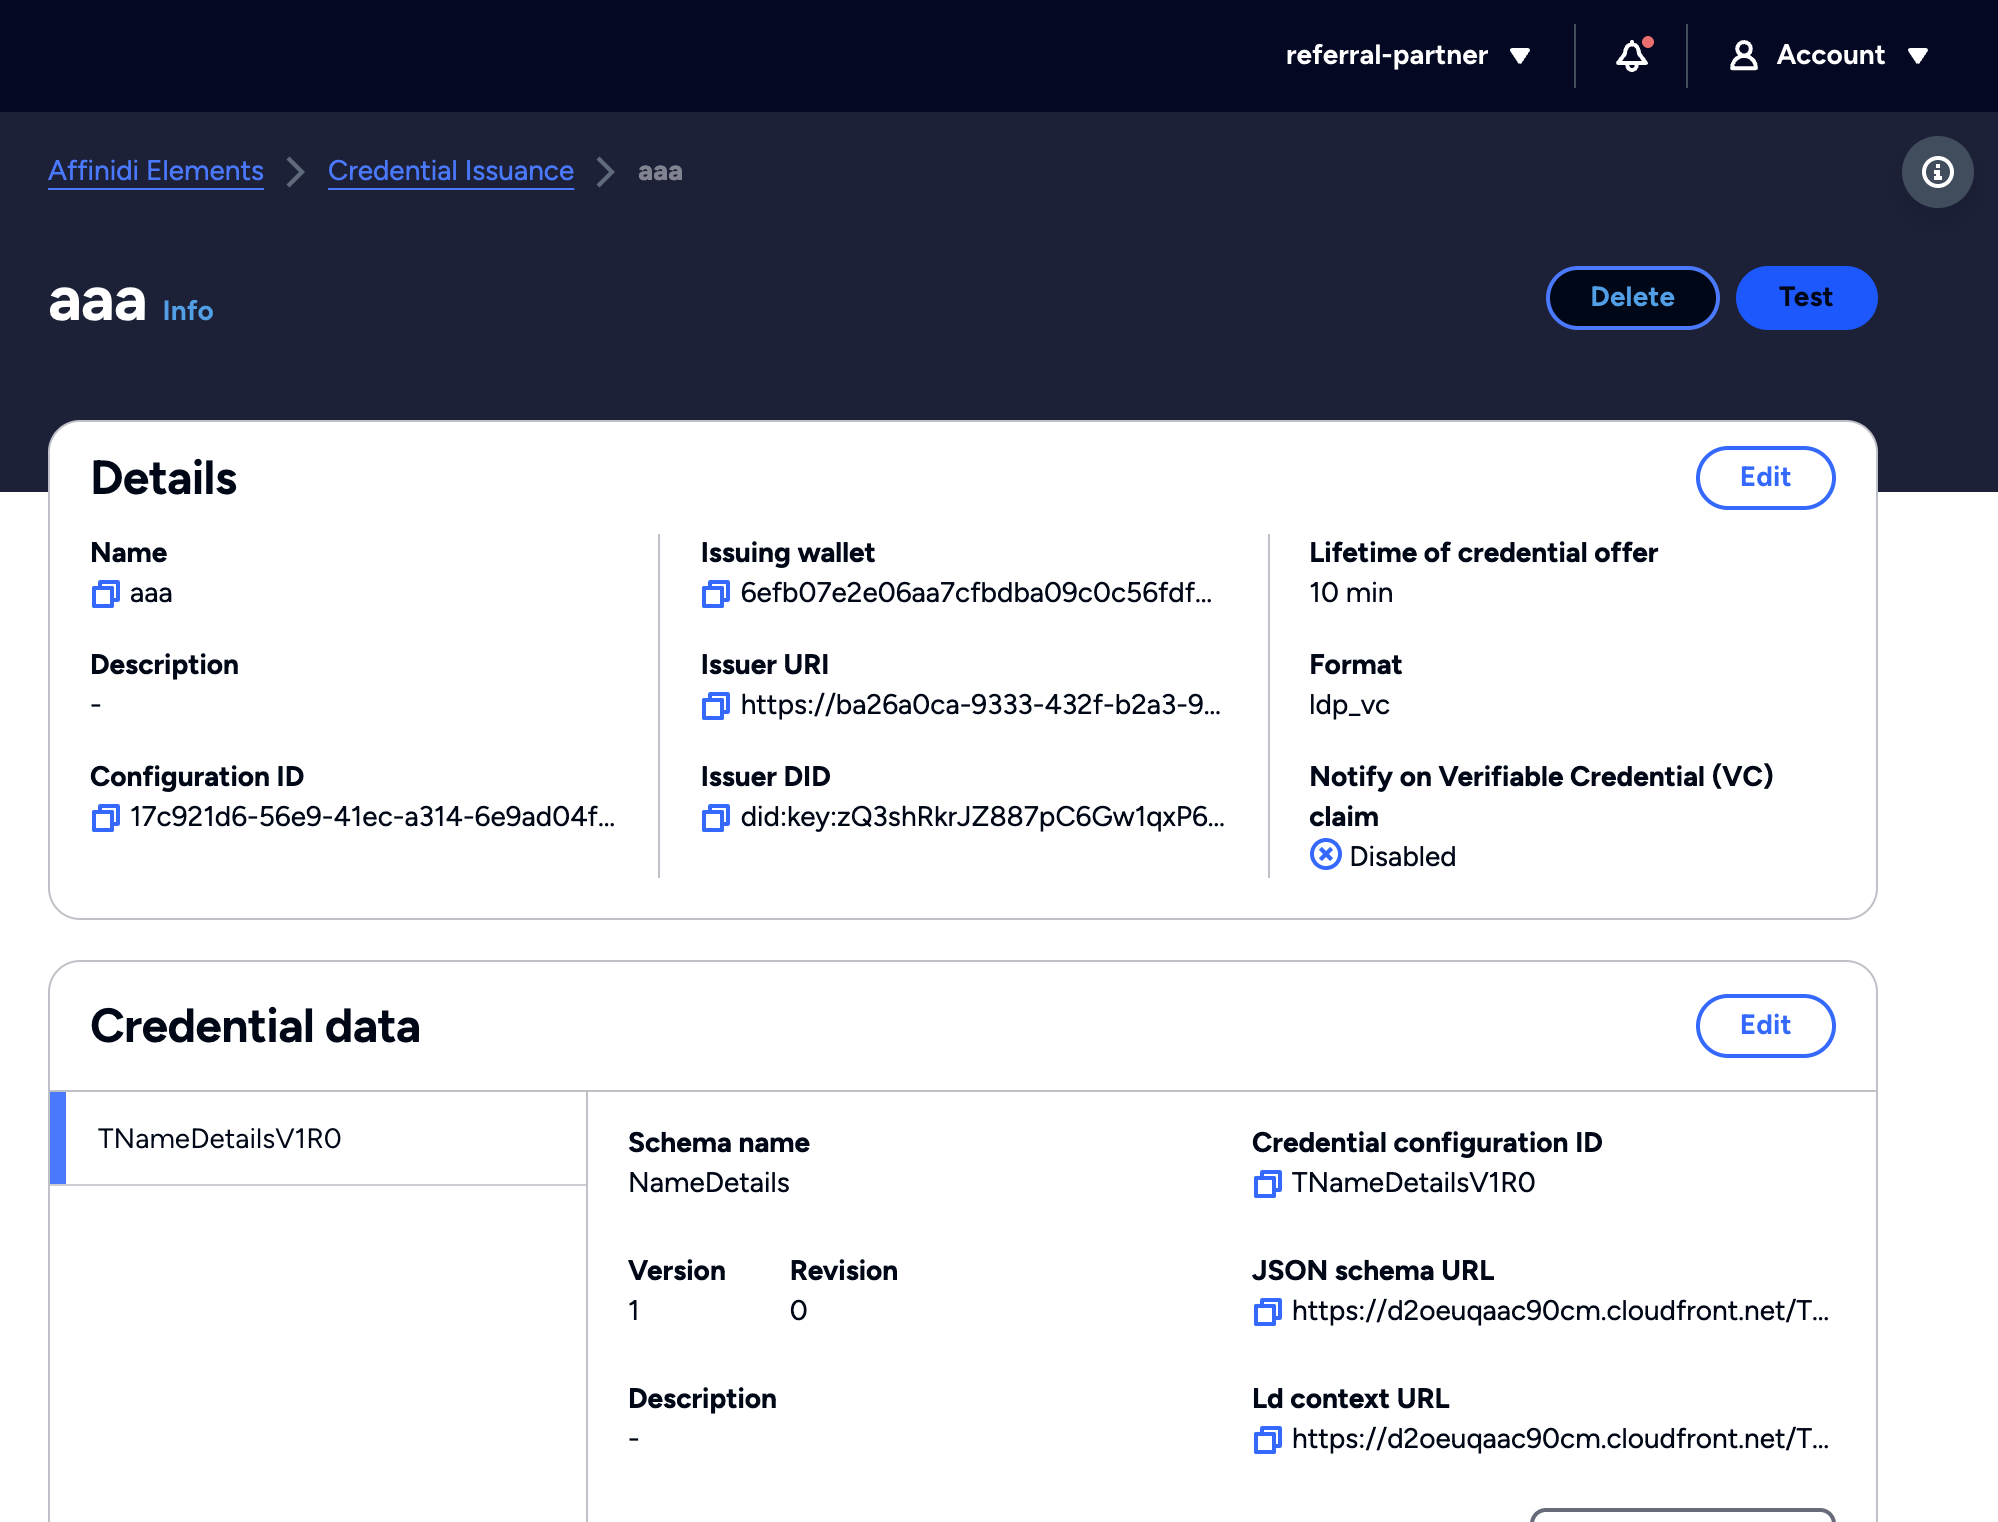
Select Create configuration. Affinidi Portal opens the page of your new configuration.
Test your issuance configuration
Before you integrate, test the configuration by issuing a credential to your own Affinidi Vault.
At the top of the configuration’s page, select Test.
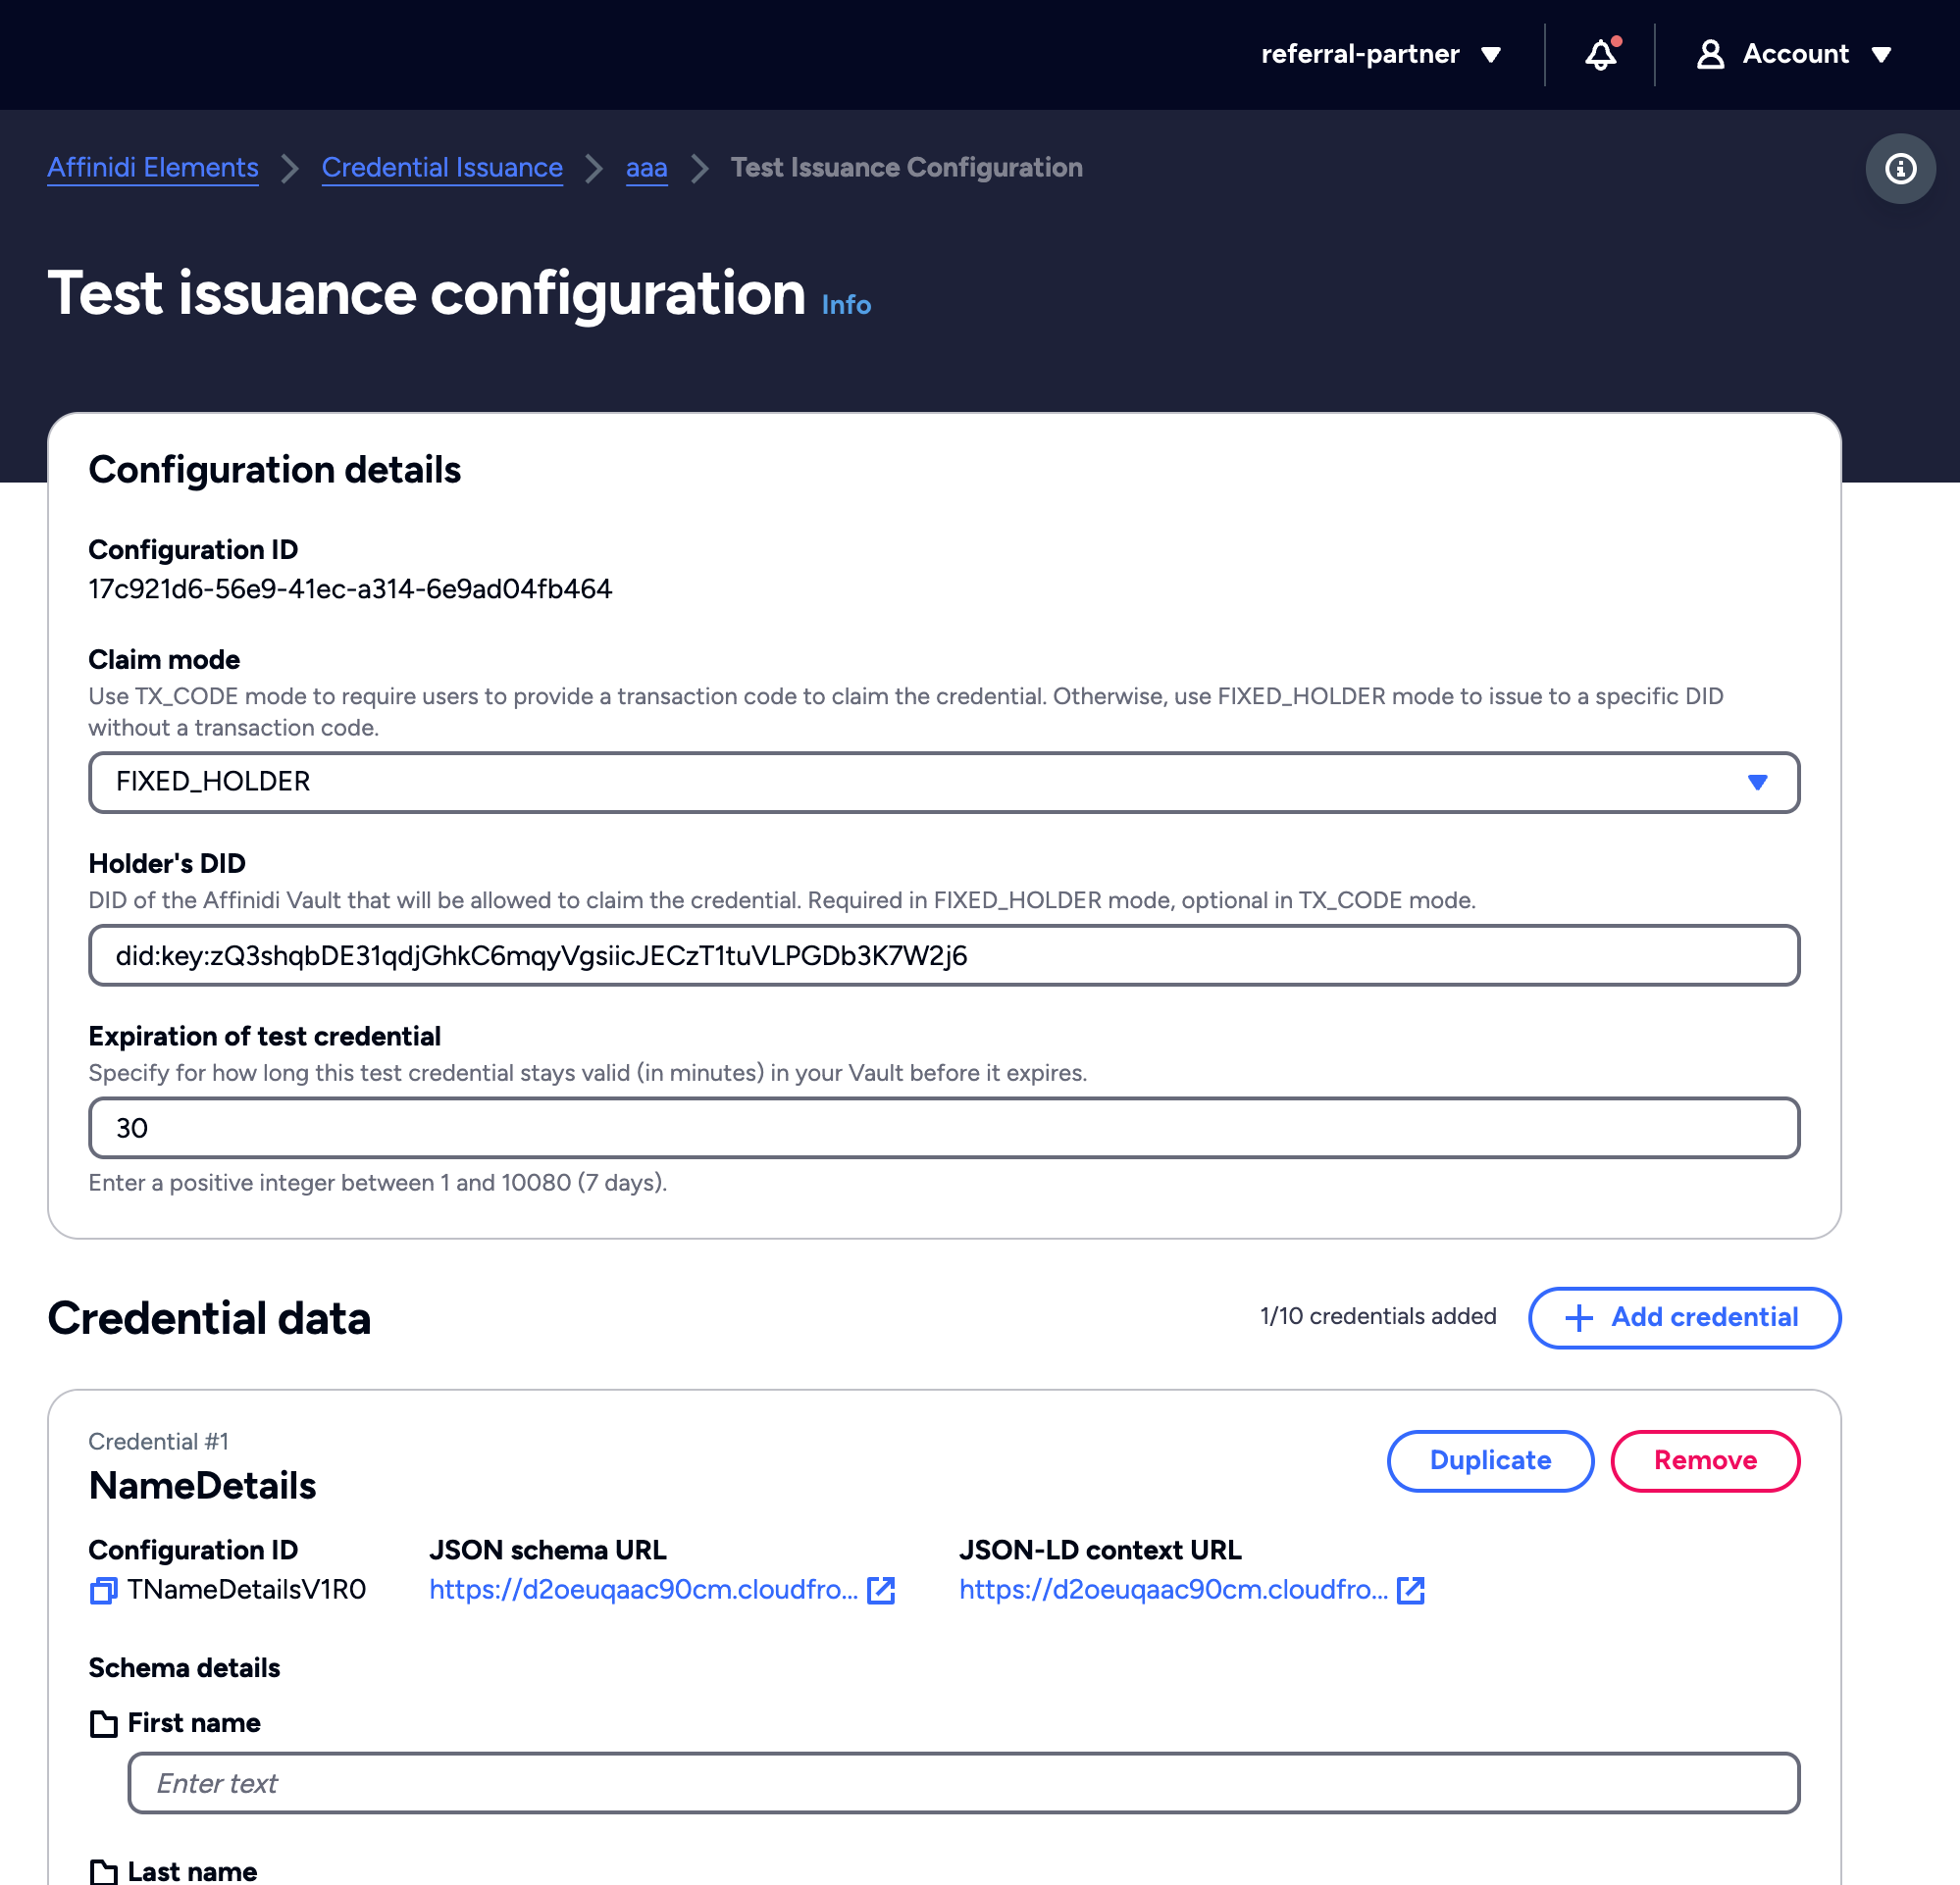
Choose the Claim mode:
FIXED_HOLDER, the default: only the holder whose DID you enter can claim the credential, without a transaction code.TX_CODE: the holder enters a 6-digit transaction code to claim the credential.
Check Holder’s DID, which is required for
FIXED_HOLDERand optional forTX_CODE:- Signed in to Affinidi Portal with Affinidi Login: the field is filled in with your Affinidi Vault’s DID.
- Signed in with Apple, Google, GitHub, or Microsoft: the field is empty, and the page shows Create an Affinidi Vault to start testing. Copy the DID from your Affinidi Vault’s Settings page and paste it into the field. If you have no Affinidi Vault yet, select Create Vault first.
Optionally, change Expiration of test credential, the number of minutes the test credential stays valid in your Affinidi Vault. The default is 30.
Under Credential data, select Add credential, choose a schema, and fill in the fields it generates. You can add up to 10 credentials. Schemas hosted outside Affinidi show Externally hosted schemas cannot be tested.
Select Issue credential. The Your credential offer is ready to test dialog shows how long the offer stays open, a claim link, and a QR code. In
TX_CODEmode, it also shows the transaction code.
Open the claim link or scan the QR code, and claim the credential with the Affinidi Vault whose DID you entered. In
TX_CODEmode, enter the transaction code when Affinidi Vault asks for it.
Test each credential type to make sure your configuration and schemas meet your requirements.
What’s next
Glad to hear it. Thanks for letting us know.
Sorry to hear that. Thanks for letting us know.
Still stuck? Ask the community on Discord or contact us.