Sign users in to a Node.js app with Affinidi Login
By the end of this guide, you will have a Node.js app where users sign in with Affinidi Login, and a page that shows the ID token your app receives.
Your app connects to Affinidi Login over OpenID Connect (OIDC), as it would to any other identity provider. Instead of entering a password, users sign in by sharing a credential from their Affinidi Vault after they review the request and consent to it.
Prerequisites
- An Affinidi Portal account with a project. See Sign in to Affinidi Portal.
- An Affinidi Vault account to sign in with when you test the app. See Set up Affinidi Vault.
- Node.js 20 or later.
Steps
Create a Login Configuration
Create a Login Configuration in Affinidi Portal. Give it a name such as Hello World App, and set Allowed Redirect URIs to http://localhost:8080/login/callback. Keep Auth method at its default, Client secret post, which is the method the app in this guide uses.
In the Affinidi Elements section of the sidebar, go to Affinidi Login .
In the Configurations section, select Create configuration.
Under Configuration Details, enter the required details:
- Name: a name for your own reference, shown only in Affinidi Portal.
- Allowed Redirect URIs: the URLs in your application that users return to after they sign in. Enter each URI on a new line.
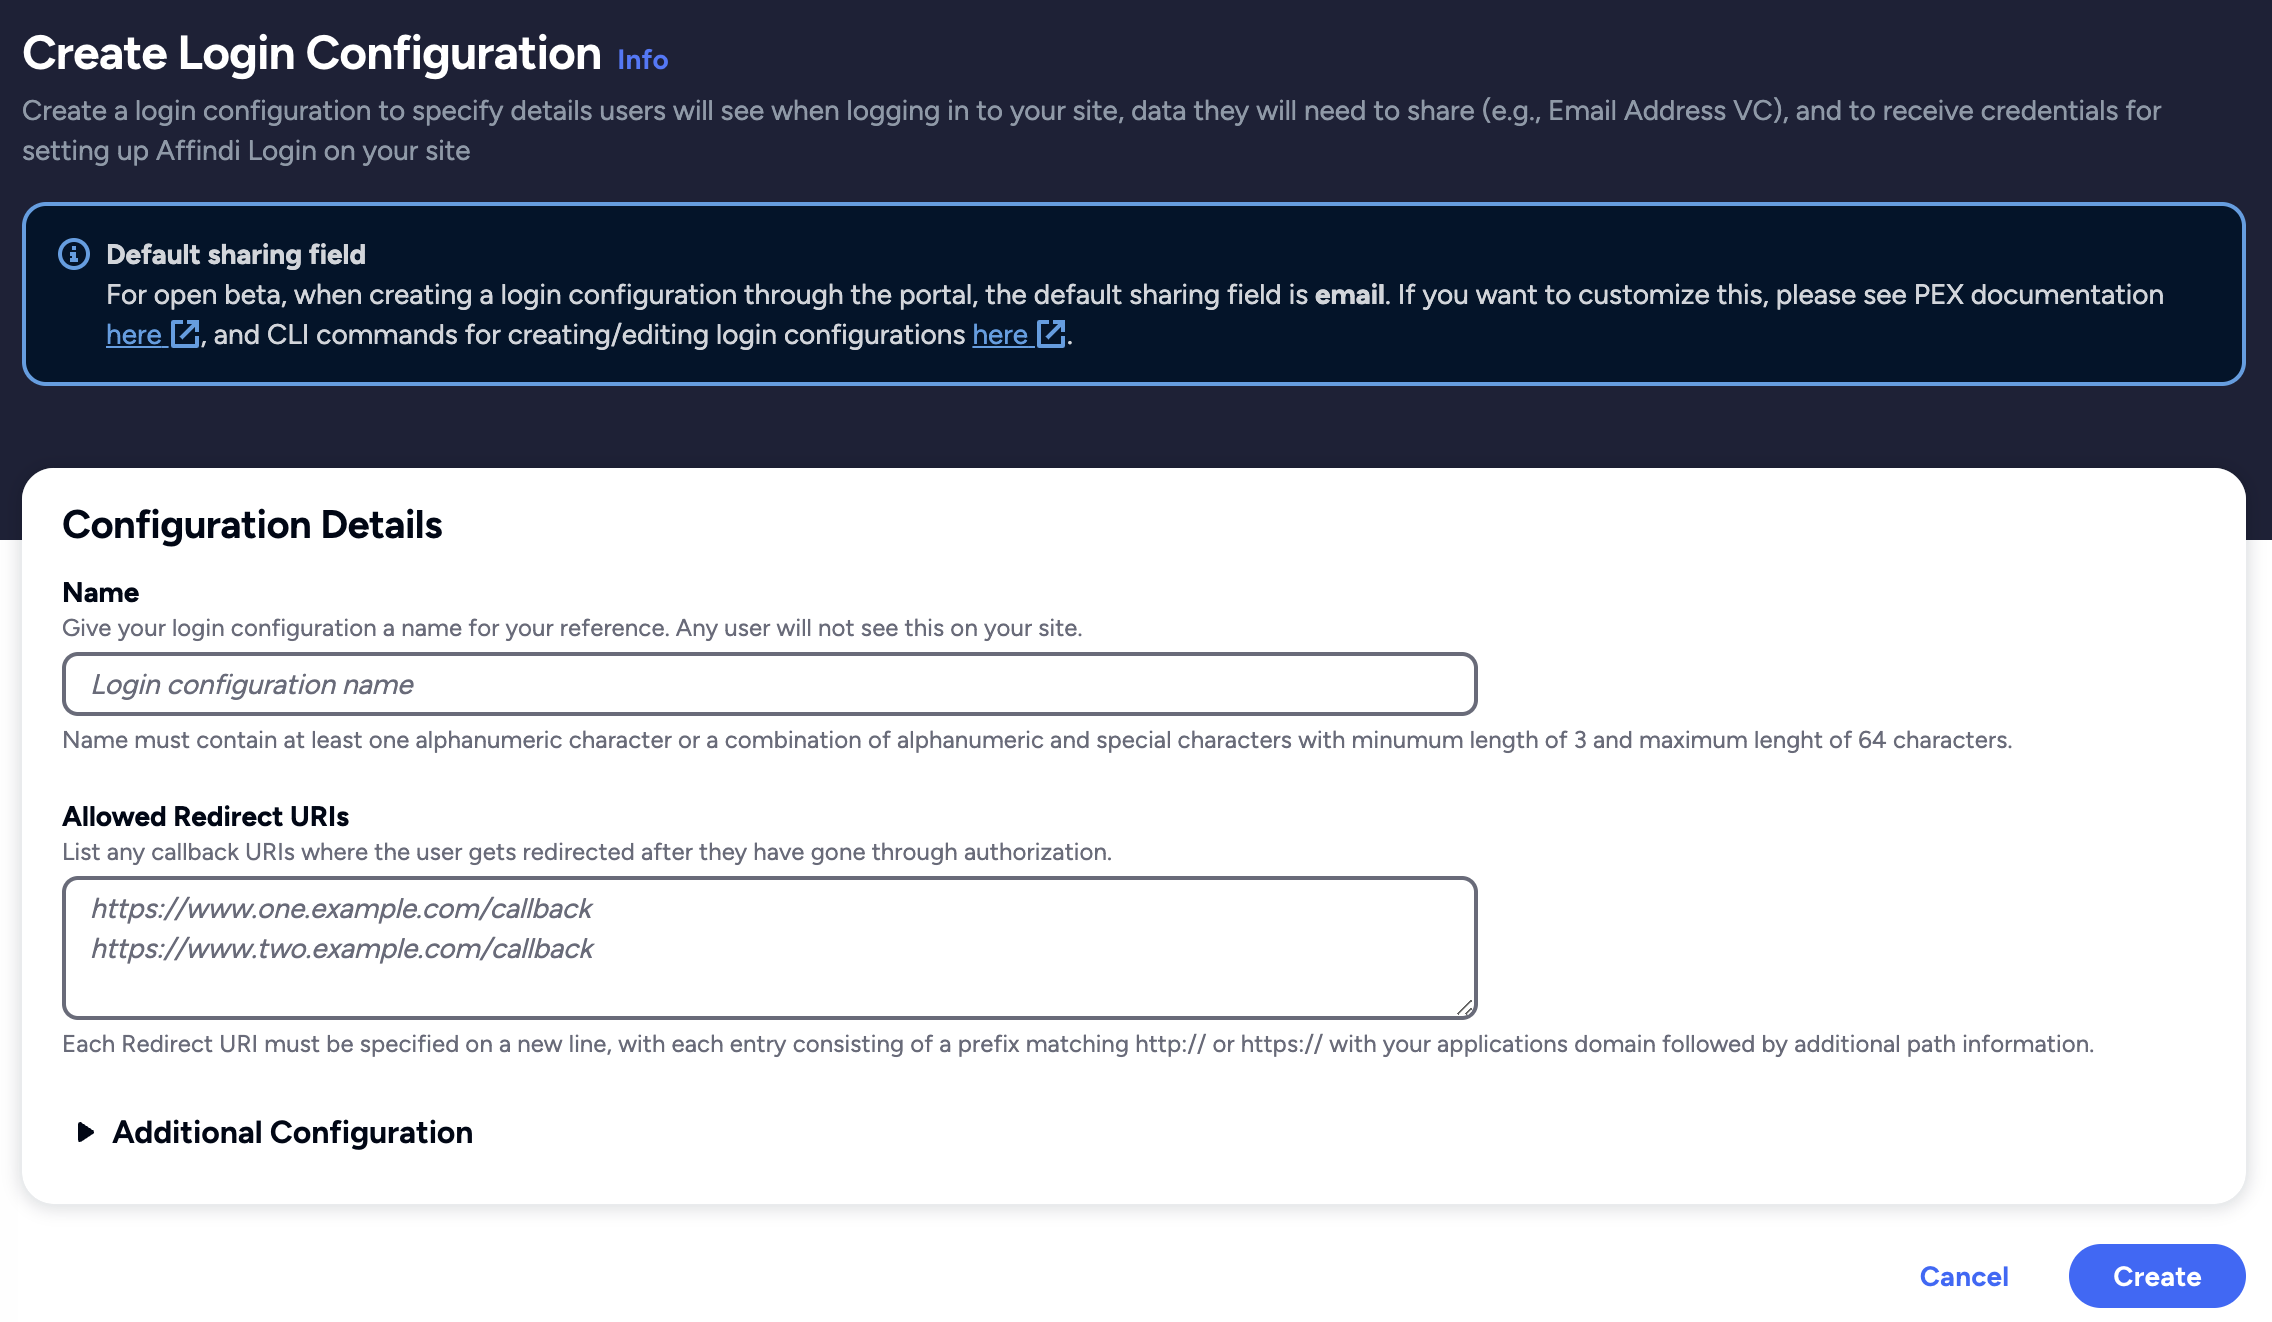
Optionally, expand Additional Configuration to set what users see when they sign in and how your application authenticates:
- Display Name: the application name shown to users when they sign in.
- Origin: the URL shown to users when they sign in.
- Logo URL: the logo shown to users when they sign in.
- Auth method: how your application authenticates when it requests an access token: Client secret basic, Client secret post (the default), or None.
- Presentation Definition and ID token mapping: the data users share when they sign in. The default requests the user’s email address. To request other data, select Create New. See Edit the presentation definition in Affinidi Portal.
If you leave Display Name, Origin, and Logo URL all empty, users see the configuration name, the domain of the first redirect URI, and a default logo.
Select Create. The Store client secret dialog shows the Client ID, Client Secret, and Issuer for your configuration.
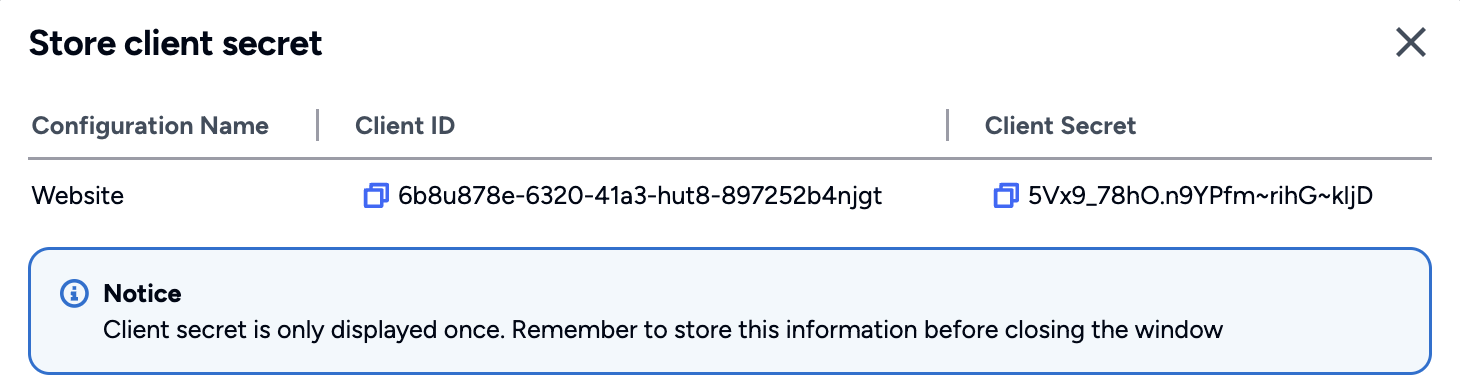
Copy the Client ID, Client Secret, and Issuer, and store them securely. You use them to integrate your application with Affinidi Login, and the dialog shows the Client Secret only once.
Close the dialog. Affinidi Portal opens the details page of your new configuration.
Create the project
Create a folder for the app, set it up as a Node.js project, and install the packages it needs:
mkdir hello-world-affinidi-login
cd hello-world-affinidi-login
npm init -y
npm install express@5 express-session@1 passport@0.7 openid-client@5 dotenv@18- express and express-session: the web server, and the session that keeps a user signed in.
- passport: authentication middleware for Express.
- openid-client: the OIDC client that talks to Affinidi Login. This guide uses version 5, because version 6 replaced the API the code below uses.
- dotenv: loads your settings from a
.envfile.
The command pins each package to its current major version (0.7 for passport, which isn’t at 1.0 yet), so the code below keeps working when a new major version is released.
Add your settings
Create a .env file in the project folder. Add the Issuer, Client ID, and Client Secret you copied in the first step, and a secret that signs the app’s session cookie:
issuer=https://<PROJECT_ID>.apse1.login.affinidi.io
client_id=<CLIENT_ID>
client_secret=<CLIENT_SECRET>
session_secret=<SESSION_SECRET>
To generate a value for session_secret, run:
node -e "console.log(require('crypto').randomBytes(32).toString('hex'))"Keep .env out of source control, because it holds your client secret.
Write the app
Create index.js in the project folder with the following code. It serves three pages:
/: a home page with a sign-in link./login: starts sign-in with Affinidi Login. After the user signs in, Affinidi Login returns them to/login/callback, where the app receives the ID token./protected: shows the claims from the user’s ID token, and sends signed-out users back to the home page.
//  1. Import required libraries
const express = require('express');
const passport = require('passport');
const session = require('express-session');
const { Issuer, Strategy } = require('openid-client');
const http = require('http');
require('dotenv').config();

//  2. Create an Express application and set up the session
const app = express();
app.use(session({
  secret: process.env.session_secret,
  resave: false,
  saveUninitialized: false
}));
app.use(passport.initialize());
app.use(passport.session());

//  3. Define application endpoints
app.get('/', (req, res) => {
  res.send("Hello World - Affinidi Login<br/><br/><a href='/login'>Sign in with Affinidi Login</a>");
});

app.get('/login', passport.authenticate('affinidi-login', { scope: 'openid' }));

app.get('/login/callback', (req, res, next) => {
  passport.authenticate('affinidi-login', { successRedirect: '/protected', failureRedirect: '/' })(req, res, next);
});

app.get('/protected', (req, res) => {
  if (!req.user) {
    return res.redirect('/');
  }
  res.header('Content-Type', 'application/json');
  res.end(JSON.stringify(req.user, null, 4));
});

//  4. Start the HTTP server
http.createServer(app).listen(8080, () => {
  console.log('Hello World - Affinidi Login: up and running on 8080');
});

//  5. Integrate authentication
//  5a. Discover Affinidi Login, the issuer
Issuer.discover(process.env.issuer).then((oidcIssuer) => {
  //  5b. Create a client that can start an OIDC flow
  const client = new oidcIssuer.Client({
    client_id: process.env.client_id,
    client_secret: process.env.client_secret,
    redirect_uris: ['http://localhost:8080/login/callback'],
    response_types: ['code'],
    token_endpoint_auth_method: 'client_secret_post'
  });

  //  5c. Give the strategy to Passport
  passport.use('affinidi-login', new Strategy({ client, passReqToCallback: true }, (req, tokenSet, userinfo, done) => {
    req.session.tokenSet = tokenSet;
    req.session.userinfo = userinfo;
    return done(null, tokenSet.claims());
  }));
});

passport.serializeUser((user, done) => done(null, user));
passport.deserializeUser((user, done) => done(null, user));
Run the app
Start the app:
node index.jsOpen http://localhost:8080 and select Sign in with Affinidi Login. Sign in with your Affinidi Vault, and consent to share your email address.
Confirm
After you consent, your browser opens http://localhost:8080/protected and shows the claims from your ID token. The custom claim holds the data you shared: the credential type, your email address, and your Decentralised Identifier (DID).
{
    "acr": "0",
    "at_hash": "0A1HHZ4xu0Cpv0gLKqnZ_Q",
    "aud": [
        "<CLIENT_ID>"
    ],
    "auth_time": 1698111980,
    "custom": [
        {
            "type": [
                "VerifiableCredential",
                "Email"
            ]
        },
        {
            "email": "user@example.com"
        },
        {
            "did": "did:key:..."
        }
    ],
    "exp": 1698112882,
    "iat": 1698111982,
    "iss": "https://<PROJECT_ID>.apse1.login.affinidi.io",
    "jti": "d96ea1d4-f8d1-aaBB-ccDD-e3d627d1bde9",
    "rat": 1698111949,
    "sid": "26c7c401-xxYY-4cb1-880c-435599ad6b1a",
    "sub": "did:key:..."
}
Affinidi Login also adds everyone who signs in to your project’s default user group, all_users. See User groups.
Troubleshooting
| Symptom | Likely cause | Fix |
|---|---|---|
node index.js stops with ERR_REQUIRE_ESM, or with TypeError: Cannot read properties of undefined (reading 'discover'). | Version 6 of openid-client is installed. It’s an ES module and has no Issuer export, which this app uses. | Run npm install openid-client@5, then start the app again. |
| Sign-in fails with an error about the redirect URI. | The configuration’s Allowed Redirect URIs does not contain http://localhost:8080/login/callback exactly. | Add the exact URI to the configuration. See Update a login configuration in Affinidi Portal. |
| Sign-in fails before you reach Affinidi Vault. | issuer or client_id in .env does not match your configuration. | Copy both values from the configuration again and restart the app. |
After you consent, the browser shows an error such as invalid_client. | client_secret in .env is wrong, or the configuration’s Auth method is not Client secret post. | Check client_secret, and set Auth method to Client secret post. If you no longer have the client secret, create a new configuration. |
/protected returns you to the home page. | You are not signed in, or the app restarted and its in-memory session was lost. | Sign in again from the home page. |
Next steps
- Request more data from your users: change the presentation definition and ID token mapping so the ID token carries more than an email address.
- Integrate Affinidi Login with your framework: samples for other languages and identity providers. For any other OIDC library, point it at the Issuer for discovery, or set the authorisation endpoint to
<issuer>/oauth2/authand the token endpoint to<issuer>/oauth2/token. - Restrict who can sign in: allow or block users with user groups.
Glad to hear it. Thanks for letting us know.
Sorry to hear that. Thanks for letting us know.
Still stuck? Ask the community on Discord or contact us.