Generate Sample Applications
In this guide, we will use Affinidi CLI to generate a sample application and configure the application to integrate Affinidi Login. The Affinidi Login is a passwordless authentication solution that verifies user identity using Affinidi Vault as the identity provider, owned and managed by the end-user on their edge devices.
The Sample Applications are open source and accessible in this Git repository .
We will use Django framework from the available Sample Applications to take you through the step-by-step guide to generating the app, creating a Login Configuration, and setting up the application to implement a passwordless authentication for end-users.
Before you begin
- Set up Affinidi Vault account. Follow the guide below if you haven’t set it up yet.
Set up Affinidi Vault
- Set up an Affinidi Vault account using the web app or install the mobile app .
The same installation steps for mobile app.
- Click on Start if you are creating a new account, or click on Restore from Backup if you have an existing backup of your Affinidi Vault.
Use this guide to learn how to migrate your existing Affinidi Vault account.
- Secure your Vault by providing a passphrase. Use this passphrase to unlock your Vault.
- Provide your Email Address to verify with OTP.
After successfully providing the OTP, you are redirected to your Affinidi Vault dashboard.
Vault Passphrase
Remember to keep your passphrase in a secure location since it cannot be retrieved if forgotten, even with your backup. If you forget it, you must setup a new Vault.- Install the Affinidi CLI. Follow the guide below if it hasn’t been installed.
Make sure you have Git installed on your machine. Follow this guide on how to install Git.
Install Python on your machine if you haven’t installed yet using this guide .
Create Login Configuration
To create a Login Configuration, you can either use Affinidi CLI or ![]() Affinidi Portal.
Affinidi Portal.
We use the Redirect URIs configured for the Django sample application that we will generate later. You may refer to this list of settings associated with each sample application available.
Django sample app settings:
Name: Django App
Redirect URIs: http://localhost:8000/callback
Expand the section below for your preferred method:
Using Affinidi Portal
Go to
 Affinidi Login under the Services section.
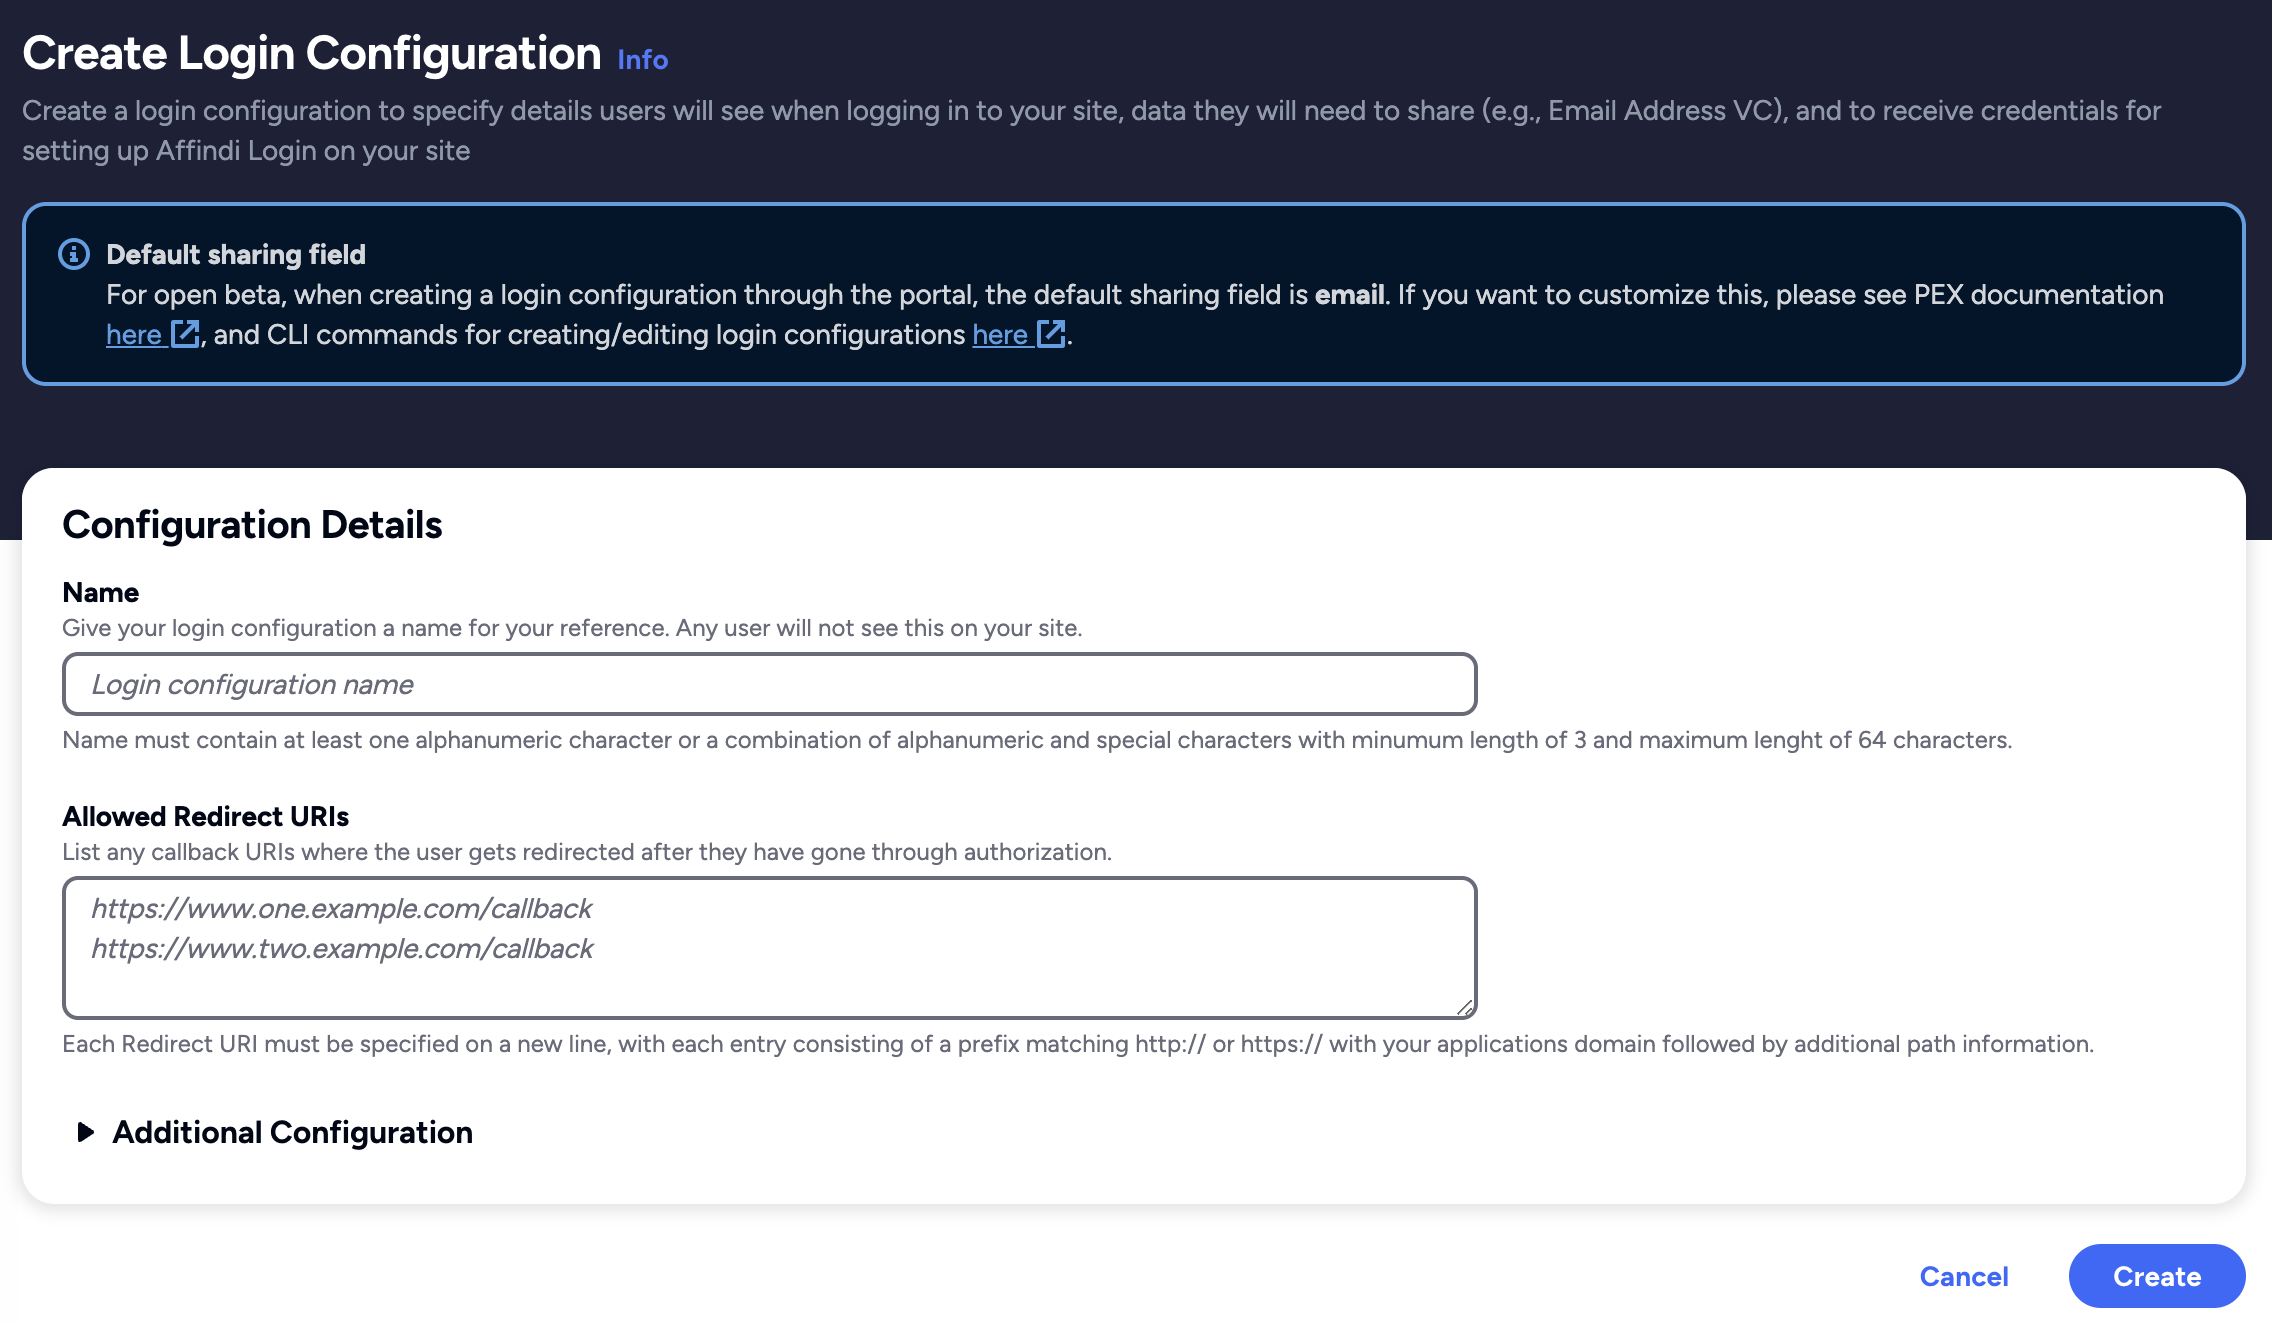
Click on the Create Login Configuration and provide the required details.
Nameis the string that describes your login configuration.Redirect URIsis the URL on your application where the user gets redirected after the successful authentication.
- Click on create and confirm if all the details are correct.
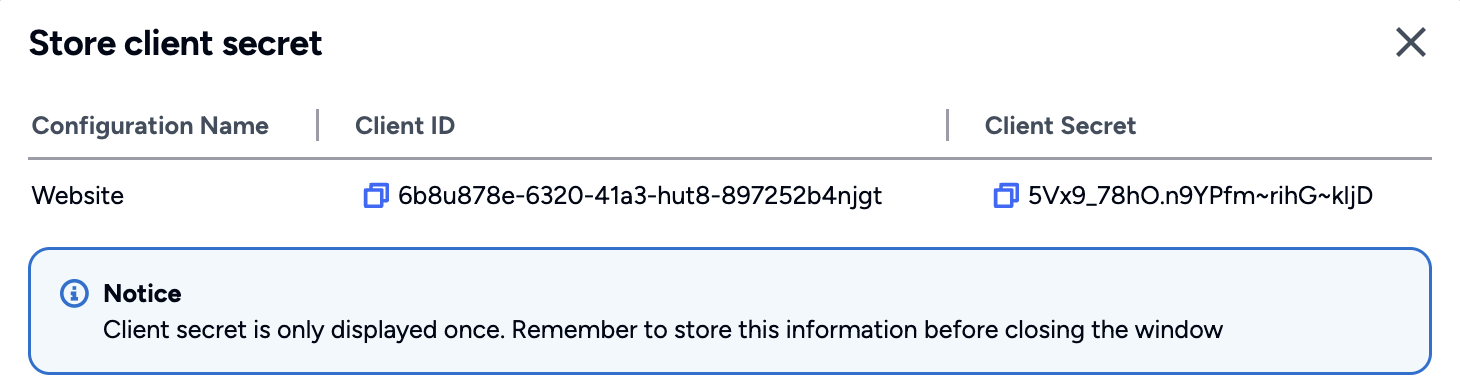
After confirming the details, another popup shows the Client ID and Client Secret for your Login Configuration. Copy the generated Client Credentials and use them to integrate with Affinidi Login.
After copying the Client ID and Client Secret and closing the popup, you are redirected back to the Affinidi Login page.
Login Configuration uses the default Presentation Definition (presentationDefinition) and ID Token Mapping (idTokenMapping) that is used to request the user’s email address during the authentication flow.
Learn more about customising the Presentation Definition and ID Token using this guide.
Important
Safeguard the Client ID and Client Secret diligently; you'll need them for setting up your IdP or OIDC-compliant applications. Remember, the Client Secret will be provided only once.
Generate and Set up Sample Application
After creating the Login Configuration required for the sample application, we generate the sample application using Affinidi CLI. Follow the steps below to run the generate app command:
- If you haven’t logged in yet to the Affinidi CLI or your session timed out, log in using the following command:
affinidi startIt will generate the necessary access token and session to call Affinidi services.
- If you have multiple projects available on your account, select the project where you created the Login Configuration previously. To do this, run the following commands:
affinidi project list-projectsAfter listing your available projects, get the Project ID of the project you wish to switch and run the following command:
affinidi project select-project --project-id <PROJECT_ID>Generate Sample App
- Generate the sample application using the Django framework and Affinidi as the provider.
affinidi generate app --path "./my-app" --framework django --provider affinidiAfter running the command, it will prompt you if you would like to configure the env for the reference app, enter Y.
Automatically configure sample app environment? (Y/n) YIt will fetch all available Login Configurations on your current project. Select the config you have created previously.
Select a login configuration to use in your reference applicationSince the Client Secret is no longer viewable, you must manually set the value generated previously.
What is the login configuration's client secret? ***********************After that, the sample application is generated with the preconfigured env variable to integrate Affinidi Login.
Set up Sample Application
- Install the Application libraries to run the application:
pip install -r requirements.txtIt will install all the required libraries for the sample application.
- Run the migration script to propagate changes to the model:
python manage.py migrateRun Sample Application
- Run the application
python manage.py runserverAfter successfully running the command, go to http://localhost:8000 to access the page with the Affinidi Login button.
Generate Other Sample Apps
To view other available Sample Applications, go to our Github repository
and open the apps.json file. This file also includes the settings required to set up the Login Configuration and the selected Provider.
To generate other Sample Applications, get the framework and provider from the list:
Format: <PROVIDER>-<FRAMEWORK>-*
Sample: affinidi-flask-authlib
Command:
affinidi generate app --path "./my-app" --framework flask --provider affinidiMore about the
generate appcommand in this documentation.
Follow the steps in this guide and refer to the README.md file in the sample app for more details about the specific setup required.
Always refer to the Github repository and check on the available Sample Applications as we develop more samples to help you with your journey of integrating Affinidi Login and enabling passwordless authentication for enhanced security and privacy for your end-users.
Glad to hear it! Please tell us how we can improve more.
Sorry to hear that. Please tell us how we can improve.
Thank you for sharing your feedback so we can improve your experience.