Affinidi Login with React
In this lab, we will use the Create React App to create a basic application and import the affinidi-react-auth and passport-affinidi libraries developed by Affinidi Team.
Before you begin
- Set up Affinidi Vault account. Follow the guide below if you haven’t set it up yet.
Set up Affinidi Vault
Click on Get started if you are creating a new account, or click on Restore from Backup if you have an existing backup of your Affinidi Vault. Provide the passphrase to secure your Affinidi Vault.
You have the option to enable Biometrics to unlock your Affinidi Vault easily instead of using passphrase.
- Enter your email address to register with the Affinidi Vault. An OTP will be sent to this email for verification.
- Enter the OTP sent to the email you have provided for verification to complete the setup.
After successfully providing the OTP, you are redirected to the Affinidi Vault dashboard.
Remember to keep your passphrase in a secure location. Use the Passphrase Reset feature in Affinidi Vault settings to generate the PDF files and keep them safe, which you can use to recover access to your Affinidi Vault if you forget your passphrase.
- Install the Affinidi CLI. Follow the guide below if it hasn’t been installed.
Download Application
You can download the Client App using React and Server App using Express for the backend and explore how to easily integrate Affinidi Login to provide a passwordless login experience for your end-users.
Important Note
The downloadable sample application is provided only as a guide to quickly explore and learn how to integrate the components of Affinidi Trust Network into your application. This is NOT a Production-ready implementation. Do not deploy this to a production environment.How it Works
Using the two libraries, we can effortlessly enable the passwordless login experience for the end-users into your applications.
affinidi-react-auth
It is a React component library that provides the login button to enable the passwordless login through Affinidi Login into the React frontend applications.
passport-affinidi
It is a library that leverages Passport to enable OpenID Connect authentication flow into the applications that support Connect-style middleware and seamlessly integrates with Affinidi Login.
It provides functionality to initialise the authentication flow using the client credentials generated from the Login Configuration and parse the idToken received from the Affinidi Login after successful user authentication.
Initialization Route: A GET route (
/api/affinidi-auth/init) that returns the Affinidi authorisation URL and redirects the frontend applications to Affinidi Login flow.Completion Route: A POST route (
/api/affinidi-auth/complete) that processes the response (code and state) from Affinidi Login flow and performs the exchange for the ID Token that returns the user’s information.
Create a React Application
To start quickly with our lab, we will use the Create React App tool to create a basic application.
npx create-react-app client-appOnce the application is generated, go to the client-app directory.
Run npm start to start the application.
Enable Affinidi Login
Once we confirm that the generated application is working, we will enable the Affinidi Login through the affinidi-react-auth library.
- Install the
affinidi-react-authlibrary from NPM.
npm install @affinidi/affinidi-react-auth- To proxy unknown requests to your API server during development, add a proxy field to your package.json like this:
"proxy": "http://localhost:3001"You can find the sample package.json here
After installing the library and configuring the package.json, we modify the src/App.js file and paste the following codes to enable Affinidi Login component.
- Import the env variable and libraries required.
        import logo from './logo.svg';
import './App.css';
import React from "react"

import { AffinidiLoginButton, useAffinidiProfile } from '@affinidi/affinidi-react-auth'

const apiBaseUrl = process.env.REACT_APP_SERVER_URI || '';- Retrieve the user information after successful authentication using
useAffinidiProfilehook and add the logout function.
        const { isLoading, error, profile, handleLogout } = useAffinidiProfile({
     authCompleteUrl: `${apiBaseUrl}/api/affinidi-auth/complete`
  })

async function logout() {
    //clear session cookie
    handleLogout();
    window.location.href = "/";
}- Display the Affinidi Login button, loading indicator, user profile, and error messages using the below code.
        {!profile && <>
    <AffinidiLoginButton authInitUrl={`${apiBaseUrl}/api/affinidi-auth/init`} />
</>}

{isLoading && <p>Loading...</p>}

{profile && <>
    <button style={{ marginRight: 10 }} onClick={logout}>
    Logout
    </button>

    <h3>User Profile</h3>
    <pre style={{ textAlign: "left" }}>{JSON.stringify(profile, null, 4)}</pre>
</>}

{error && <><h2>error</h2>{error}</>}
After implementing the required codes, restart the application. The Affinidi Login button shows on the homepage.
In cases where proxy settings is not working on the app with your hosting provider, define the
REACT_APP_SERVER_URIin the.envwith the base url of your Express server.
You can find the sample App.js implementation here.
Create an Express Server
We will use the Express framework as the backend to enable OIDC flow to integrate with Affinidi Login.
- Create a folder named server-app and navigate to it.
        mkdir server-app
cd server-app- Initialize the project by creating a package.json file.
npm init -yYou can find the sample package.json here
- Install the required packages.
expressfor creating the server.dotenvfor managing environment variables.nodemonfor automatic reloading.
npm install express dotenv nodemon cors- Create an index.js file and set up a basic Express server.
        var express = require('express');
var cors = require('cors');
require('dotenv').config()

var app = express();
app.use(express.json());
app.use(express.urlencoded({ extended: false }));

const PORT = process.env.PORT || 3001;

const initializeServer = async () => {

    app.get('/', function (req, res, next) {
        res.json({ success: 'Express' });
    });

    app.use(cors({ credentials: true, origin: true }));
    app.set('trust proxy', 1);

    app.listen(PORT, () => {
        console.log(`Server listening on ${PORT}`);
    });

}

initializeServer();- Add the following script to your package.json file to start the server with nodemon.
"start": "nodemon index.js"Start the server using the following command:
npm startEnable Affinidi Provider
To integrate Affinidi Login to the Express Server app that we just created, we have to install the passport-affinidi library and implement the affinidiProvider.
- Create a
.envfile in the Express Server app and set the Login Configuration auth details created previously.
        AFFINIDI_CLIENT_ID="<AUTH.CLIENT_ID>"
AFFINIDI_CLIENT_SECRET="<AUTH.CLIENT_SECRET>"
AFFINIDI_ISSUER="<AUTH.ISSUER>"- Install the
passport-affinidilibrary in the Express Server app.
npm install @affinidi/passport-affinidi- Modify the index.js file to import the required module.
const { affinidiProvider } = require('@affinidi/passport-affinidi')- Initialise the Affinidi Provider inside the
initializeServerasync function before theapp.listencall.
        await affinidiProvider(app, {
    id: "affinidi",
    issuer: process.env.AFFINIDI_ISSUER,
    client_id: process.env.AFFINIDI_CLIENT_ID,
    client_secret: process.env.AFFINIDI_CLIENT_SECRET,
    redirect_uris: ['http://localhost:3000/auth/callback']
});
You can find the sample index.js implementation here.
Create a Login Configuration
To create a Login Configuration, you can either use Affinidi CLI or Affinidi Portal .
Expand the section below for your preferred method:
Name: Affinidi Login App
Redirect URIs: http://localhost:3000/auth/callback
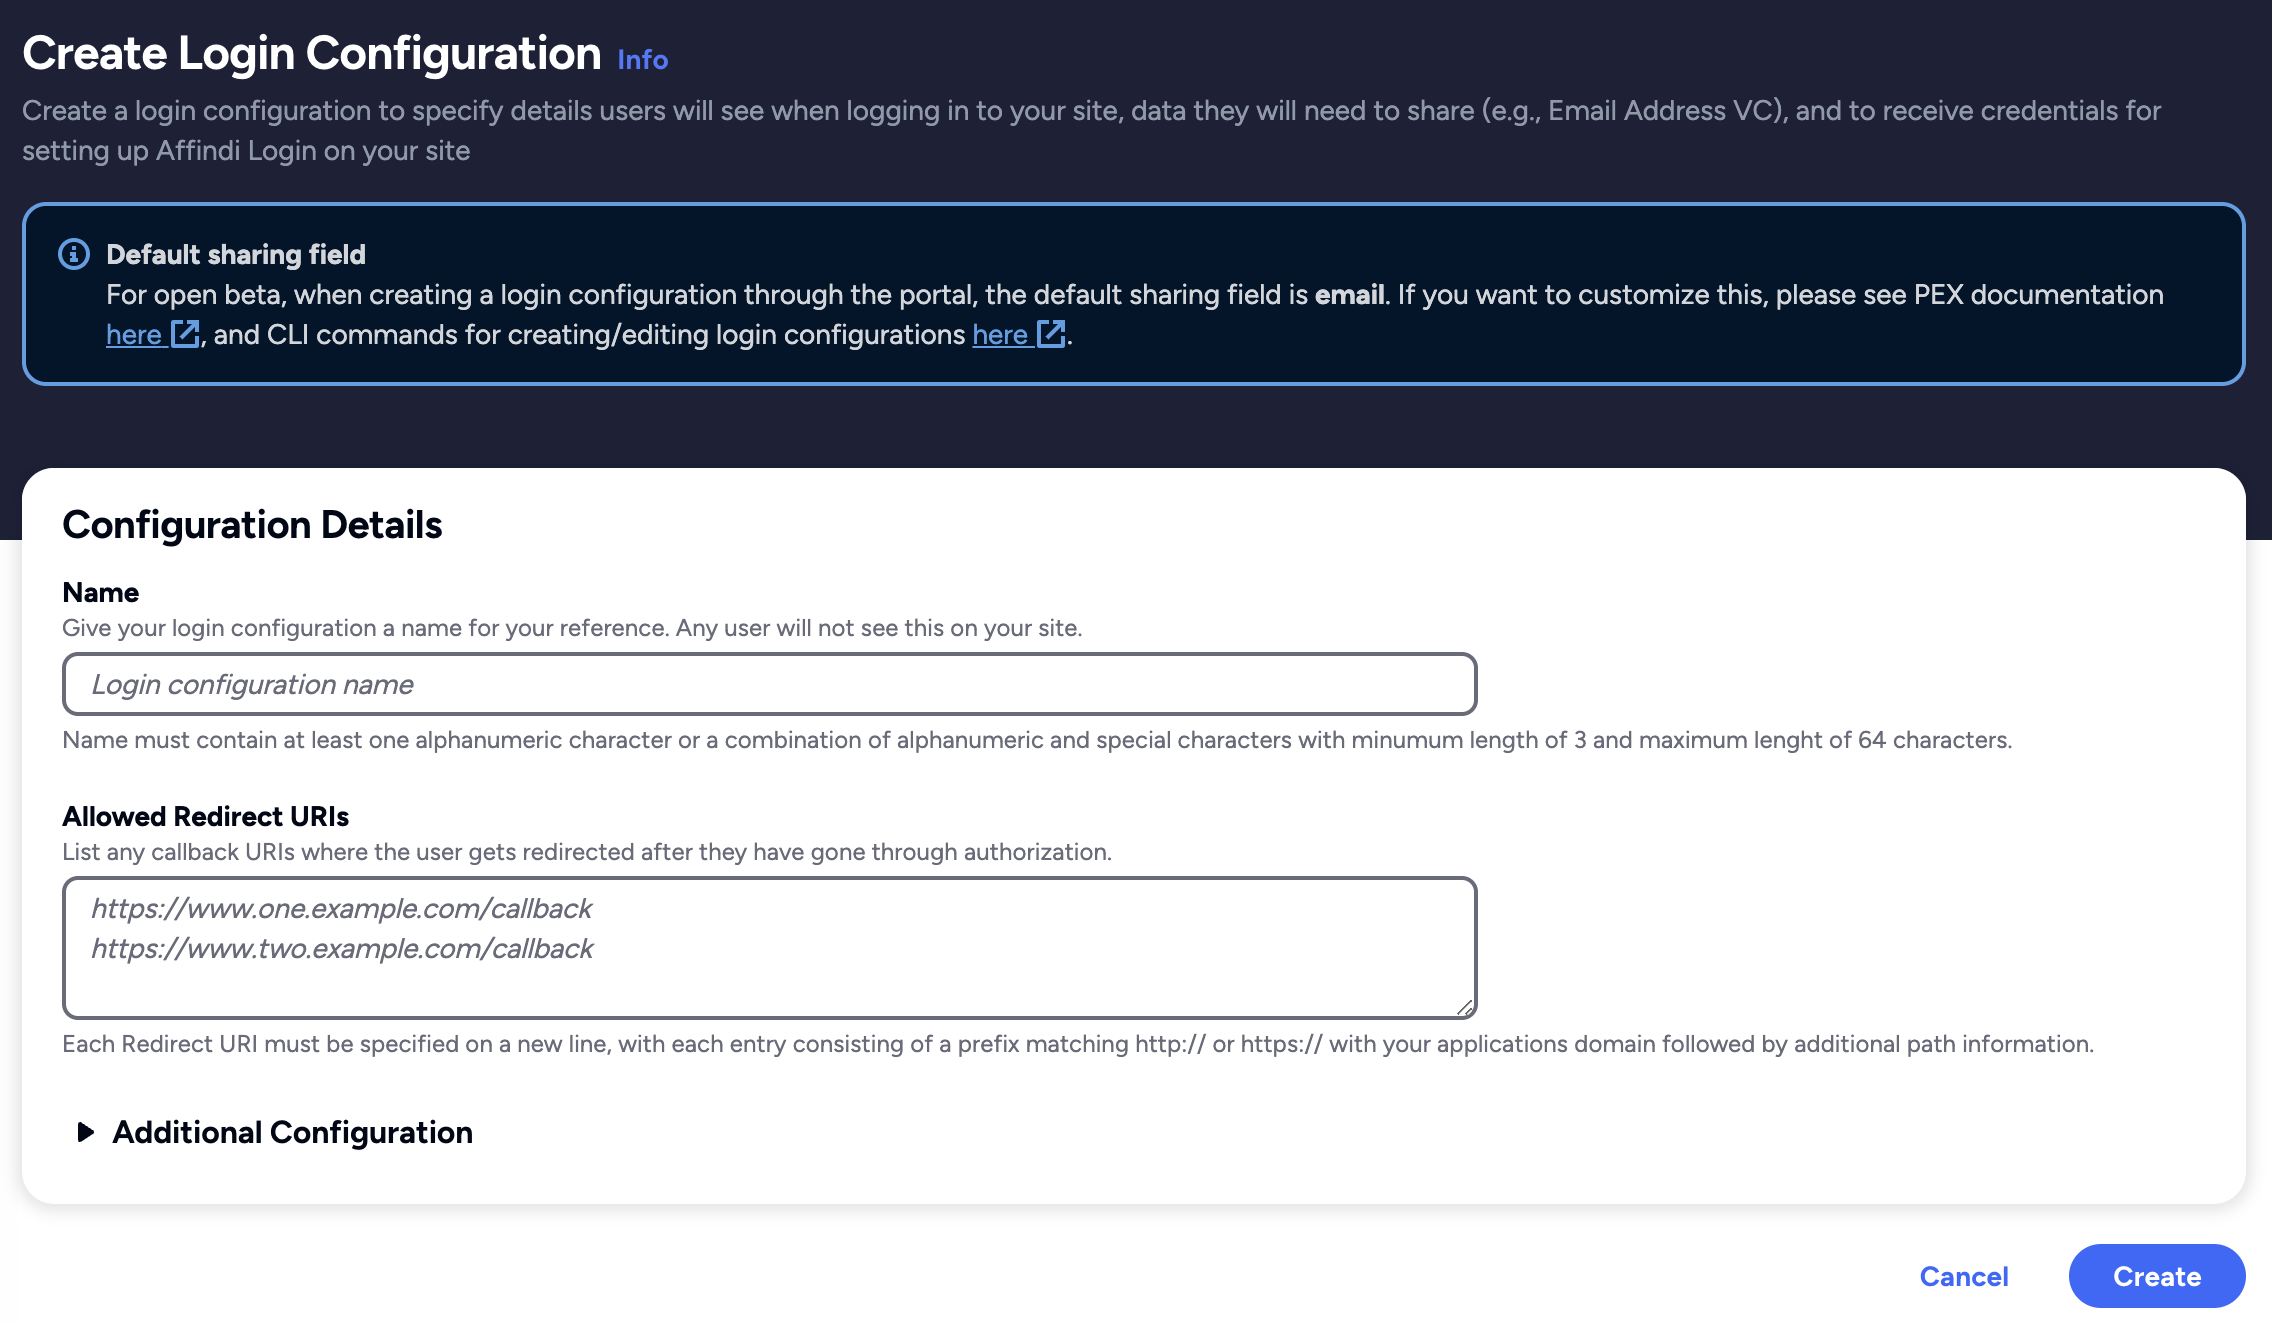
Using Affinidi Portal
Go to Affinidi Login under the Services section.
Click on the Create Login Configuration and provide the required details.
Nameis the string that describes your login configuration.Redirect URIsis the URL on your application where the user gets redirected after the successful authentication.
Click on create and confirm if all the details are correct.
After confirming the details, another popup shows the Client ID and Client Secret for your Login Configuration. Copy the generated Client Credentials and use them to integrate with Affinidi Login.
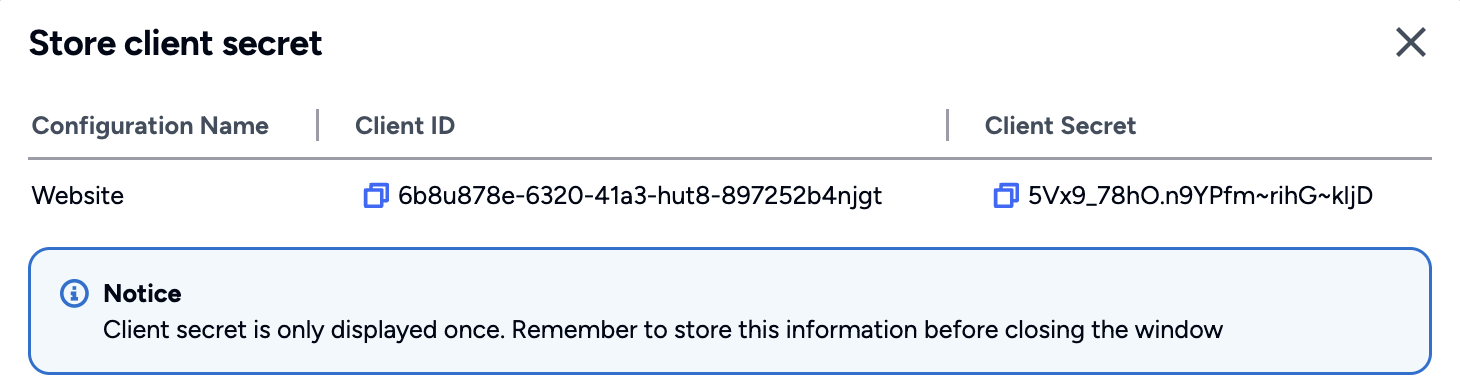
- After copying the Client ID and Client Secret and closing the popup, you are redirected back to the Affinidi Login page.
Login Configuration uses the default Presentation Definition (presentationDefinition) and ID Token Mapping (idTokenMapping) that is used to request the user’s email address during the authentication flow.
Important
Safeguard the Client ID and Client Secret diligently; you'll need them for setting up your IdP or OIDC-compliant applications. Remember, the Client Secret will be provided only once.
Update Client Credentials
After generating the Login Configuration successfully, go back to the Express server and update the .env file that was created previously.
- AFFINIDI_CLIENT_ID is the
auth.clientIdvalue from the Login Configuration. - AFFINIDI_CLIENT_SECRET is the
auth.clientSecretvalue from the Login Configuration. - AFFINIDI_ISSUER is the
auth.issuervalue from the Login Configuration.
After completing the setup on the Express Server, restart the application.
Testing Affinidi Login Integration
After completing the setup on both the Client App (React) and Server App (Express), we can access the Client App and click on the Affinidi Login button to trigger the OID4VP authentication flow.
Make sure both application is running to test the implementation.
If the integration is successful, it should go through the Affinidi Login flow, where you will be requested to share your Email VC from the Vault to verify your identity. After you consent to share your Email VC, the user is redirected to the Client App with the information.
Learn more about how Affinidi Login works here.
Retrieving Profile with Affinidi Login
By default, Affinidi Login request for the Email VC that is available in the user’s Vault. To retrieve additional information like User Profile from the Vault, we will update the default Presentation Definition and ID Token Mapping of the Login Configuration that we have created previously.
Download the JSON payload that contains the updated presentationDefinition and idTokenMapping that request for the user profile from the Vault aside from the default Email Address.
Update the login config using CLI, execute the below command:
        affinidi login update-config \
--id=<LOGIN_CONFIG_ID> \
--file=<PATH_TO_JSON_FILE>/profile-pex.json
Where the
LOGIN_CONFIG_IDis the ID of the Login Configuration we have created previously andPATH_TO_JSON_FILEwhere we saved the JSON payload we downloaded from the previous step.
Once you successfully update the Login Configuration, you can go to the Client App again and trigger the Affinidi Login.
After the successful authentication, you should receive the user profile data and email address.
Glad to hear it! Please tell us how we can improve more.
Sorry to hear that. Please tell us how we can improve.
Thank you for sharing your feedback so we can improve your experience.