Affinidi Login Integration using .NET and OpenIDConnect Library
Affinidi C# .NET openidconnect
A code sample using .NET framework and uses openidconnect library to enable passwordless login using Affinidi IDP.
Before you begin
- Set up Affinidi Vault account. Follow the guide below if you haven’t set it up yet.
Set up Affinidi Vault
Click on Get started if you are creating a new account, or click on Restore from Backup if you have an existing backup of your Affinidi Vault. Provide the passphrase to secure your Affinidi Vault.
You have the option to enable Biometrics to unlock your Affinidi Vault easily instead of using passphrase.
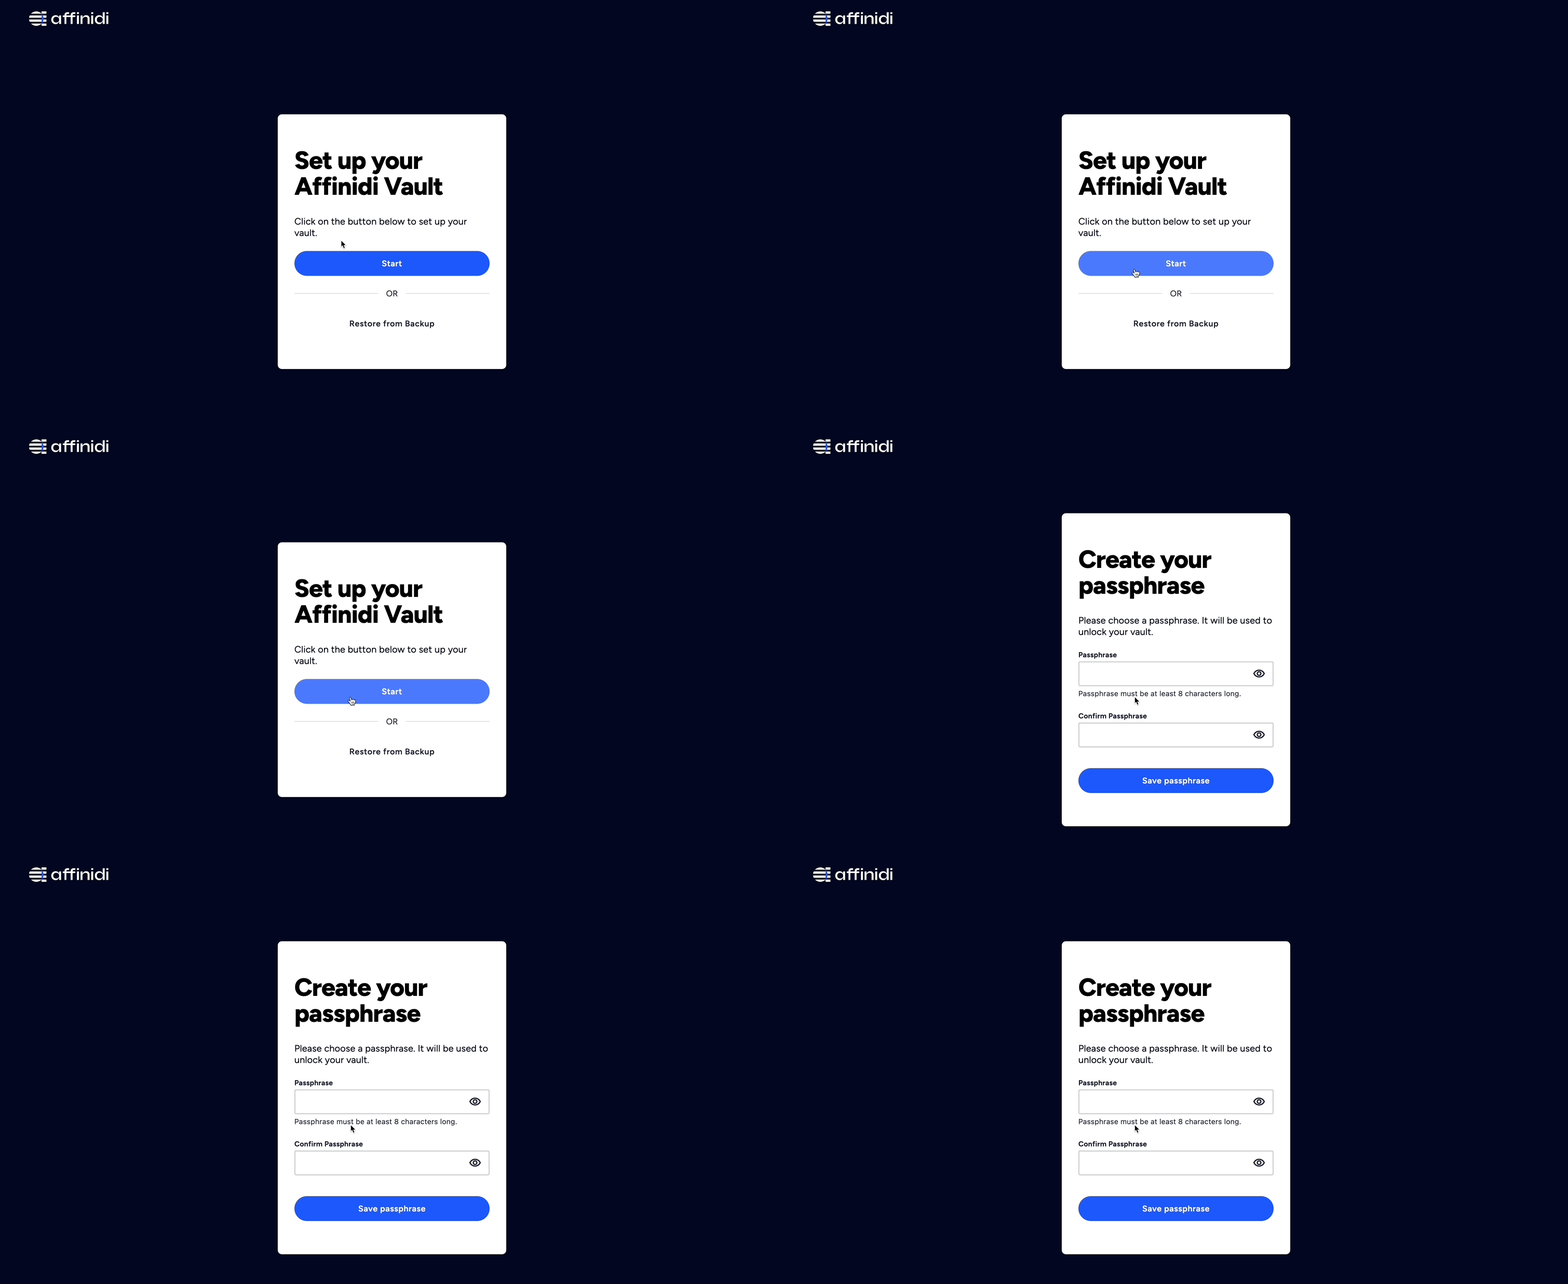
- Enter your email address to register with the Affinidi Vault. An OTP will be sent to this email for verification.
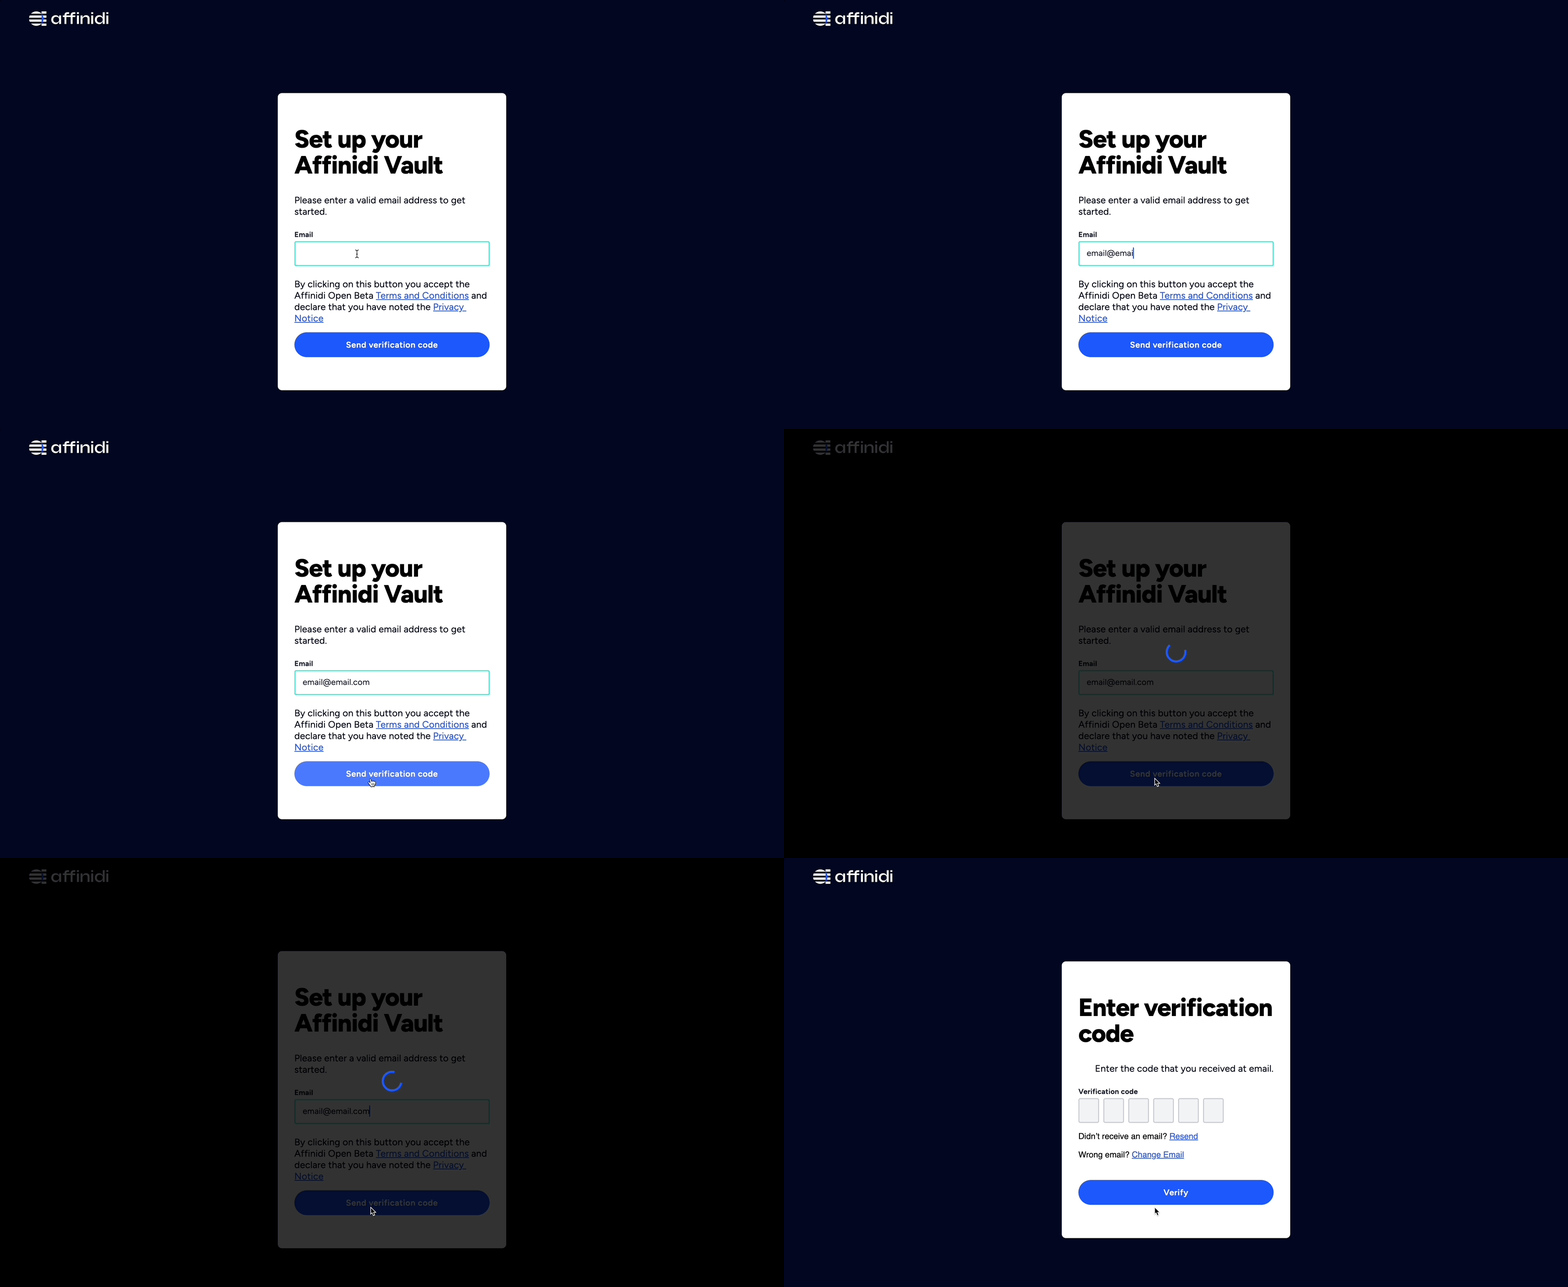
- Enter the OTP sent to the email you have provided for verification to complete the setup.
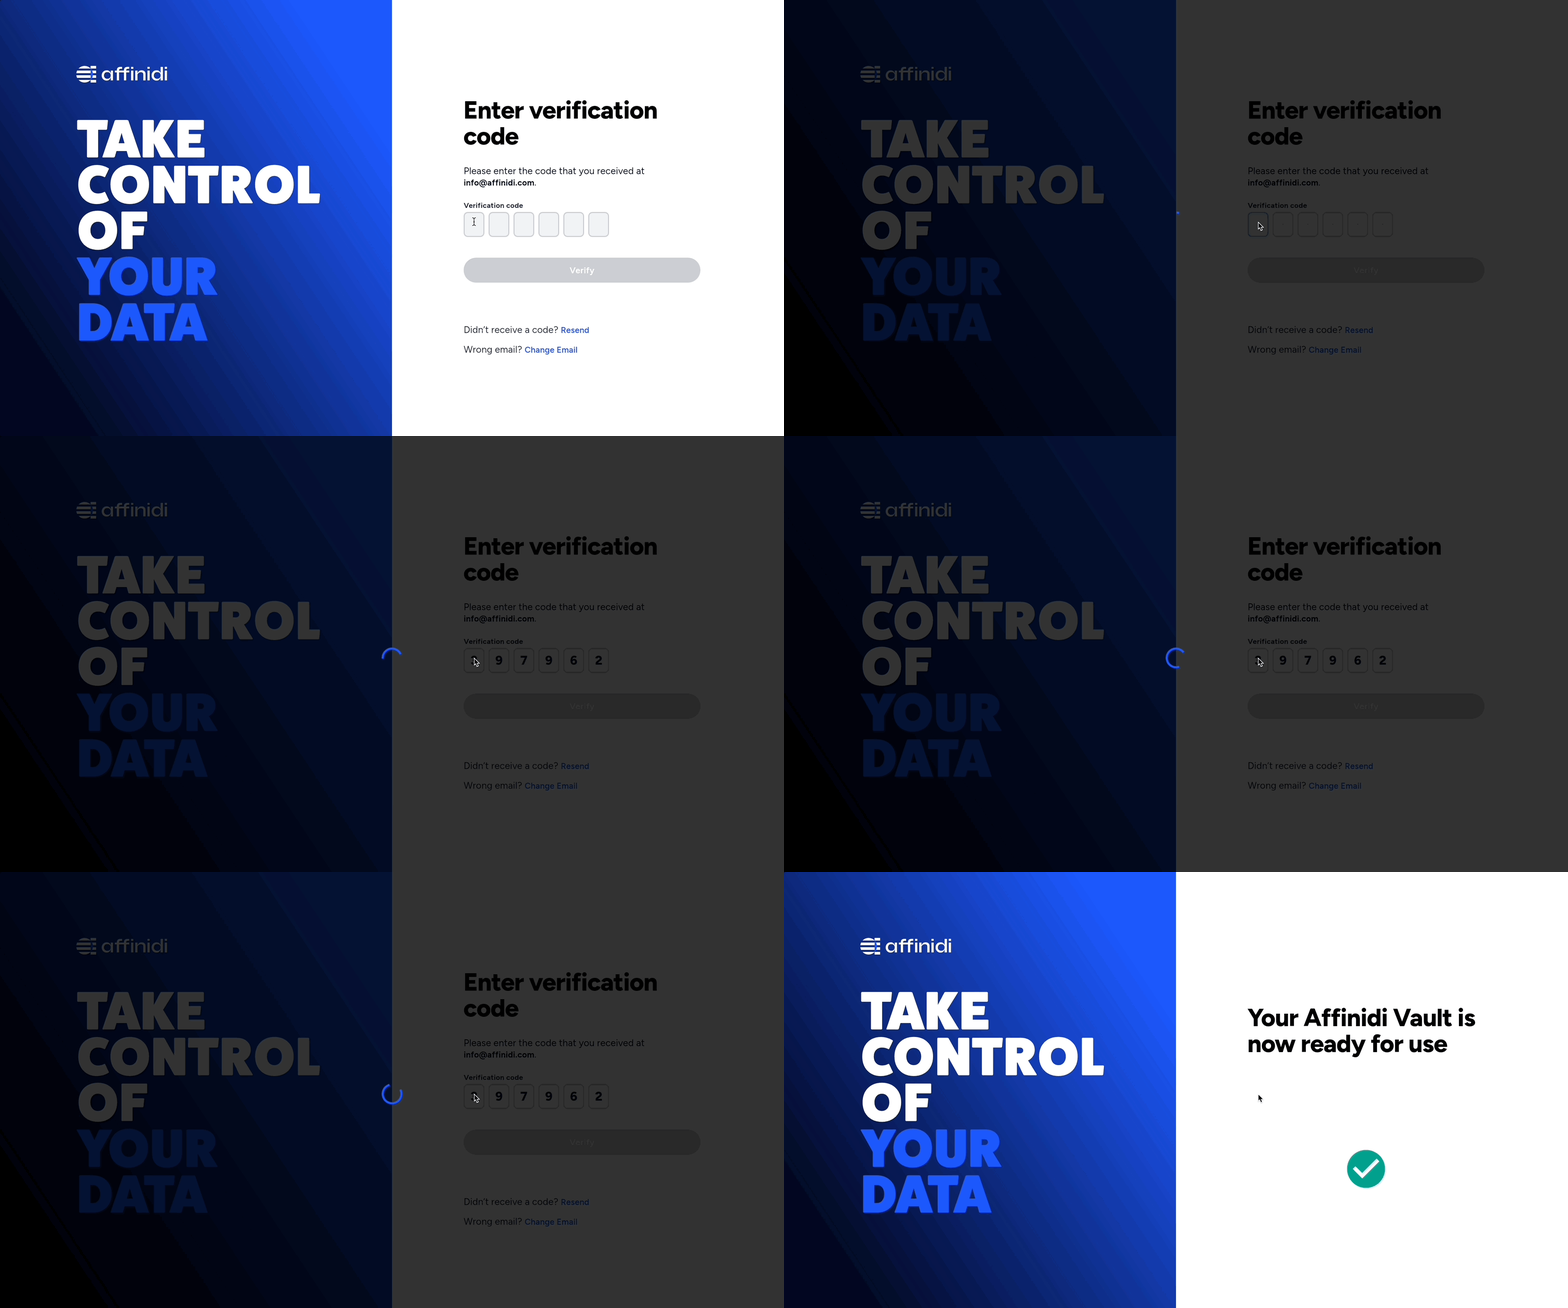
After successfully providing the OTP, you are redirected to the Affinidi Vault dashboard.
Remember to keep your passphrase in a secure location. Use the Passphrase Reset feature in Affinidi Vault settings to generate the PDF files and keep them safe, which you can use to recover access to your Affinidi Vault if you forget your passphrase.
- Install the Affinidi CLI. Follow the guide below if it hasn’t been installed.
Make sure you have Git installed on your machine. Follow this guide on how to install Git.
Install .NET SDK 8.0 if you haven’t set it up yet.
Download the Application
You can download as ZIP file the code sample from the GitHub Repo or generate it using Affinidi CLI with the following command:
affinidi generate app --provider=affinidi --framework=dotnet --library=openidconnect --path=affinidi-login-refcodesSelect
nwhen prompted to Automatically configure sample app environment, we will configure it later.
The above command will generate the code sample in the affinidi-login-refcodes directory.
Important Note
The downloadable sample application is provided only as a guide to quickly explore and learn how to integrate the components of Affinidi Trust Network into your application. This is NOT a Production-ready implementation. Do not deploy this to a production environment.Create Login Configuration
Name: Affinidi Login Sample
Redirect URIs: http://localhost:5068/signin-oidc
Using Affinidi Portal
In the Affinidi Elements section of the sidebar, go to Affinidi Login .
In the Configurations section, select Create configuration.
Under Configuration Details, enter the required details:
- Name: a name for your own reference, shown only in Affinidi Portal.
- Allowed Redirect URIs: the URLs in your application that users return to after they sign in. Enter each URI on a new line.
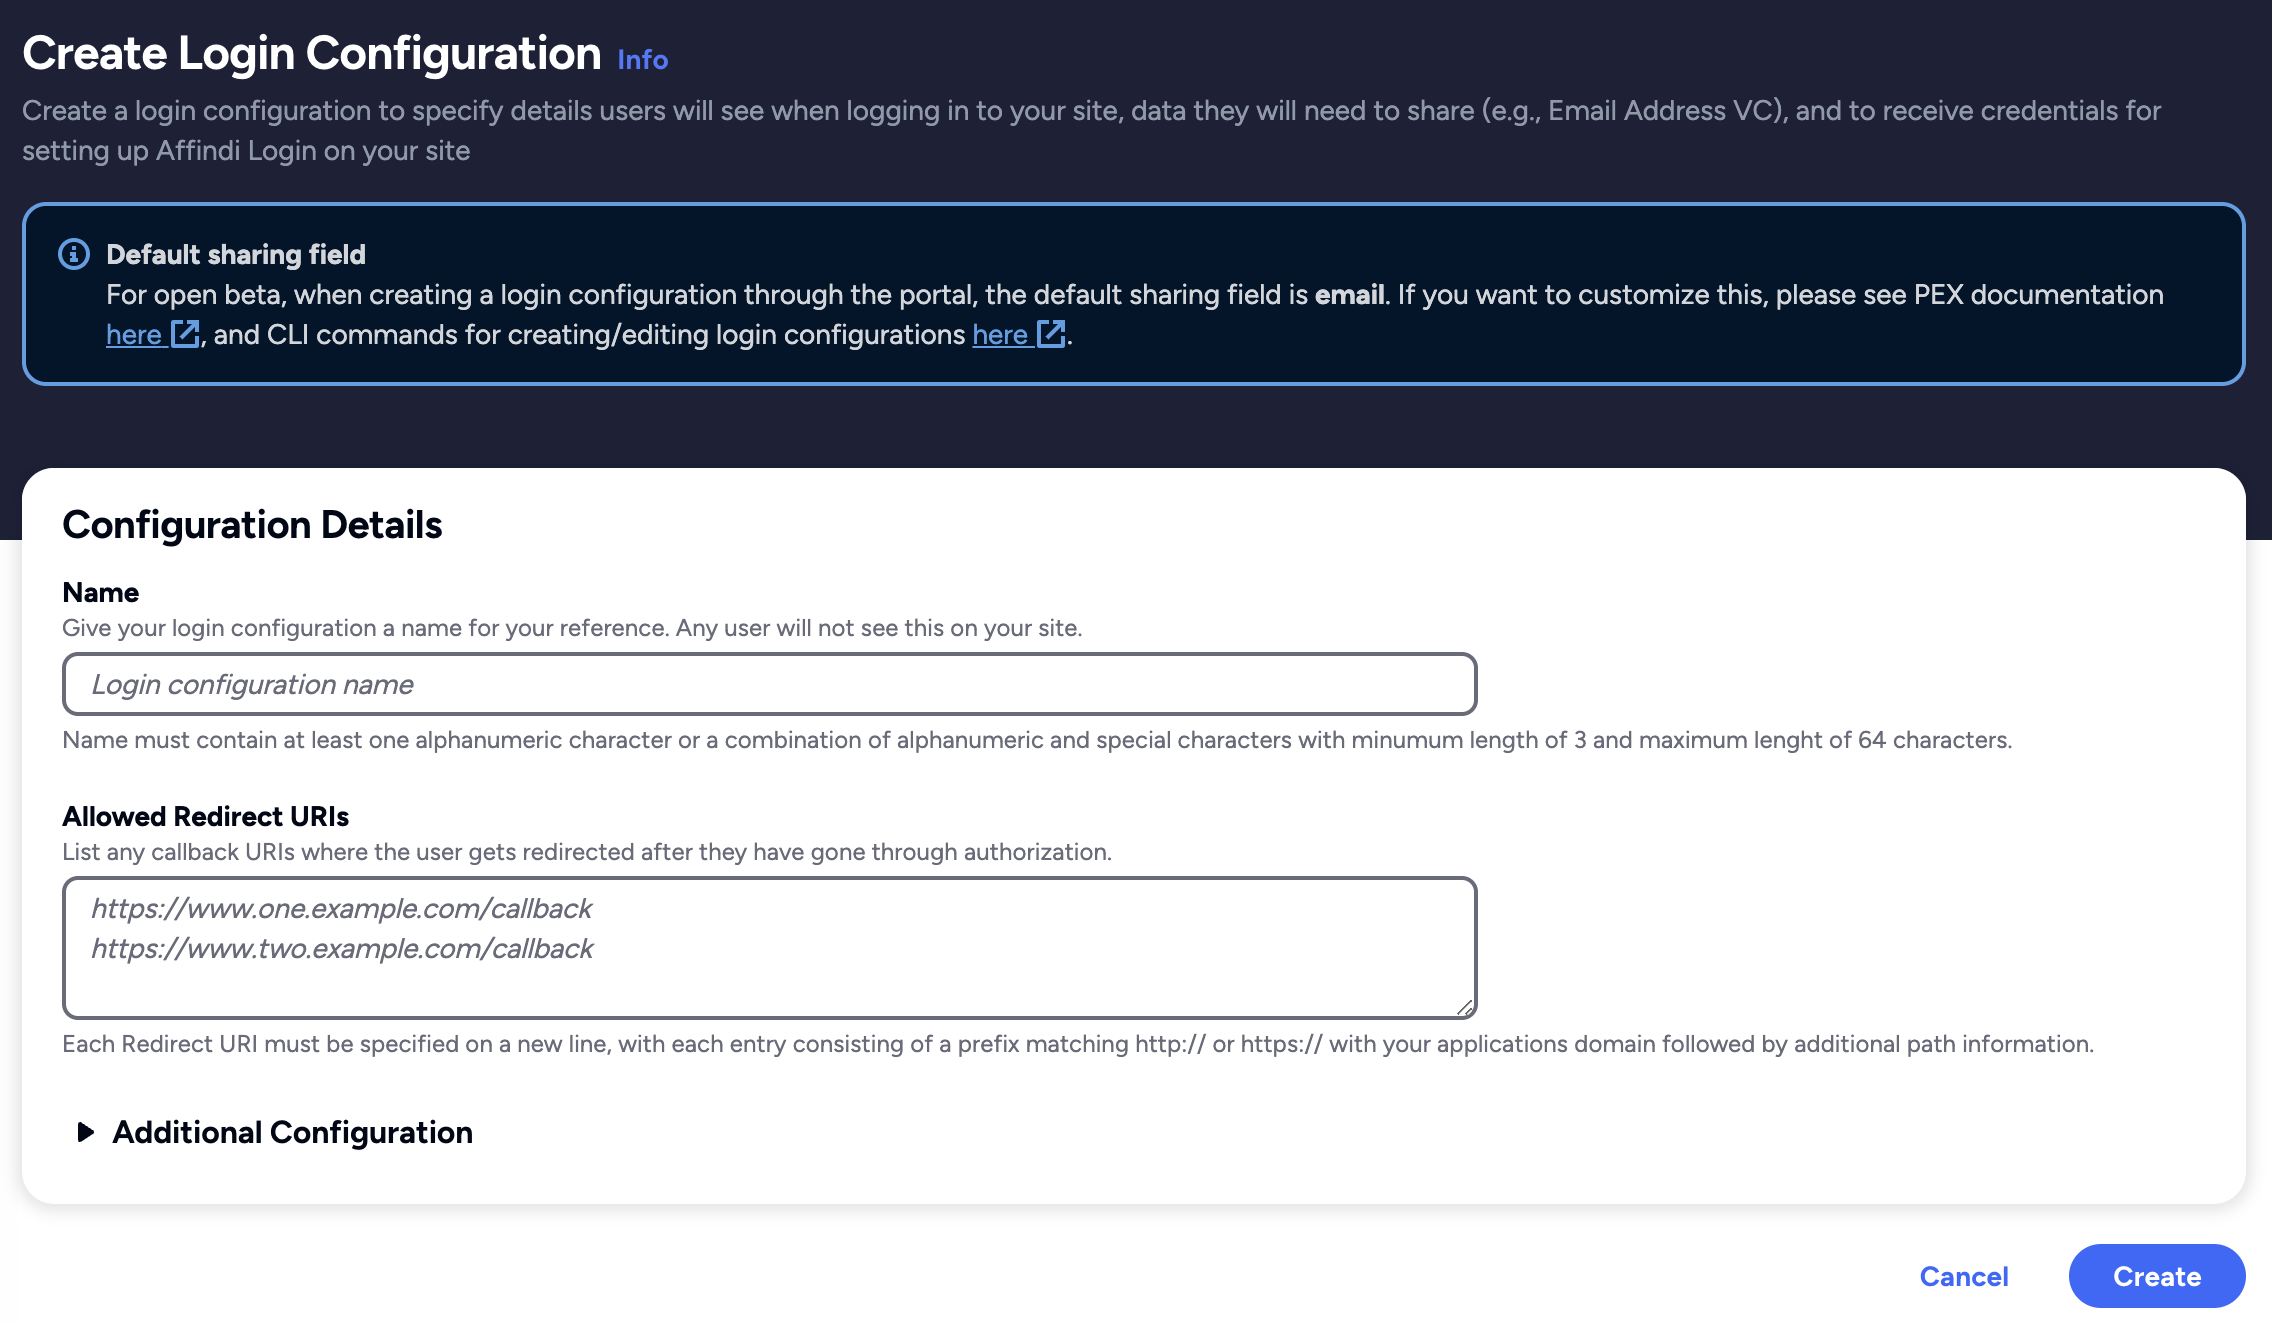
Optionally, expand Additional Configuration to set what users see when they sign in and how your application authenticates:
- Display Name: the application name shown to users when they sign in. It defaults to the configuration name.
- Origin: the URL shown to users when they sign in. It defaults to the domain of the first redirect URI.
- Logo URL: the logo shown to users when they sign in. A default logo is used if you leave it empty.
- Auth method: how your application authenticates when it requests an access token: Client secret basic, Client secret post, or None.
- Presentation Definition and ID token mapping: the data users share when they sign in. The default requests the user’s email address. Select Edit to change it. See Edit the presentation definition in Affinidi Portal.
Select Create. The Store client secret dialog shows the Client ID, Client Secret, and Issuer for your configuration.
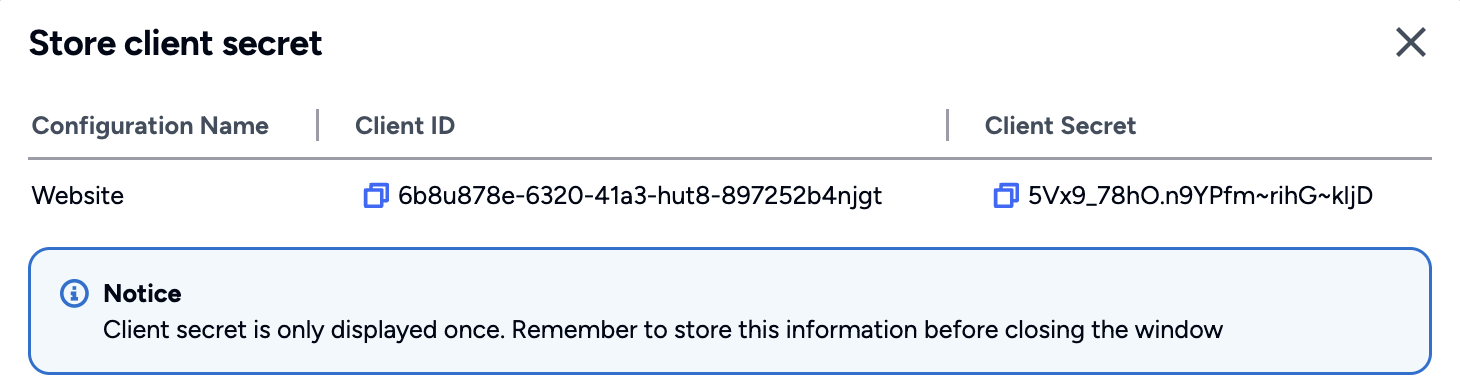
Copy the Client ID, Client Secret, and Issuer, and store them securely. You use them to integrate your application with Affinidi Login, and the dialog shows the Client Secret only once.
Close the dialog. Affinidi Portal opens the details page of your new configuration.
Login Configuration uses the default Presentation Definition (presentationDefinition) and ID Token Mapping (idTokenMapping) that is used to request the user’s email address during the authentication flow.
Learn more about customising the Presentation Definition and ID Token using this guide.
Important
Safeguard the Client ID and Client Secret diligently; you'll need them for setting up your IdP or OIDC-compliant applications. Remember, the Client Secret will be provided only once.
Set up the Application
Once the Login Configuration is created, set up the client credentials provided to integrate Affinidi Login.
Copy and set up the environment variables:
cp .env.example .envSet the following variables with the values provided by the Login Configuration:
PROVIDER_CLIENT_ID="<LoginConfig.auth.ClientID>"
PROVIDER_CLIENT_SECRET="<LoginConfig.auth.ClientSecret>"
PROVIDER_ISSUER="<LoginConfig.auth.Issuer>"
The <LoginConfig.auth.*> are values from Login Configuration.
Then run the build command:
dotnet buildRun the Application
After setting up the required details in the application, run the following command to start the app locally:
dotnet runOnce it is successfully started, visit the app using the link http://localhost:5068/.
Integration-related Changes
To enable a seamless passwordless login experience with Affinidi Login, refer to the following key changes were implemented:
- Imported
openidconnectto enable OAuth flow. - Added Affinidi Login as an OIDC provider using the function
AddOpenIdConnectand configured the client credentials in the./Startup.cs.
Explore the sample implementation to learn more about how the integration works.
Glad to hear it! Please tell us how we can improve more.
Sorry to hear that. Please tell us how we can improve.
Thank you for sharing your feedback so we can improve your experience.