Work with projects
Create projects to keep each application’s resources apart, switch between them, and share a project with your team.
A project groups the resources you create in Affinidi Portal, such as login configurations, wallets, and issuance configurations, and carries its own plan and usage. Every product page shows the resources of your active project, so switching project changes what you see and where new resources are created.
Use this guide when:
- You want a separate project for a new application or environment.
- You need to switch to another project before creating resources.
- You want to rename a project or give a team member access to it.
Prerequisites
- An Affinidi Portal account. See Sign in to Affinidi Portal.
Create a project
You can own up to 5 projects. The limit covers only the projects you own, so projects other owners share with you are on top of it.
Open the project switcher
Select the project switcher at the top right of Affinidi Portal. It shows the name of your active project.
Start a new project
Select Create New Project. The Create new Project dialog opens.
Name the project
Enter a Project Name of 2 to 100 characters. Start it with a letter or number, and use letters, numbers, spaces, full stops, hyphens, and underscores. You can also add a Description of up to 150 characters, using letters, numbers, spaces, and . , - ' : ( ).
Create it
Select Submit. Affinidi Portal creates the project on the free Essential plan and makes it your active project. To give it more credits, see Upgrade your plan.
Switch your active project
Open the project switcher and select the project you want. A check mark shows your active project.
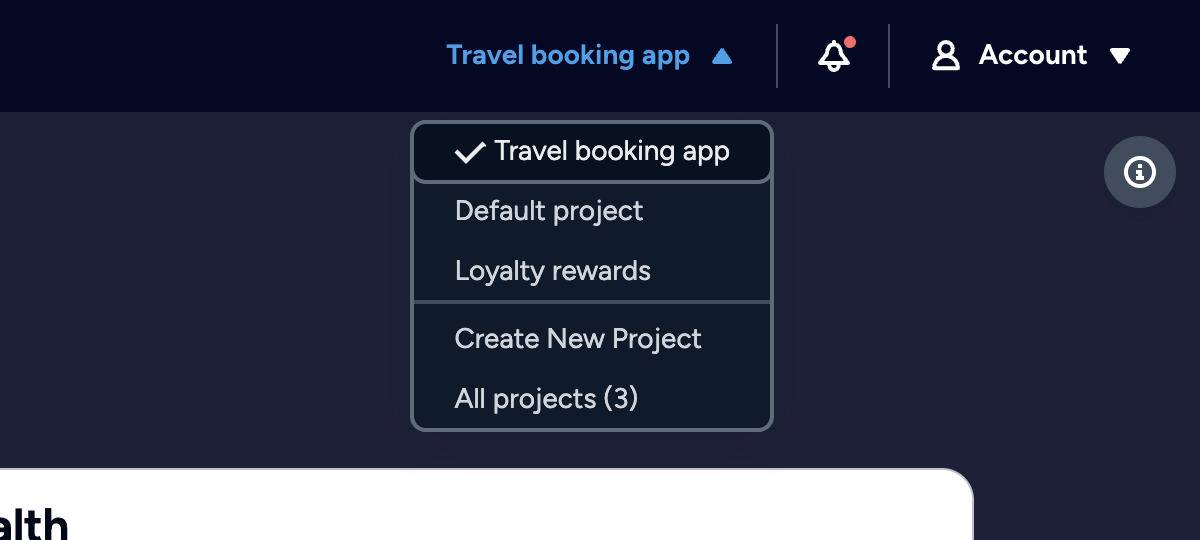
Switch project before you create a resource, because new resources belong to the active project.
Open a project’s page
Open the list of projects
Select All projects in the sidebar. The All projects page lists the projects you own under Created by you and the projects other owners have shared with you under Shared with you.
Open the project
Select the project’s name.
Opening a project’s page, or selecting its row on All projects, also makes it your active project.
The project page shows the project’s details, usage, plan, tokens, and collaborators. See Project page for each field.
Edit a project
You can edit the projects you own.
Open the project’s page
Open the settings
Select Edit. The Edit Project Settings page opens.
Change the details
Update the Name or Description (Optional), then select Save Changes.
Give a team member access
Project access is granted with a policy that you define with Affinidi CLI. Affinidi CLI signs you in with Affinidi Login, so you can define policies for the projects your Affinidi Login account owns.
Get their User Principal ID
Ask your team member for their User Principal ID. They find it under Account > Account Info in Affinidi Portal.
Define a policy
Define a policy for them on your project with Affinidi CLI. See Defining a policy.
Check the Collaborators table
Open the project’s page. Your team member appears in the Collaborators table with their Principal ID. Select View Policy to check what they can do.
Your team member now sees the project under Shared with you on their All projects page.
Confirm
Test 1: the project switcher shows your new project
Open the project switcher. Your new project appears in the list, with a check mark if it is active.
Test 2: Total Projects counts the new project
Open the Dashboard. Total Projects has gone up by one.
Troubleshooting
| Symptom | Likely cause | Fix |
|---|---|---|
| Resources you created are missing from a product page. | A different project is active. | Open the project switcher and select the project you created them in. |
| Edit is missing on the project page. | Only the project’s owner can edit it. | Ask the project’s owner to make the change. |
| Selecting Create New Project opens a Reached Subscription Limit dialog, and Create Project on All projects is disabled. | You already own 5 projects. See Plans, credits, and limits. | Use one of your existing projects for the new resources. |
Next steps
- Upgrade your plan when a project needs more credits.
- Create a login configuration in your project.
Related
Glad to hear it! Please tell us how we can improve more.
Sorry to hear that. Please tell us how we can improve.
Thank you for sharing your feedback so we can improve your experience.